As the cooler weather sets in, this Crocheted Basket Weave Blanket is the perfect project to make. Curl up with some cozy yarn, a hot beverage, and crochet this very warm and beautiful blanket. The pattern for the blanket is quite dense, and that is what makes it so warm. The crocheted basket weave blanket is perfect for a lap blanket, a baby blanket or to use as a floor blanket for a baby. Depending on the yarn you choose, it could also be used as a weighted blanket. This pattern is suited for those with some crochet experience. If you are new to crochet, you can check out my Beginner Crochet Series, try some of my simpler crochet tutorials, and then once you have some experience, come back to this pattern!
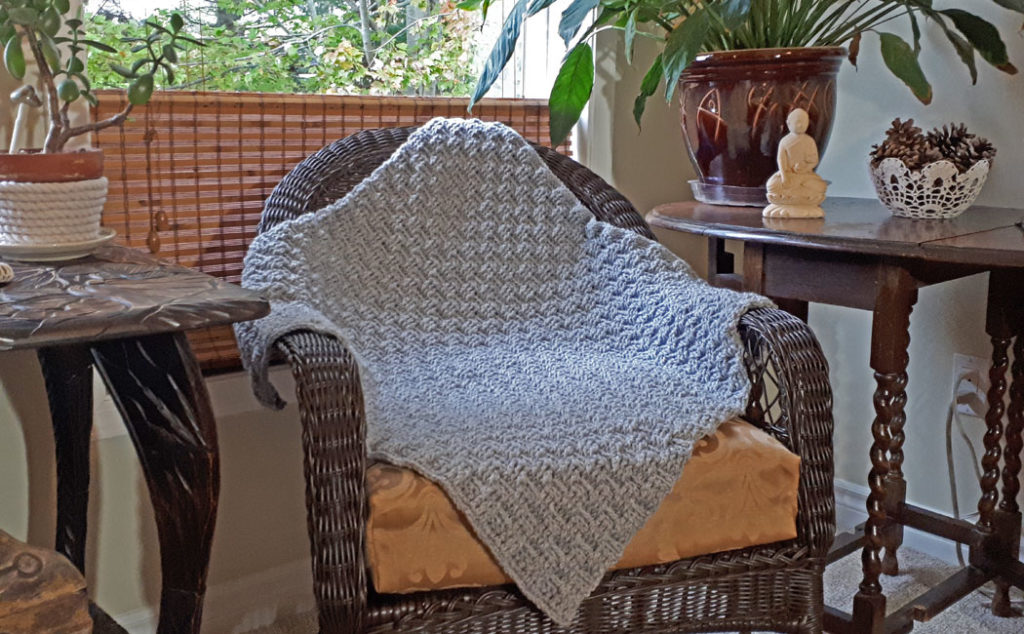
As I mentioned, this crocheted basket weave blanket is quite a dense pattern which means it uses a lot of yarn. The dimensions of the blanket I made measure 30″ by 30″ (76 cm by 76 cm) and used a total of 1080 yards (990 m) of yarn! I was planning to make the blanket another 6″ (15 cm) higher, but I’ve actually developed carpal tunnel syndrome in my crochet hand, so I had to stop at 30″. The stitches used in the pattern do require a fair bit of wrist action, so if you have any tendency towards hand or arm issues, then I would give this project a pass. As always, there is a video tutorial for this pattern and you can find that at the bottom of this post.
Helpful Information
- st = stitch
- yo = yarn over
- ch = chain
- sc = single crochet
- hdc = hdc
- dc = dc
- fpdc = front post double crochet
- bpdc = back post double crochet
- Guage: 13 sts = 4″ (10 cm) and 8.58 rows = 4″ (10 cm)
- Pattern repeat = 6 stitches
Special Stitches
The following stitches are raised stitches that create the textured look of a basket weave. When referring to the dc post from the previous row, that could be either a fpdc or bpdc, depending on where you are in the pattern.
Front post double crochet (fpdc): Yo, place hook under next dc post from the previous row, working from the right to left. The hook will be behind the post. Yo, pull the yarn behind the post (3 loops on your hook), yo, pull through 2 loops, twice.
Back post double crochet (bpdc): Yo, place hook over top the next dc post from the previous row, working from the right to left. The hook will be in front of the post. Yo, pull the yarn from behind the post, over top the front of the post, (3 loops on your hook), yo, pull through 2 loops, twice.
These are somewhat tricky stitches, so the video tutorial can be helpful to figure them out.
Supplies required for this project:
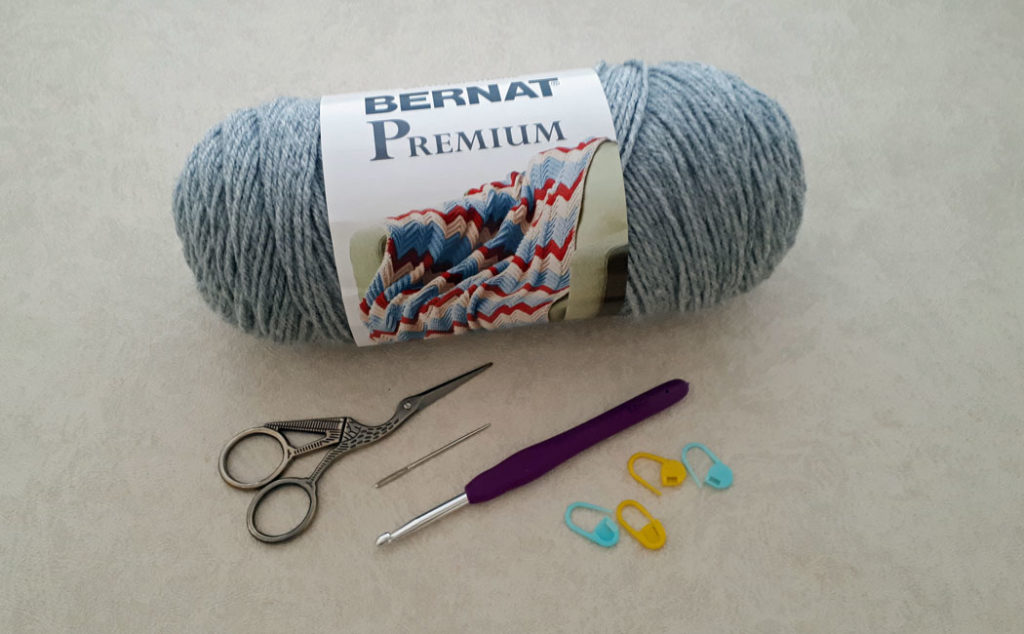
- 3 balls of Bernat Premium Yarn ~ Soft Heather Grey
- or 1080 yards (990 m) of a number 4 medium weight yarn
- H-6 US (5 mm) crochet hook
- I-9 US (5.5 mm) crochet hook (optional)
- Stitch markers
- Darning needle
- Scissors
- Hand Steamer (optional)
Note: Bernat Premium Yarn seems to only be available at Walmart or Yarnspirations. Each ball is made of 100% acrylic yarn, is 7 oz (198 g) in weight, and has 360 yards (329 m) of yarn per ball. Any number 4 medium-weight yarn can be used.
Some (but perhaps not all) of the links in this blog are affiliate links to Amazon.com. As an Amazon Associate, I earn from qualifying purchases. This page contains some affiliate links. Please see my policy page for details. I look for the best possible option for your convenience, however, I encourage you to support your local shops!

Begin with a very loose chain of 101 chains. It is important for the foundation chain to be very loose, so if needed, use a larger crochet hook (say I-9 or 5.5 mm) for this part. The pattern repeat is 6 stitches, so at this point, you can either add or subtract 6 stitches to make the blanket a different width. Once you have the desired chain length, ch 1 and turn your work. Go back to the H-8 or 5 mm crochet hook if you were using a larger hook.
Row one: 1 sc in the second st from the hook (work into the back bump of the ch st), 1 sc into the back bump of each ch to the end of the row (101 sc’s).
Row two: Ch 3, turn your work (count’s as first dc), sk first st, 1 dc in the next sc. 1 dc in each sc to the end of the row (101 dc). From here on in, each row will be 101 stitches. You can count if you like, but the pattern will keep you on track.
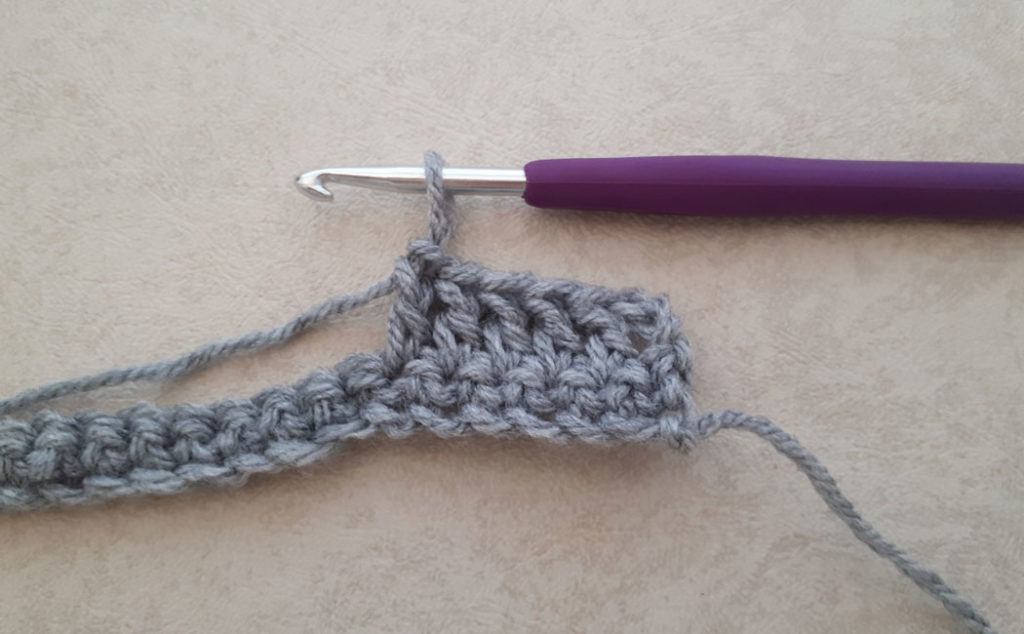
Row Three: Ch 3, turn your work (counts as first dc), sk first st, *1 fpdc in next st, 3 times (3 fpdc), 1 bpdc in next st, 3 times (3 bpdc), repeat from * to the last 4 sts, 1 fpdc in next st, 3 times, 1 hdc in the last st (see two images below)
Showing how these stitches work in photographs is a bit tricky, but again the video shows this much better.
As you come to the end of row three, you will have 4 stitches left and should finish this row with a set of 3 fpdc’s and 1 hdc in the last stitch as written in the directions. You’ve now set up the blanket for the pattern repeat.
Rows four through seven will be the pattern repeat, and I do recommend using a stitch marker at the beginning of each pattern repeat.
Row four: Ch 2, turn your work, sk first st, * 1 bpdc in next st, 3 times, 1 fpdc in next st, 3 times. Repeat from * to the last 4 sts, 3 bpdc in next st, 3 times, 1 hdc in last st.
Row five: repeat row four.
Row six: Ch 2, turn your work, sk first st, *1 fpdc in next st, 3 times, 1 bpdc in next st, 3 times. Repeat from * to the last 4 sts, 1 fpdc in next st, 3 times, 1 hdc in last st.
Row seven: Repeat row six.
Rows eight to sixty-three: Repeat the pattern of rows four through seven, fifteen times. Of course, you can carry on and do as many four-row repeats as you like until you get to the desired height. Once you’ve reached the desired height, then follow the directions for rows sixty-four and sixty-five to finish the blanket.
When you come to the end of a ball of yarn, you can either join the yarn using a magic knot (see video tutorial here) or just join the new yarn at the top of a double crochet stitch. Bring the new piece through the last two loops of the stitch and carry on. Darn in the tail ends.
Row sixty-four: Repeat row four.
Row sixty-five: Ch 1, turn your work, 1 sc in each stitch to the end of the row. Fasten off.
Darn in all your tail ends and you are all done! At this point, you can either use a hand steamer to block the blanket or wash it according to the yarn directions and lay it flat to dry. This pattern is quite textured and therefore, doesn’t need a border. If you want to add a border, then that would be fun too!
I hope you enjoyed this pattern and have fun making this very warm and cozy crocheted basketweave blanket! Make sure to subscribe to my newsletter so you don’t miss out on any future projects.