Learn how to crochet a granny square blanket with this simple and easy “Happyghan” pattern. This crochet tutorial is suited for beginners and looks so amazing with all the fun and happy colors! It would be perfect as a gender-neutral baby blanket or as a lap blanket for a loved one!
The size of this blanket is 32″ by 40″ (81 cm by 101.5 cm), but I will show you how you can modify the pattern to make the blanket 38″ by 46″ (96.5 cm by 117 cm). If you are new to crochet, then you can check out my Beginner Crochet Series to learn everything you need to know for this project. I have also created a video tutorial for this project and you can find that at the bottom of this post.
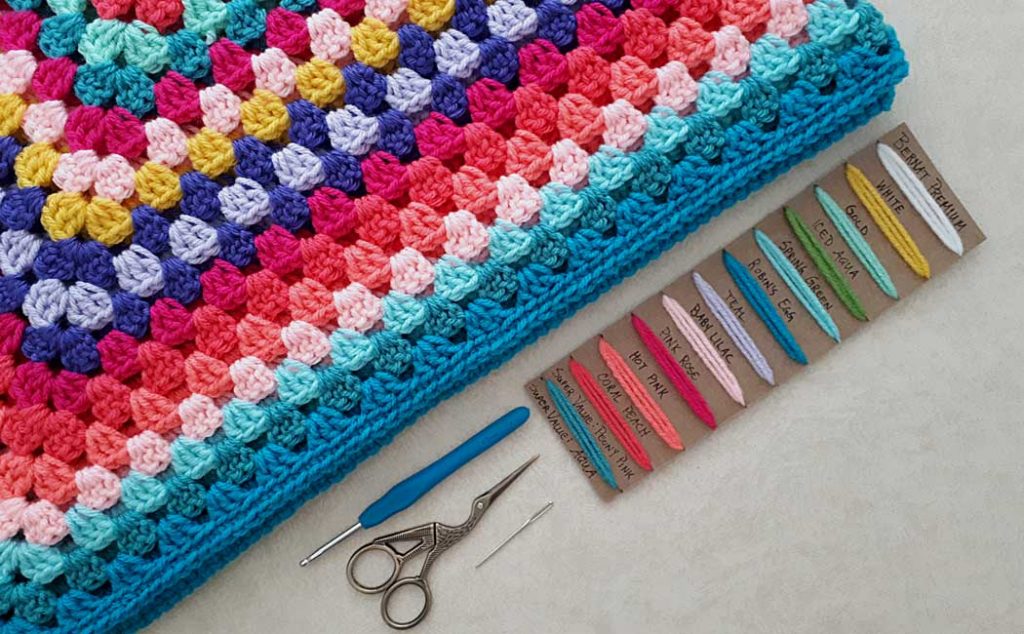
The supplies you will need for this blanket are:
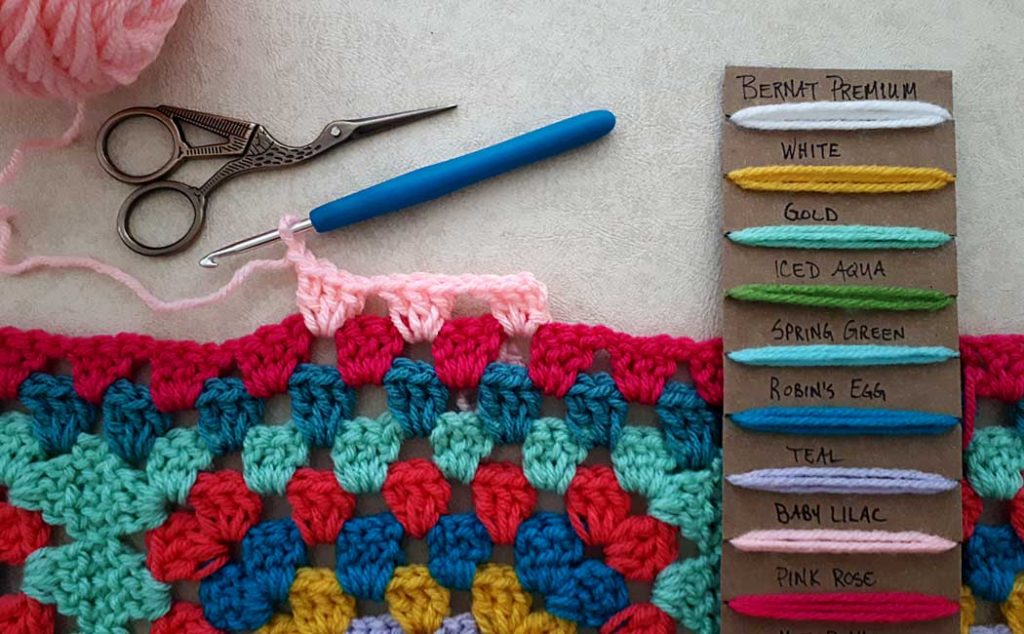
- Bernat Yarn in 8 different colors: I used the following
- Premium Line
- Gold, Iced Aqua, Robin’s Egg, Teal, Baby Lilac, Pink Rose, Hot Pink, Coral Peach.
- The Premium line above doesn’t seem to be available at this time online, but I did find them at my local Walmart. Here is a list of comparable colors in the Super Value and Satin lines:
- Super Value Line
- Satin Line
- Premium Line
- 4 mm or G-6 crochet hook
- Darning needle
- Scissors
Some (but perhaps not all) of the links in this blog are affiliate links to Amazon.com. As an Amazon Associate, I earn from qualifying purchases. This page contains some affiliate links. Please see my policy page for details. I look for the best possible option for your convenience, however, I encourage you to support your local shops!
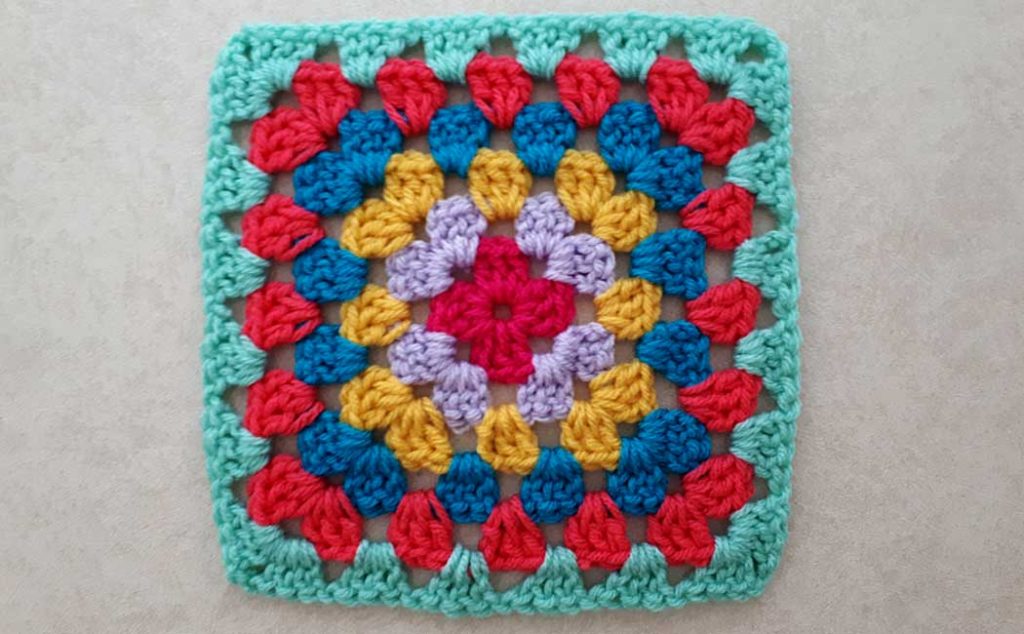
To begin, crochet six granny squares with six rounds in the following colors: Hot Pink, Baby Lilac, Gold, Teal, Peony Pink, and Iced Aqua. I am not going to demonstrate the traditional granny square pattern here because I’ve already created a video tutorial for this pattern. You can find the tutorial here. I do, however, have the written direction below.
For this blanket pattern, I am turning the square for each round, working in the opposite direction. The reason for this is to help balance the tension of the blanket as it gets bigger. I have a video that demonstrates this here. (I don’t show this in the tutorial for the traditional granny square pattern)
A common problem with crocheted blankets that are made in the round (rather than a pattern that crochets back and forth), is that the blanket can pull in one direction and cause it to warp. This is especially true if you tend to have tight or uneven crochet tension.
An easy solution to this problem is to simply turn your work and crochet in the opposite direction. This actually creates an interesting pattern for the blanket and makes it reversible, especially if you are very neat with darning in your tail ends.
Basic Granny Square Pattern
Round 1: Hot Pink ~ ch 5, sl st in first ch to form a ring, ch 3 (counts as first dc), 2 dc in ring, ch 2, *3 dc, ch 2 in the ring, repeat from * 2 more times, sl st in the 3rd ch of beg ch 3. Fasten off.
Round 2: Baby Lilac ~ (Optional-turn your work) Join with a sl st in any ch2 sp, ch 3 (counts as first dc), (2 dc, ch 2, 3 dc, ch 1) in same ch2 sp. * (3 dc, ch 2, 3 dc, ch 1) in next ch2 sp, repeat from * 2 more times, sl st in the 3rd ch of beg ch 3. Fasten off.
Round 3: Gold ~ (Optional-turn your work) Join with a sl st in any ch2 sp, ch 3 (counts as first dc), (2 dc, ch 2, 3 dc, ch 1) in same ch2 sp, 3 dc, ch 1 in next ch1 sp, *(3 dc, ch 2, 3 dc, ch 1) in next ch2 sp, 3 dc, ch 1 in next ch1 sp. Repeat from * 2 more times, sl st in the 3rd ch of beg ch 3. Fasten off.
Round 4: Teal ~ (Optional-turn your work) Join with a sl st in any ch2 sp, ch 3 (counts as first dc), (2 dc, ch 2, 3 dc, ch 1) in same ch2 sp, 3 dc, ch 1 in next ch1 sp 2 times, *(3 dc, ch 2, 3 dc, ch 1) in next ch2 sp, 3 dc, ch 1 in next ch1 sp 2 times. Repeat from * 2 more times, sl st in the 3rd ch of beg ch 3. Fasten off.
Round 5: Peony Pink ~ Repeat round 4, but increasing sets of 3 dc, ch 1 in ch1 sps between corners.
Round 6: Iced Aqua ~ Repeat round 5.
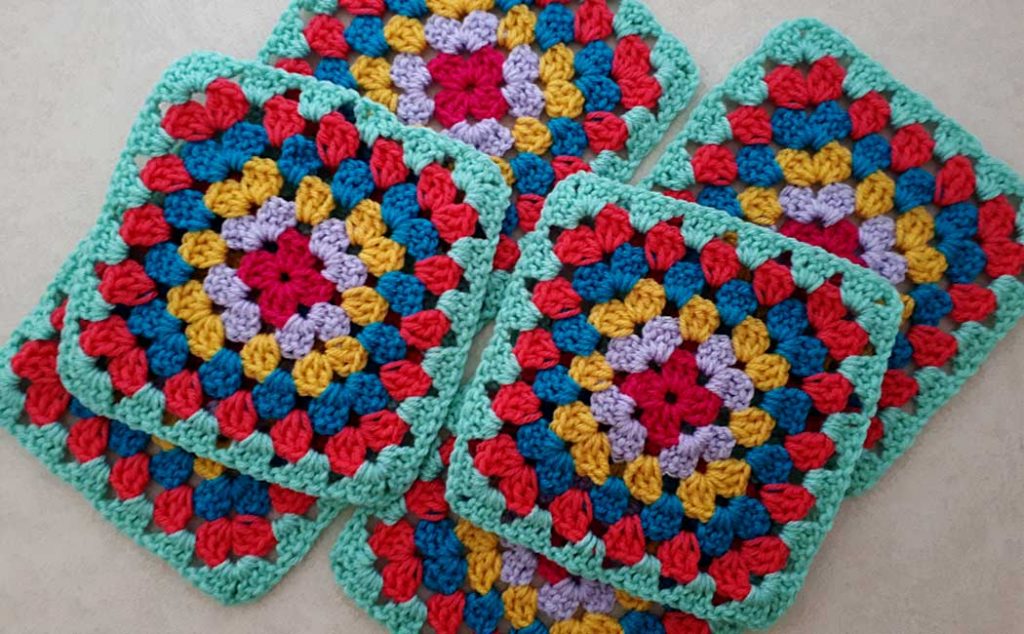
Crochet 6 squares in this pattern and darn in all your tail ends. When you begin to sew the squares together, keep the side of the square that you fastened off (where the knot is) to the outside of the panels. This way, when you sew your squares together, you won’t have to sew into a knot. (I show this better in the video tutorial below)

Start by sewing the first panel of squares together using a whip stitch (or any method of joining you prefer). Place two squares together with the ‘good side’ up. Cut a piece of yarn 2.5 times the length of the square. Bring the darning needle from the bottom square through the top loop of the first chain of the chain two space (leaving a length of yarn to darn in). Pick up the top loop of the same stitch in the opposing square. Bring the needle around to the bottom square and pick up the top loop of the next chain of the chain two space, and then go into the same stitch in the opposing square.
Continue to sew the squares together, picking up the top loop of each opposing stitch. Keep your stitches nice and even.
Complete the join by sewing into both chains of the chain two space. Darn in your tail ends. Sew the second panel of three squares together in the same way, and then join those two panels together using the whip stitch. The finished center panel will be two squares wide and three squares long. (I’m sorry, I forgot to take a picture of this, but you can see the center panel in the image at the bottom of the post).
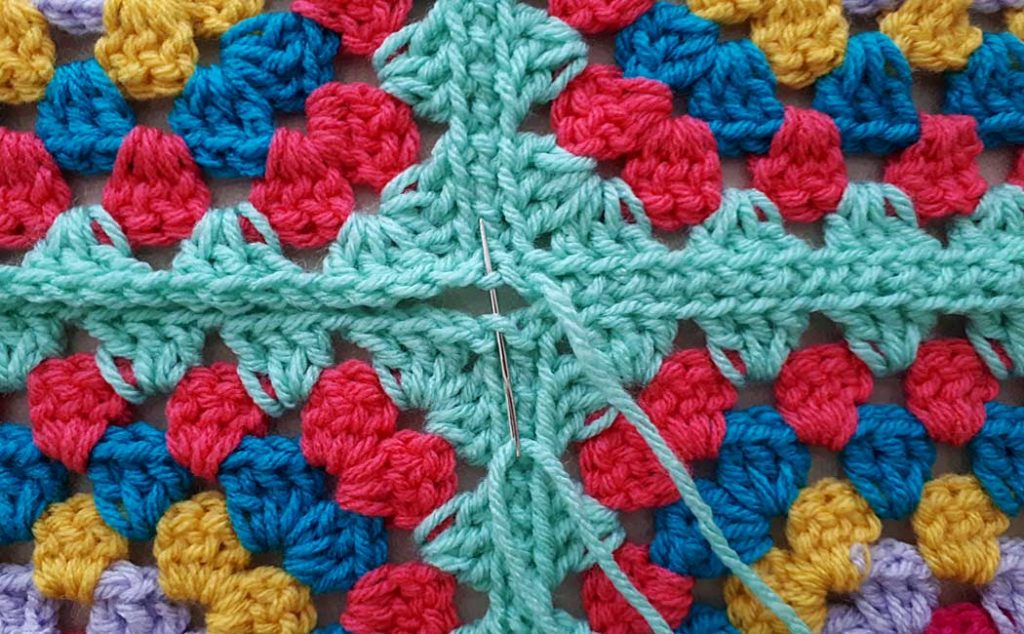
When you get to the intersection of the squares, make sure to pick up the whip stitch from the previous join as well.

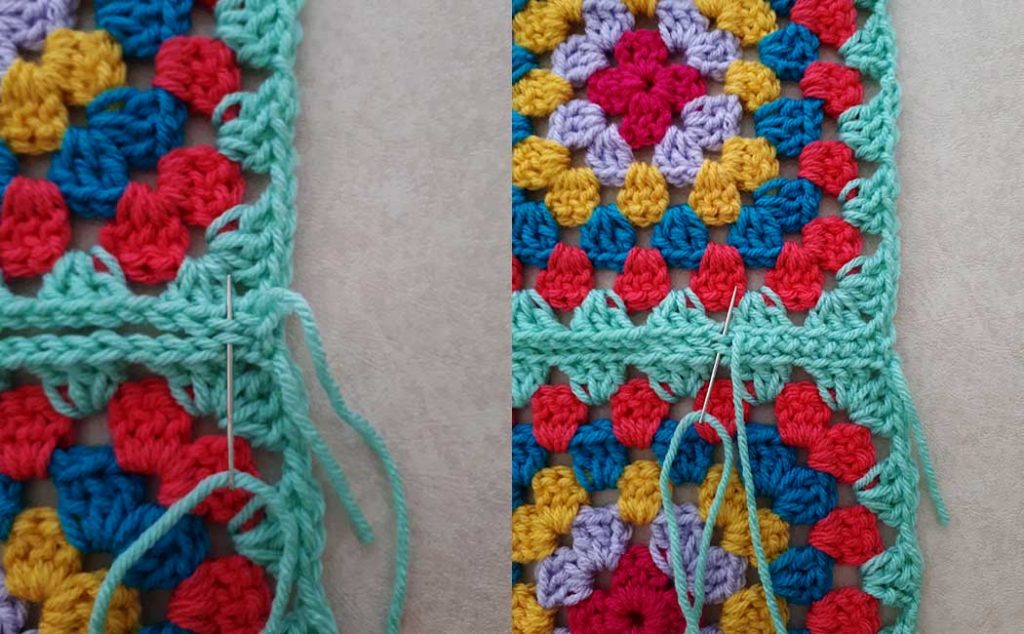
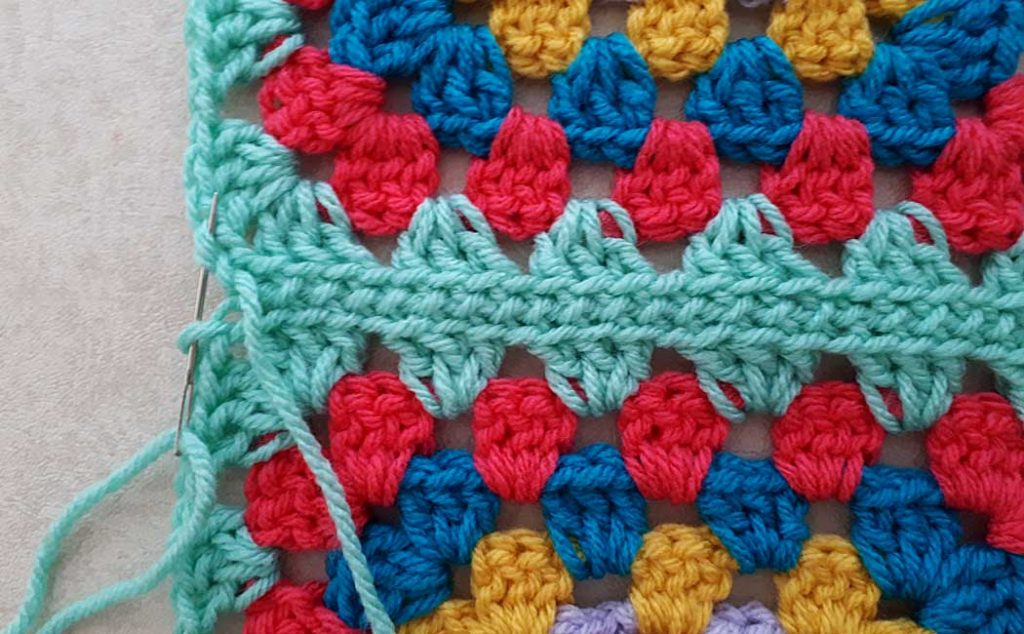
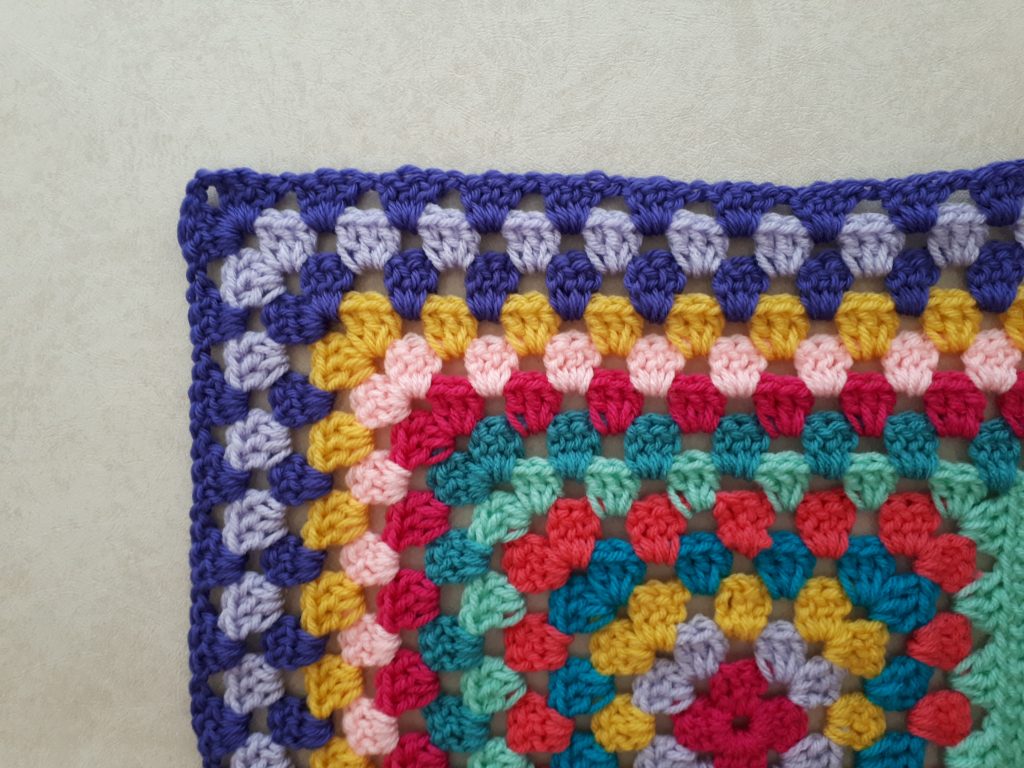
Once you have joined the six squares together to create the center panel, begin the first row of crochet around the panel. This round will start on the ‘backside’ of the panel with the wrong side facing up, so to speak. If you choose to crochet in the round without flipping your work, then disregard this.
Round 1: Aqua ~ Join with a sl st in any ch1 sp, ch 3 (counts as first dc), 2 dc, ch 1 in same ch1 sp, *3 dc, ch 1 in next ch 1 sp. Repeat to corner. (3 dc, ch 2, 3 dc, ch 1) in ch 2 sp (see image above)
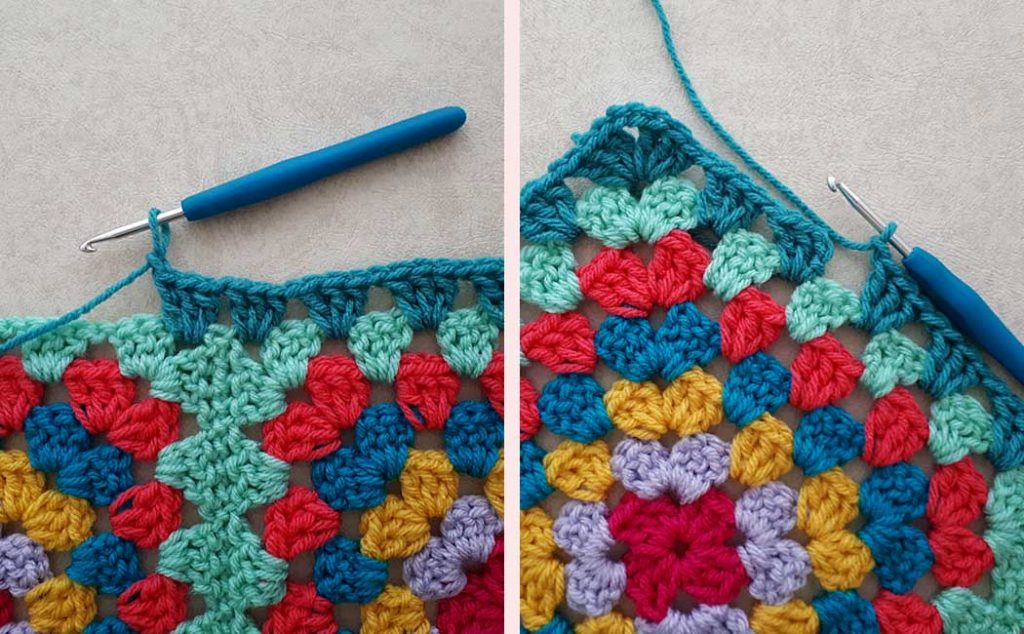
*3 dc, ch 1 in next ch 1 sp (I will refer to this as a granny square stitch from now on) Continue to next square. Work a granny square stitch in each ch 2 sp between squares. Continue with the granny square stitch in each ch 1 sp to the next corner and repeat corner as above. Continue all the way around the blanket. Join with a sl st in the 3rd ch of the beg ch3. Fasten off.

Round 2: Hot Pink ~ (Optional-turn your work) Join with a sl st in any ch 1 sp, ch 3 (counts as first dc), 2 dc, ch1 in same ch1 sp. Continue with granny square stitch to the next corner. Work corner as usual and crochet all around the blanket with the granny square stitch and corner patterns. Fasten off as usual.
Row 3: Pink Rose ~ (Optional-turn your work) Repeat row 2.
Rows 4 to 7: Repeat row 2, turning your work for each row (or not) using the following colors in this order: Gold, Grape, Baby Lilac, Grape.
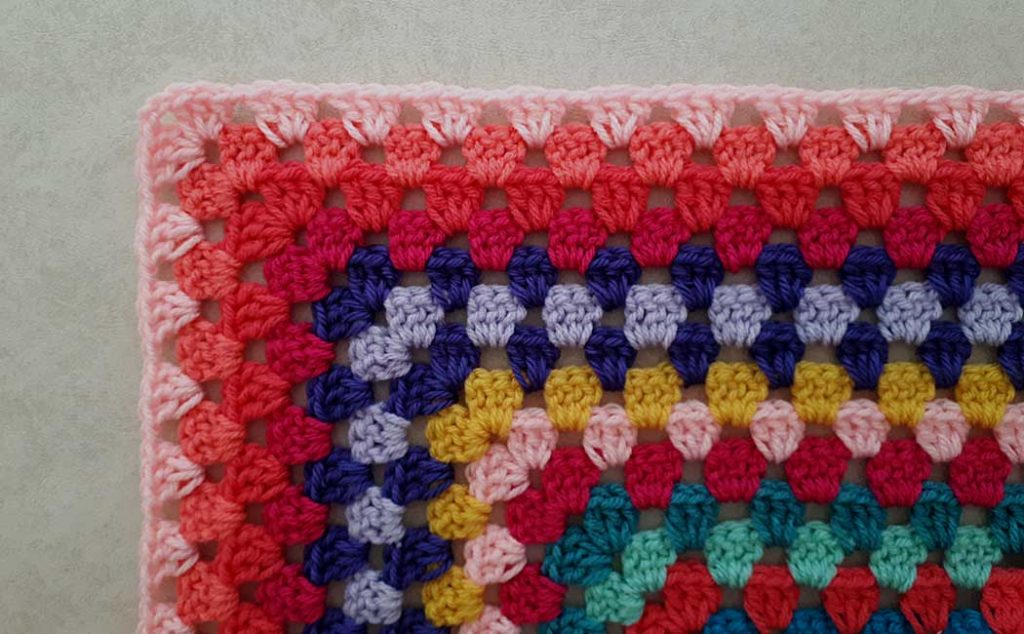
Rows 8 to 11: Repeat row 2, turning your work (or not) using the following colors in this order: Hot Pink, Peony Pink, Coral Peach, Pink Rose.
If you want to make the blanket larger (38″ by 46″), then add 3 more rows after row 11, using the following colors in this order: Coral Peach, Peony Pink, Hot Pink. (This would count as rows 12 to 14).
Then add 5 more rows using the following colors in this order: Teal, Aqua, Robin’s Egg, Aqua, Teal. For the last row of Teal, join with a sl st in the 3rd chain of beg ch3. Do not fasten off. (This would count as rows 15 to 19). Proceed to the final row if you choose this modification, otherwise, continue with the pattern below.
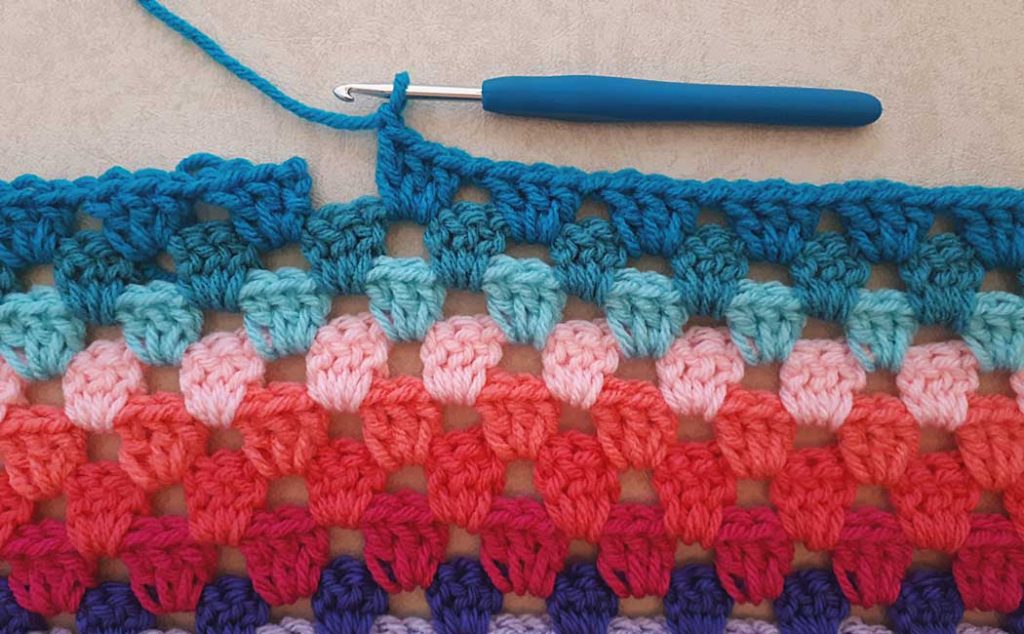
Rows 12 to 14: Repeat row 2, turning your work (or not) using the following colors in this order: Robin’s Egg, Aqua, Teal. For the last row of Teal, join with a sl st in the 3rd chain of beg ch3. Do not fasten off.
Row 15 (or 20): Continuing with the Teal, ch 1, *1 sc in the top loop of the next st. Repeat from * to the corner. (2 sc in the top loop of the first ch1, 2 sc in the top loop of the next ch1). *1 sc in the top loop of the next stitch. Repeat from * to the next corner. Repeat corner as above. Crochet around the blanket with the sc pattern.
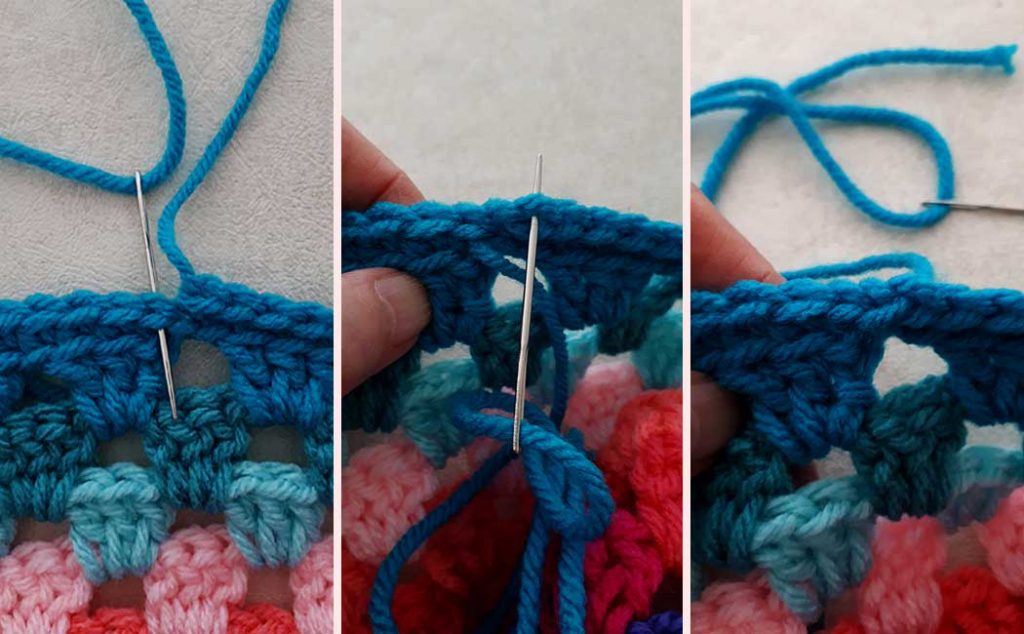
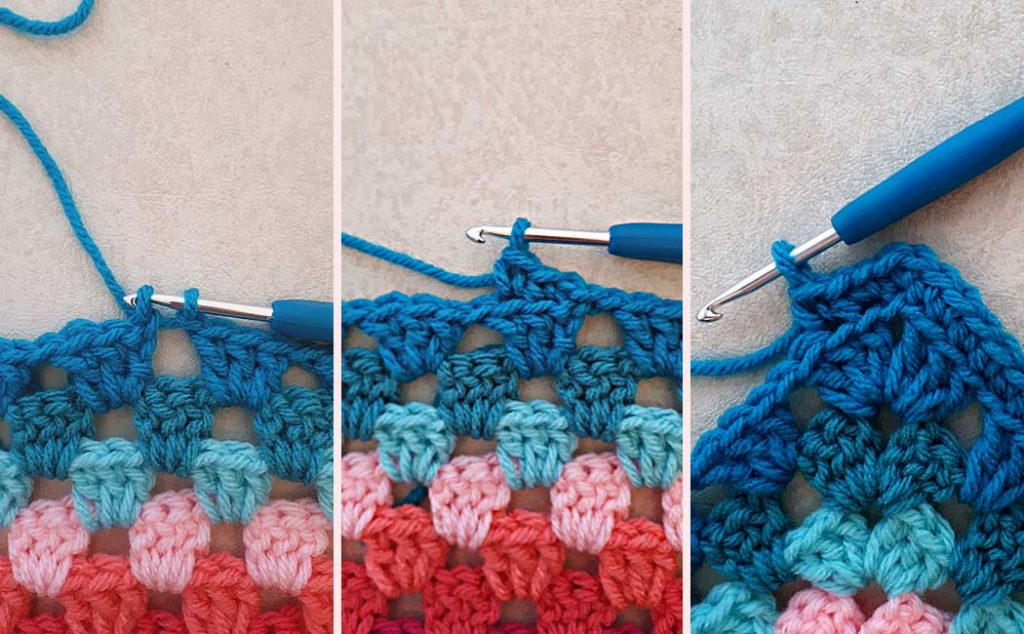
You can finish this round in two ways: sl st into beg ch1 and fasten off. Alternatively, you can create an invisible join as shown above.
To do this, complete the last sc and remove the yarn from the hook. Cut a tail about 4 to 6 inches long and pull it through the last stitch. Thread the yarn on a darning needle and bring the needle in from the back of the beg ch 1, going under 2 loops. Then bring the needle down into the middle ‘v’ of the previous sc. Pull the yarn through to the back and adjust the tension so it mimics a stitch. Darn in the tail end and all the others if you haven’t done so.
Then you are done! If you like, you can block the blanket, but I didn’t find it necessary to do so. Follow the washing instructions of the yarn you choose. The Bernat yarn is machine washable and can go in the dryer. I prefer to lay the blanket flat to dry, but that is totally up to you!
I hope you enjoyed this tutorial, please share this post by choosing a social share button and picking an image from below. Please leave a comment as well!
If you liked this tutorial, you may also like:
- How to Crochet a Small Granny Square Blanket
- Rectangle Granny Square Blanket
- Granny Square Tote Bag (this is Part One of Two)