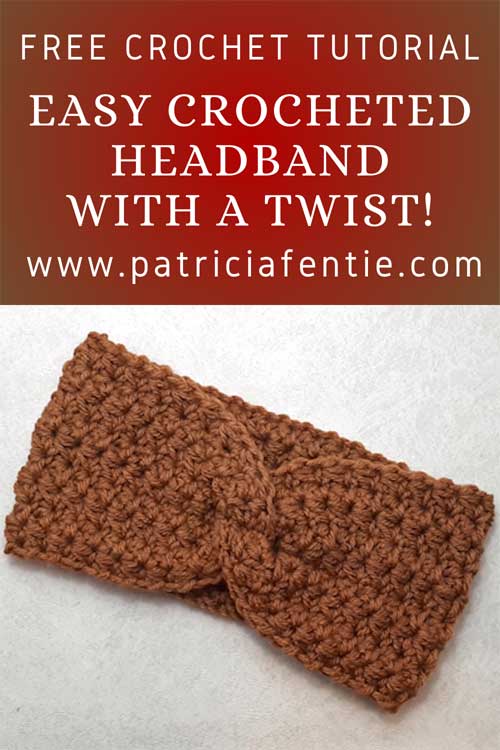
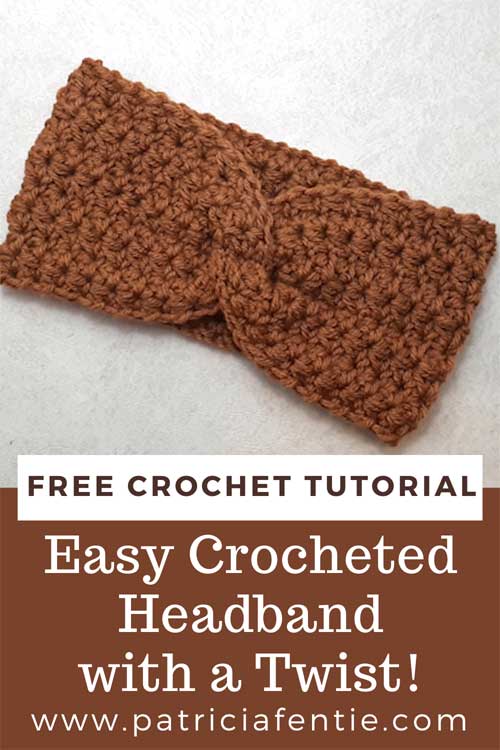
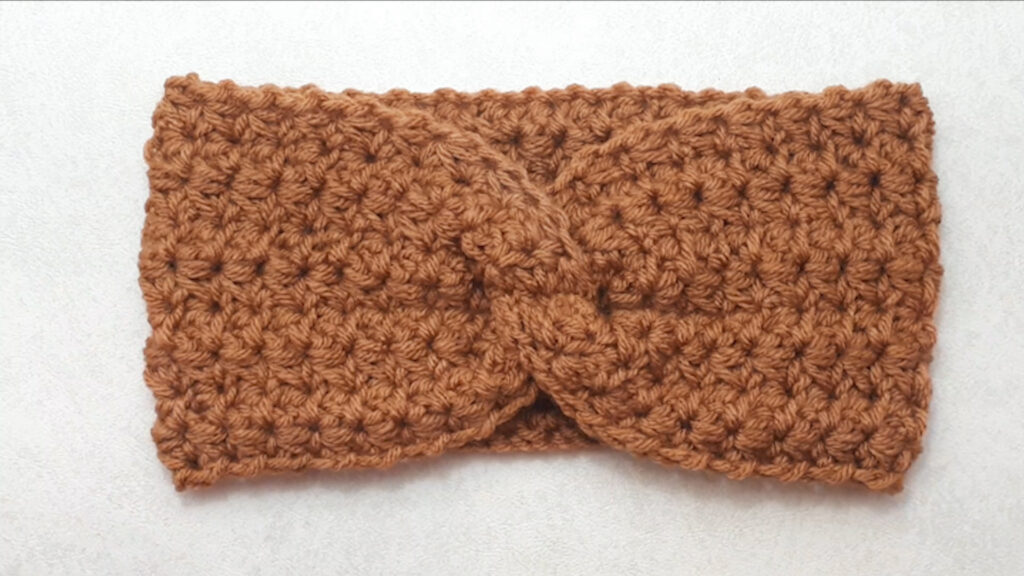
Learn how to make this Crocheted Headband with a Twist! The stitch pattern is called the “small daisy stitch” and it is such a pretty pattern for this headband. Creating the knot is much easier than you may think, and the technique can be used for any crocheted stitch pattern you like. A simple single crochet stitch could be used to make a panel. Just crochet a rectangle piece to fit, and then follow the directions on how to sew the panel together.
If you are new to crocheting, then check out my Beginner Crochet Series. I also have two other crocheted headband patterns you may want to check out. The “Easy Crocheted Headband” is made using the same knotted technique, and the “Easiest Crocheted Headband Ever” is made using a simple gathering stitch.
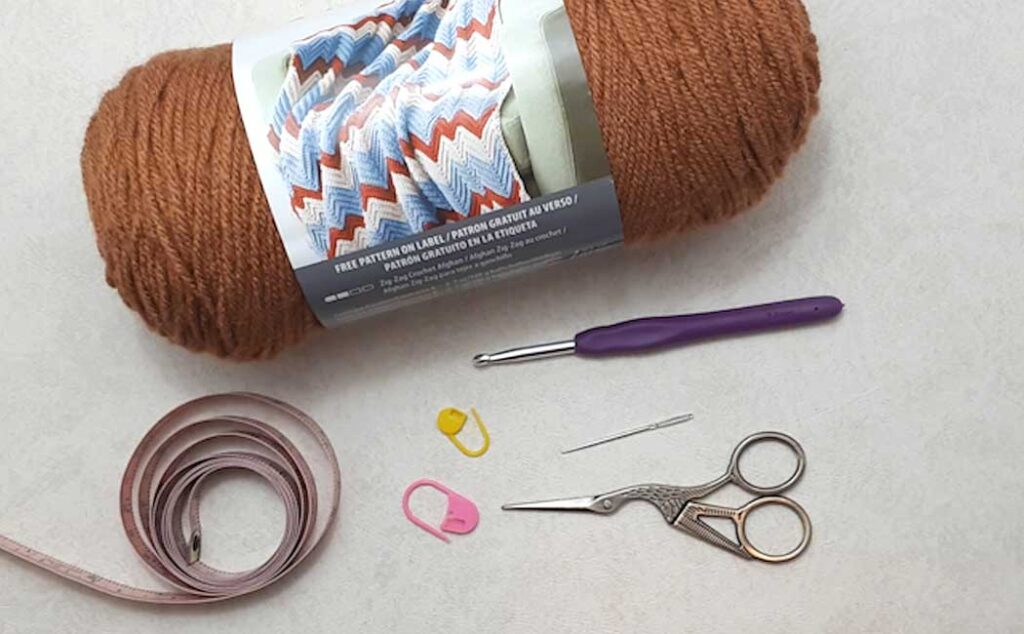
Supply List
- Number 4, medium-weight yarn (approximately 60-70 yards)
- I used Bernat Premium yarn (acrylic) in Caramel.
- 4mm (G-6) to 5mm (H-8) crochet hook
- Darning needle
- Stitch markers (optional)
- Scissors
- Cloth tape measure
- Hand-steamer (optional)
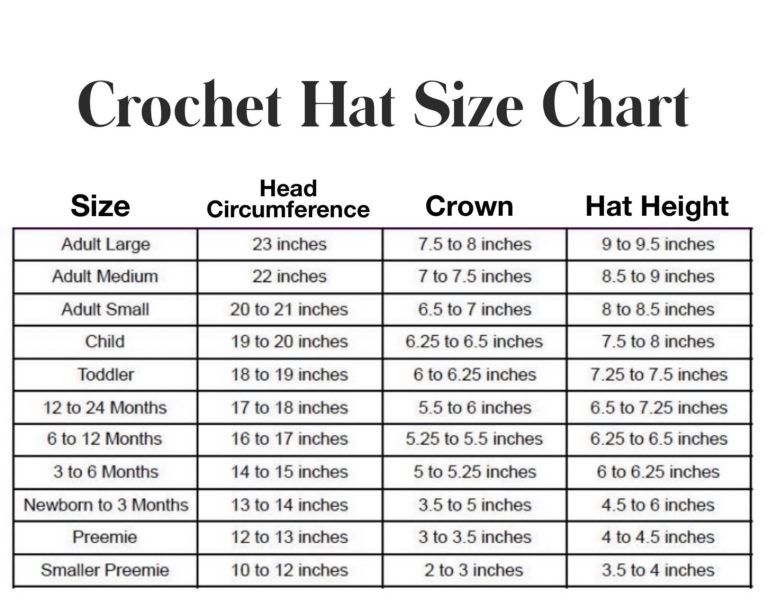
People often about making these projects to fit different size people. I always custom-fit, but here is a chart that can help you figure out sizing. I do find these sizes generous because crochetwork tends to have a fair bit of flexibility in it, but it can be used as a guideline for this Crocheted Headband with a Twist.
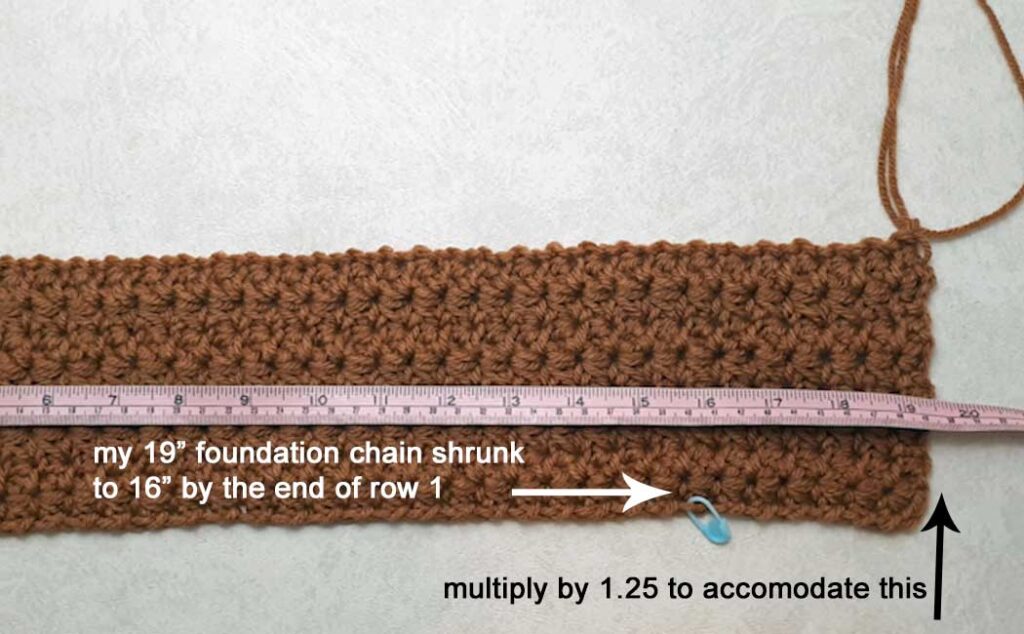
You will need to do a bit of math to calculate the length of the foundation chain. For some reason, this stitch (the small daisy stitch) compresses in length…quite substantially. I have always used the foundation chain to measure the fit. My head circumference is 20.5″, but the foundation chain with a comfortable fit is 19″. This is because the chain has some flexibility in it.
When I made the foundation chain 19″ in length (which again, was the comfortable size for the chain around my head) and crocheted the first row of this stitch pattern, the length shrunk to 16″! So, after much trial and error, I found a calculation that worked. Use the fitted length of the foundation chain and multiply that by 1.25. So in my case, that was 19″ x 1.25 = 24.75″ for the foundation chain.
Once I crocheted the first row, it finished at 19.5″. It did finish a little bit larger (by 1/2″), so if you have to add a stitch or subtract a stitch to get your odd number count on the foundation chain, I would suggest subtracting a stitch. I know this is a bit fussy, but this stitch pattern is so pretty and worth the effort! The finished size of the fabric is 19.5″ by 4.75″.
The Pattern
Note: This stitch pattern seems complicated, but it is very easy, once you know the pattern. There are several steps for each stitch, so I am not providing photos for this pattern. You can check out the video tutorial to see how this pattern works up.
Make a foundation chain to fit with an odd number of stitches. For this project, I am making a ladies’ small, which measures 24.75″ in length (after special math), and based on my yarn choice, hook size, and tension, the foundation chain worked out to 77 chains.
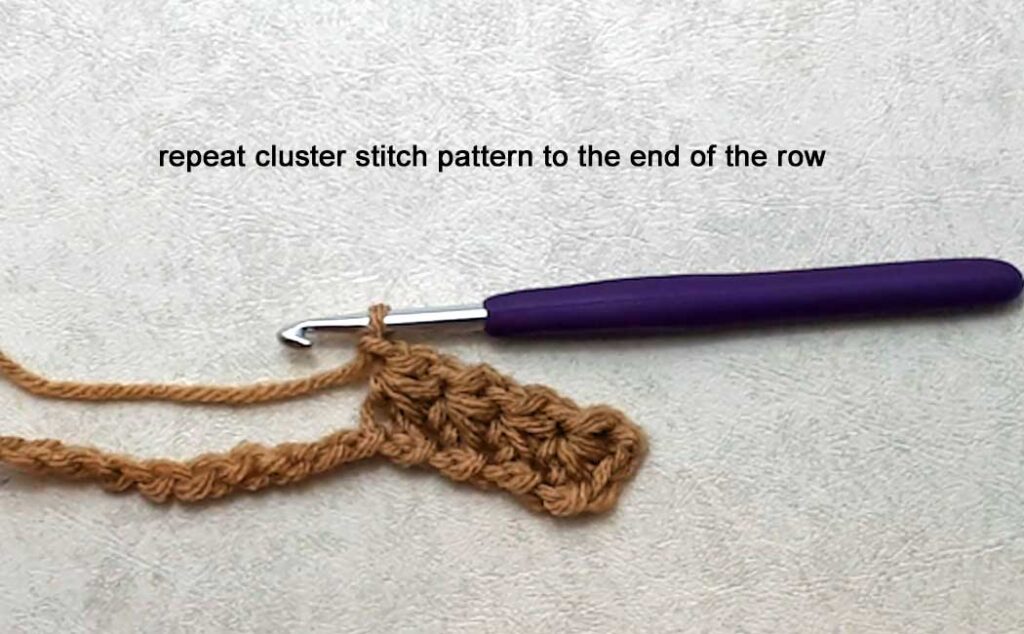
Row one: working into the back bump of the chain for the entire row, sk st, yo, pull through the 2nd ch from the hook (2 loops on hook), yo, pull through next st, (3 loops on hook), sk st, yo, pull through next st (4 loops on hook), yo, pull through all four loops, ch 1 (beginning cluster made).
*Yo, pull through the leg of ch1, (2 loops on hook), yo, pull through the base stitch of the cluster (3 loops on hook), sk st, yo, pull through next st (4 loops on hook), yo, pull through all four loops, ch 1. Repeat from * to the end of the row. There will be 2 ch’s left, complete the cluster as directed except the ch 1 stitch. Turn your work.
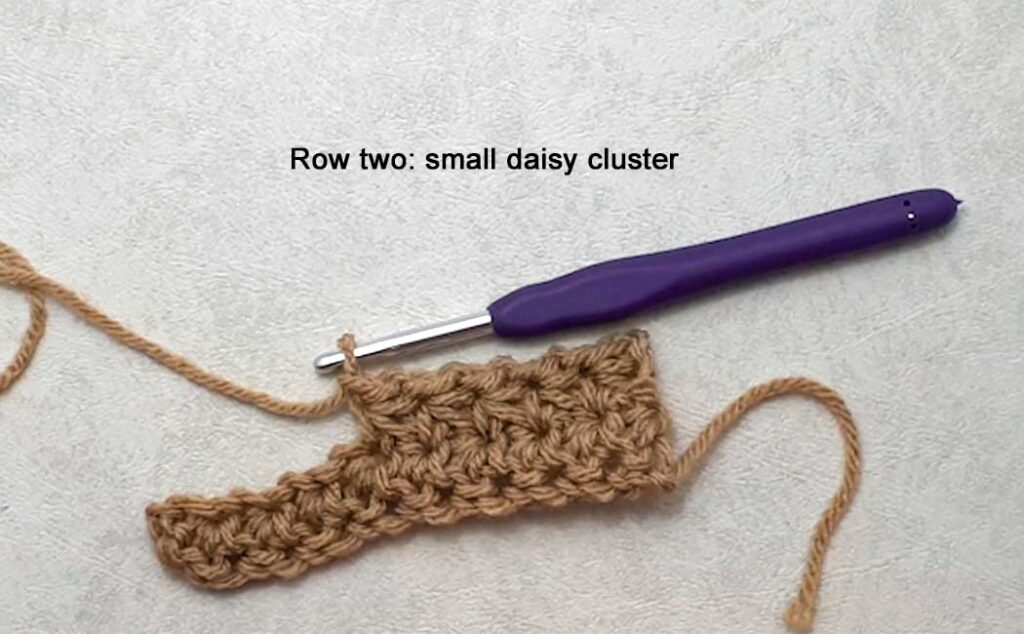
Row two: ch 3, yo, pull through one loop of 2nd ch from the hook, (2 loops on hook), yo, pull through a loop of the next ch st (3 loops on hook), sk st, yo, pull through sk’d sp from previous row (4 loops on hook), yo, pull through all four loops, ch 1 (beginning cluster made).
*Yo, pull through the leg of ch1, (2 loops on hook), yo, pull through the base stitch of the cluster (3 loops on hook), sk st, yo, pull through next st (4 loops on hook), yo, pull through all four loops, ch 1. Repeat from * to the end of the row. There will be 2 ch’s left, complete the cluster as directed except the ch 1 stitch. Turn your work.
Rows three to seven: repeat row two
Last row: finish row two repeat, ch 1 for the last cluster and ch 1 to fasten off. Leave a 12″ tail to sew the band together. Darn in the beginning tail end. You can make the band any depth you like, but this knot pattern works best with a slightly deeper fabric. My panel finished at 19.5″ by 4.75″.
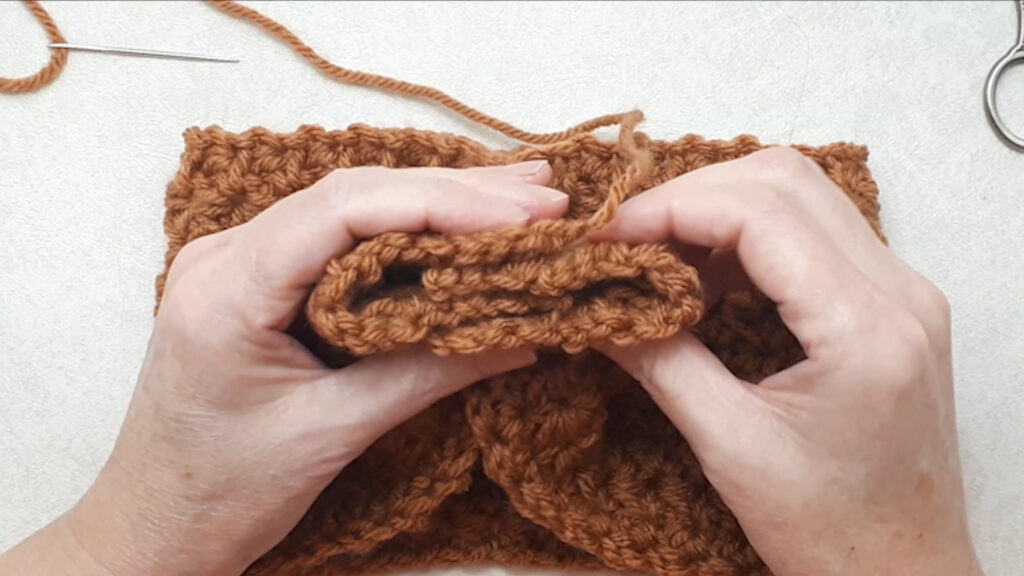
To create the know for this Crocheted Headband with a Twist, bring the short ends of the band together and tuck them inside each other halfway. You will have 1/3 gap on each side and 1/3 with four layers of fabric. If you are using a different stitch pattern, you want to have the fabric with the right sides facing together. This daisy stitch pattern is reversible, so either side is fine.
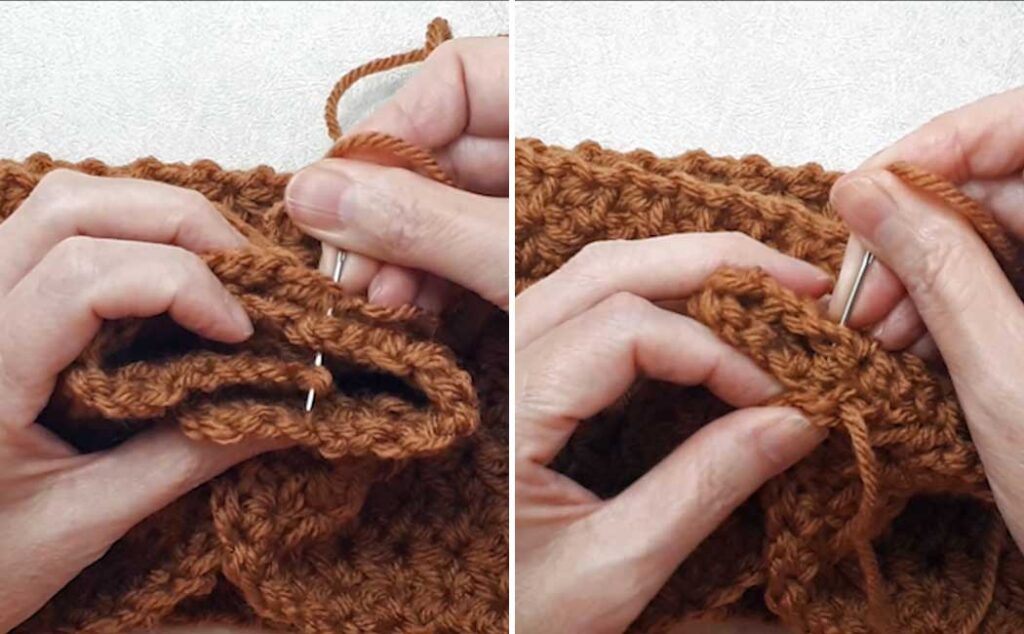
Using the long tail end, sew the four layers of fabric together using a whip stitch (or any stitch you like). Do a double stitch for the last stitch and turn the headband 180 degrees (see below).
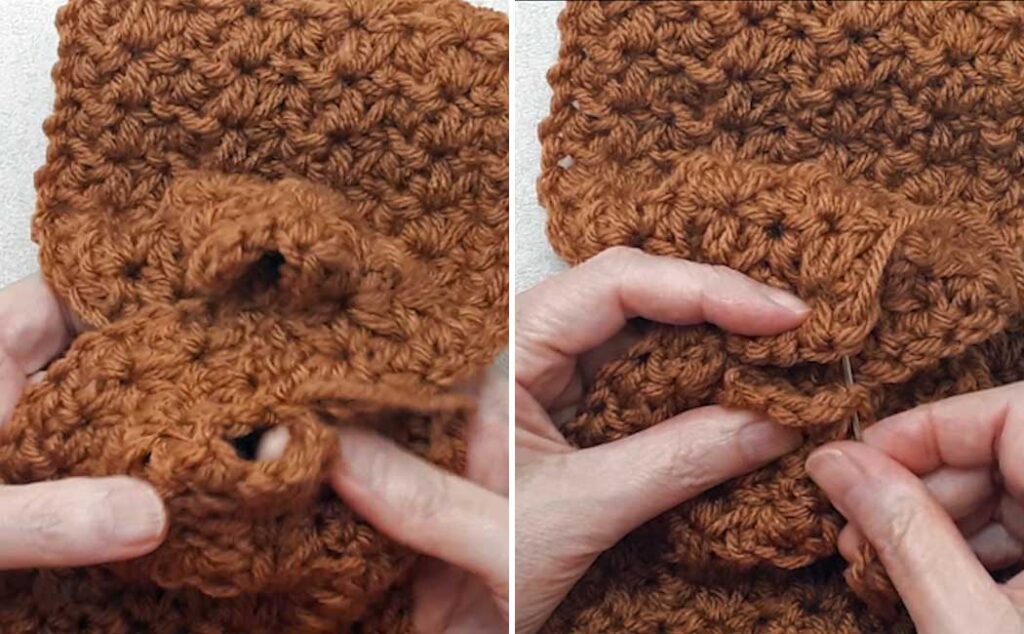
The two open spaces will fold naturally together. Line them up, and using the same strand of yarn, sew the two ends together using the same stitch. Finish with a knot and darn in the tail end. Flip the band right side out and you are done!!! How pretty!
Sharing is caring! Click on the social share button at the top of the blog and choose an image from below to share on social media.