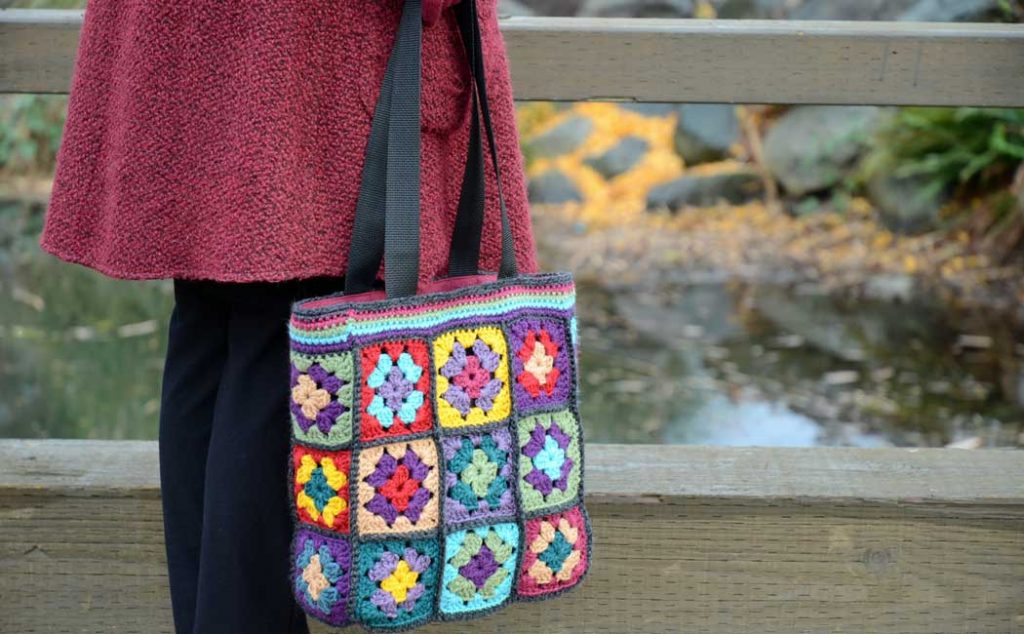
In part one of this tutorial, I demonstrated how to make the crocheted bag itself. This included making the granny squares and joining them together to make the tote bag. In this tutorial, we will make the lining for the bag. While this is a more involved project and is suited for individuals with crochet and sewing experience, each step is shown in detail, so it is easy to do!
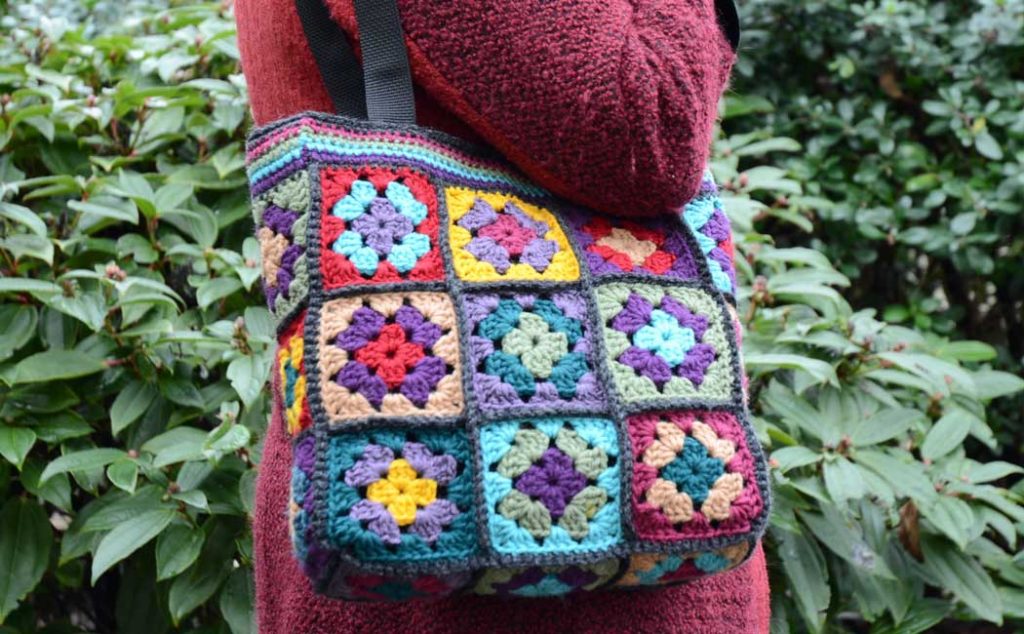
If you haven’t already checked it out, Part One of this tutorial can be found here. Making the lining for the bag does require some sewing experience, however, the bag doesn’t actually need to have a lining. I just think a lining makes the bag more durable. It also prevents little things from falling out of the crocheted fabric. If you choose not to make the lining, then you can attach the handles directly to the granny square bag.
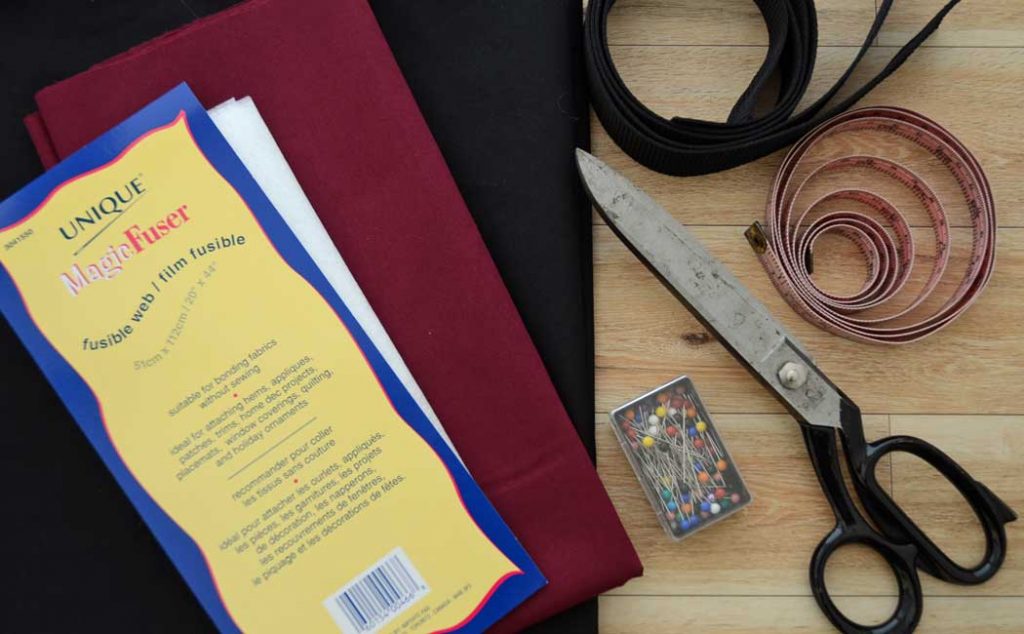
The supplies you will need for this tutorial are:
- 1/2 yard or meter of heavy-duty lining fabric
- OR
- 1/2 yard or meter each, of 2 colors of cotton lining fabric
- 1/2 yard or meter of fusible webbing
- 1 and 1/2 yard or meter of strapping for handles
- Scissors
- Cloth and hard edge tape measure
- Straight pins
- Miscellaneous sewing supplies
To calculate what size to cut the lining fabric, do the following:
- Measure the width of the 3 squares of the front panel of the bag.
- Measure the width of the 1 square of the side panel of the bag.
- Add 1″ (2.5cm) for seam allowance.
- Add all these measurements up and this will be the cut width of the lining.
- Measure the height of the front panel of the bag, including the crocheted border around the top. Multiply this by two.
- Measure the width of the 1 square of the bottom panel of the bag.
- Add 3″ (7.5cm) for top hem.
- Add all these measurements up and this will be the cut length of the lining.
My measurements looked like this:
- Lining Width
- Front panel width (3 squares) = 10.5″ (27cm)
- Side panel width (1 square) = 3.5″ (9cm)
- Seam allowance = 1″ (2.5cm)
- Total width: 10.5″ + 3.5″ + 1″ = 15″ (38.5cm)
- Lining Length
- Front panel length (including top border) = 11.5″ (29.25cm)
- Bottom panel width (1 square) = 3.5″ (9cm)
- Top hem = 3″ (7.5cm)
- Total length: 11.5″+ 11.5″ + 3.5″ + 3″ = 29.5″ (75cm)
As with Part One of this project, there are many steps involved with constructing the lining and attaching it to the crocheted bag. Therefore, rather than writing out all the directions, I have created a video showing all these steps.
I hope you enjoyed this tutorial and I would be very grateful if you would share this with your friends or on social media! Just click on the share icon and choose an image to share. Thank you for your support!
If you liked this tutorial, you may also like:
- How to Crochet a Granny Square Blanket
- How to Crochet a Bohemian Hat
- How to Crochet a Bohemian Scarf
- DIY Produce Bags (made from old lace curtains)
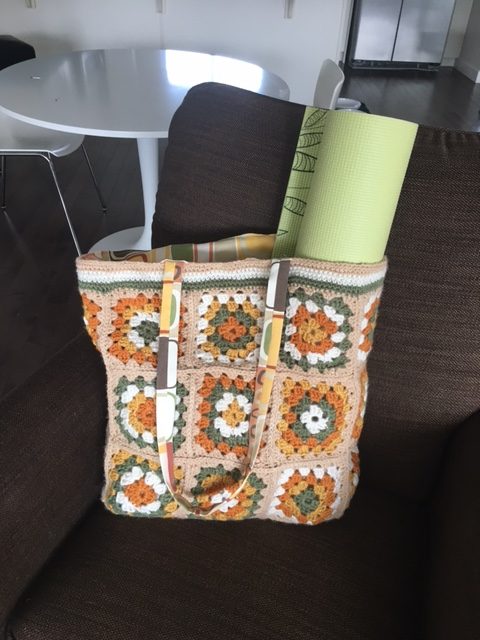
Here is a granny square bag made by one of my lovely, creative followers. I love the color combination she used and the lining is such a perfect color match too!
Thank you Jamie for sharing this!