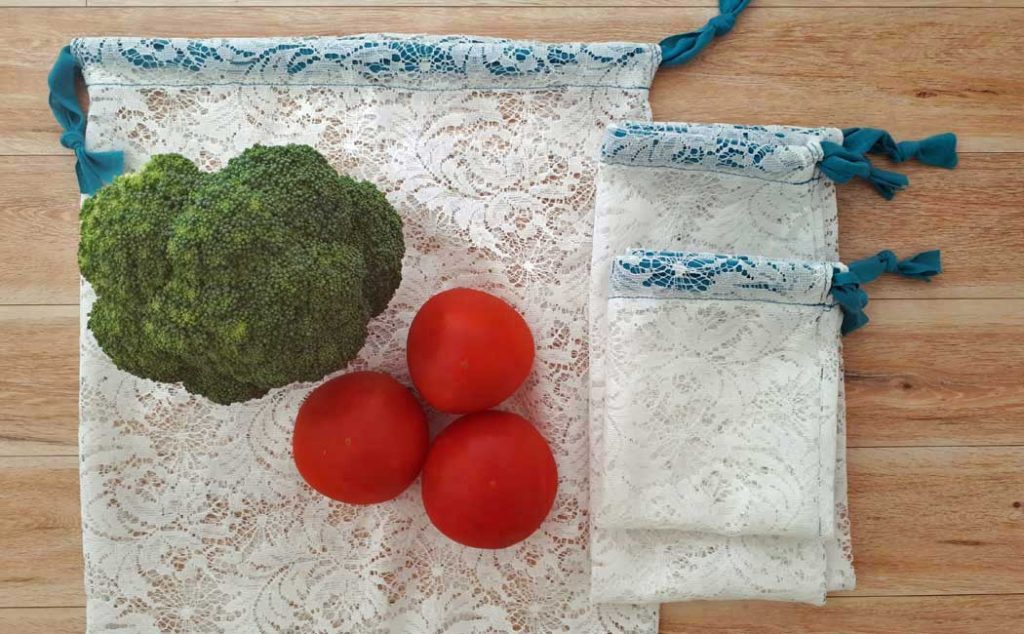
Single-use plastic bags are a huge problem for the environment. Many cities are implementing a ban on single-use plastic. What is one to do? Well, how about going back to good old fashioned fabric bags! These DIY Produce Bags are made from old lace curtains and they are super easy to make.
Some (but perhaps not all) of the links in this blog are affiliate links to Amazon.com. As an Amazon Associate, I earn from qualifying purchases. This page contains some affiliate links. Please see my policy page for details. I look for the best possible option for your convenience, however, I encourage you to support your local shops!
Lace fabric is perfect for produce bags because it allows the produce to breathe, you can see inside, and the bags are easy to wash! You can store your fruit and veggies in these bags in the fridge.
I found this lace fabric at my local thrift shop and I lucked out because it was about five yards of unused fabric. Lace can be made from all sorts of materials such as cotton, acrylic, polyester and acetate, and can be a blend of any of these. Some fabrics will fray when cut and others will not. If your fabric does fray, you can finish the edges with either a zig-zag stitch or use pinking shears.
This tutorial does require basic sewing knowledge and the project is sewen on a sewing machine. I will show you step by step how to make your own produce bags, and there is also a video tutorial that is even more comprehensive! You can see that at the bottom of this post.
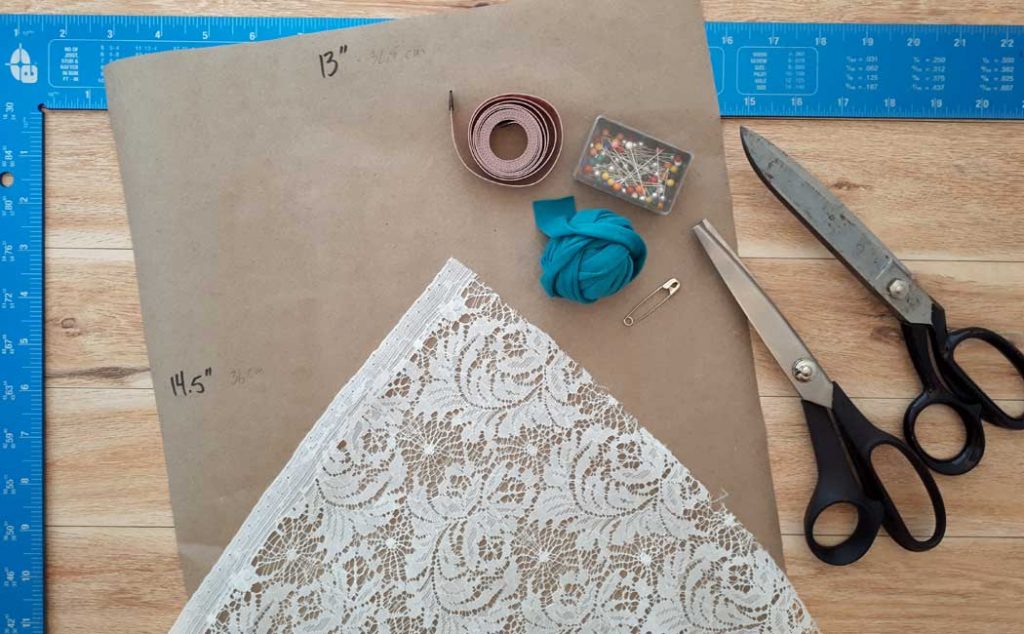
You will need the following supplies for this project.
- Lace fabric (I found mine at the thrift store)
- Scissors
- Pinking shears (optional)
- Tape measure or builders square
- Tee-shirt yarn or cording
- Straight pins
- Safety pin
- Thread
- Pattern (see measurements below)
- Construction paper or tissue paper (optional)
I created three different sizes for the produce bags. You can choose one size or make them all! I am using the pattern with two pieces in this tutorial, but I am giving you the measurements for one piece if you want to choose that option. I explain this more in the video tutorial.
- Small Bag: 9″ x 10″ (22.5cm x 25cm)
- 10″ x 12.5″ (25cm x 31.5cm) Cut x 2
- Optional one piece: 10″ x 24.5″ (25cm x 61.5cm) Cut x 1
- Drawstring: 28″ (70cm) Cut x 2
- Long Bag: 9″ x 18″ (22.5cm x 45cm)
- 10″ x 20.5″ (25cm x 51.5cm) Cut x 2
- Optional one piece: 10″ x 41″ (25cm x 102.5 cm) Cut x 1
- Drawstring: 28″ (70cm) Cut x 2
- Large Bag: 12″ x 12″ (30cm x 30cm)
- 13″ x 14.5″ (32.5cm x 36.5cm) Cut x 2
- Optional one piece: 13″ x 28.5″ (32.5cm x 71.5 cm) Cut x 1
- Drawstring: 34″ (85cm) Cut x 2
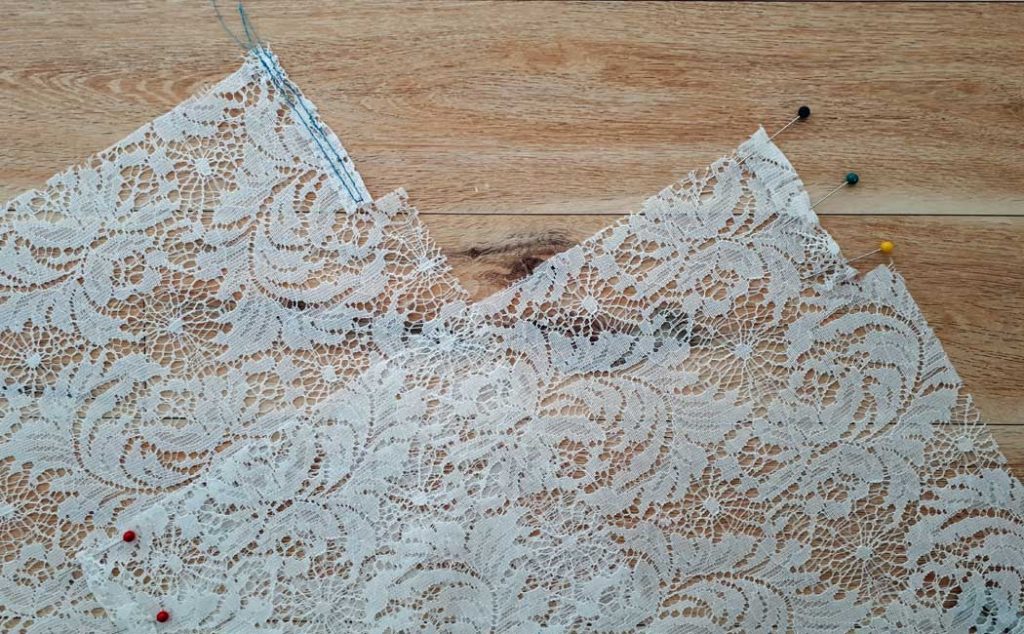
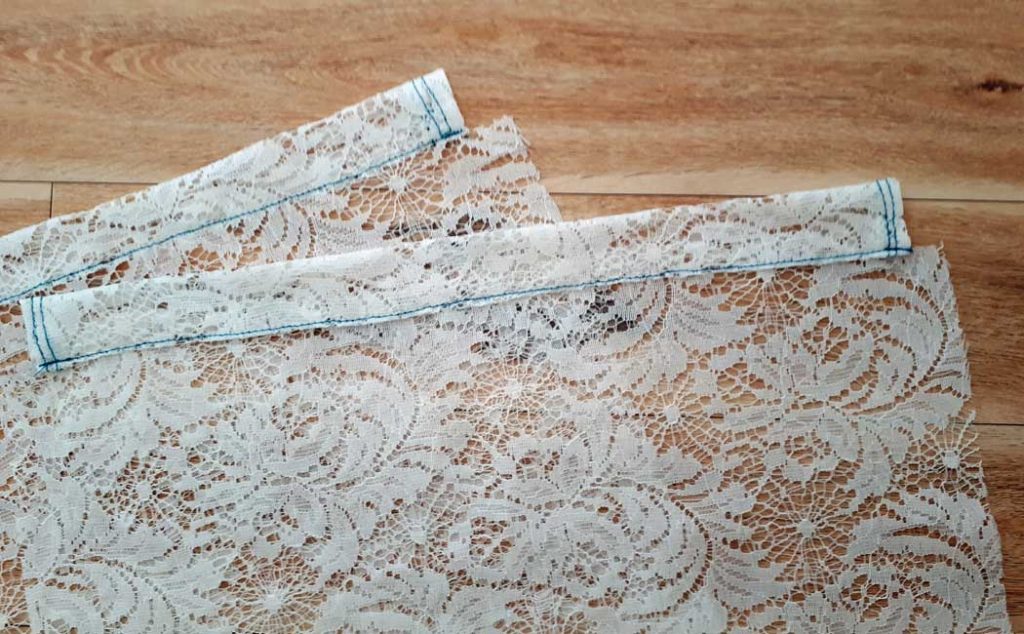
Start by cutting out your pattern pieces, right sides together. To create the pocket (casing) for the drawstring, measure down 2.5″ (6.25cm) from the top and 1/2″ (1.25cm) in from the side and make a 1/2″ (1.25cm) cut on the side. Do this on both sides and both pieces so you have 4 cuts all together. Turn the 1/2″ (1.25cm) piece to the inside, press (very carefully on a low temperature on your iron as some lace fabrics are very heat sensitive) and stitch two rows as shown below.
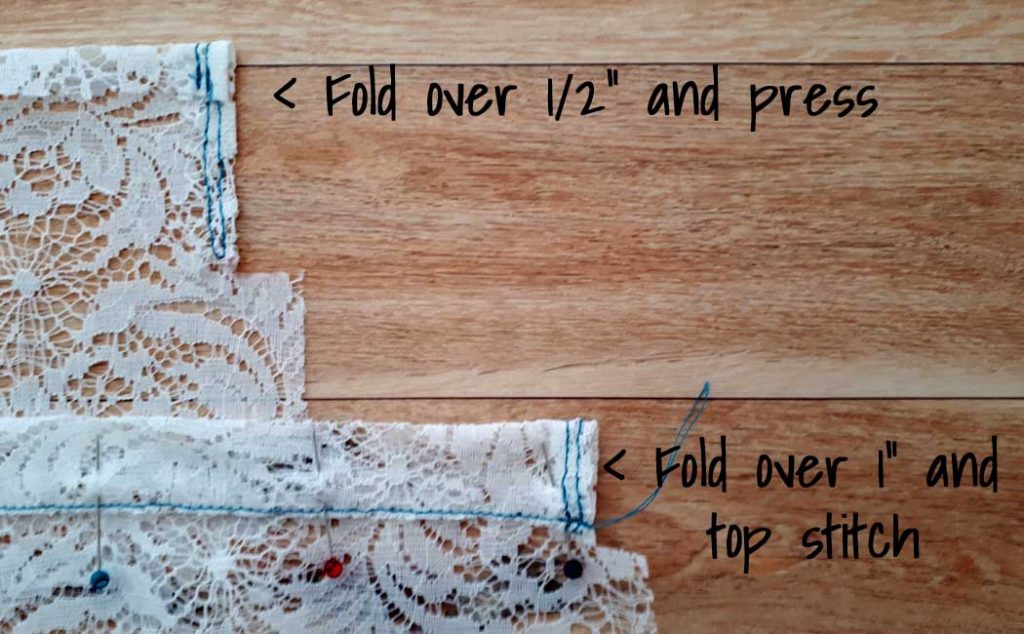
Once you have stitched all four sides, turn the top hem over 1/2″ (1.25cm) and press. Then turn the hem down 1″ (2.5cm), press, pin, and topstitch to create the pocket. Do this for both sides.
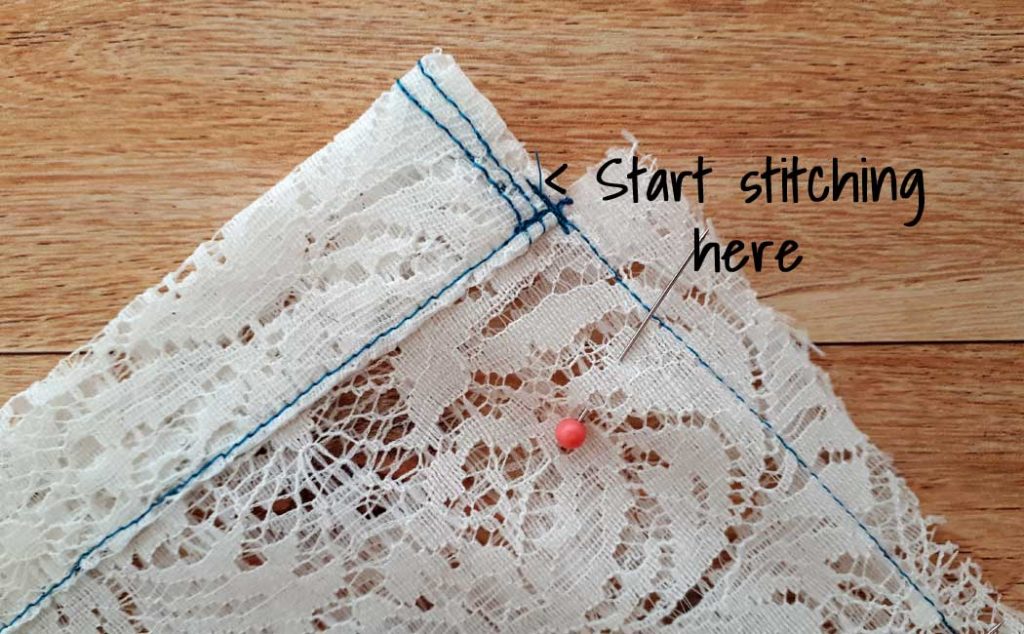
Once you have the pockets sewen, place right sides together and sew together with a 1/2″ (1.25cm) seam allowance. Start stitching just below your pocket to ensure a secure join. This may be at 5/8″ (1.6cm) to start, but then taper down to the 1/2″ (1.25cm) seam allowance for the sides and bottom edge.
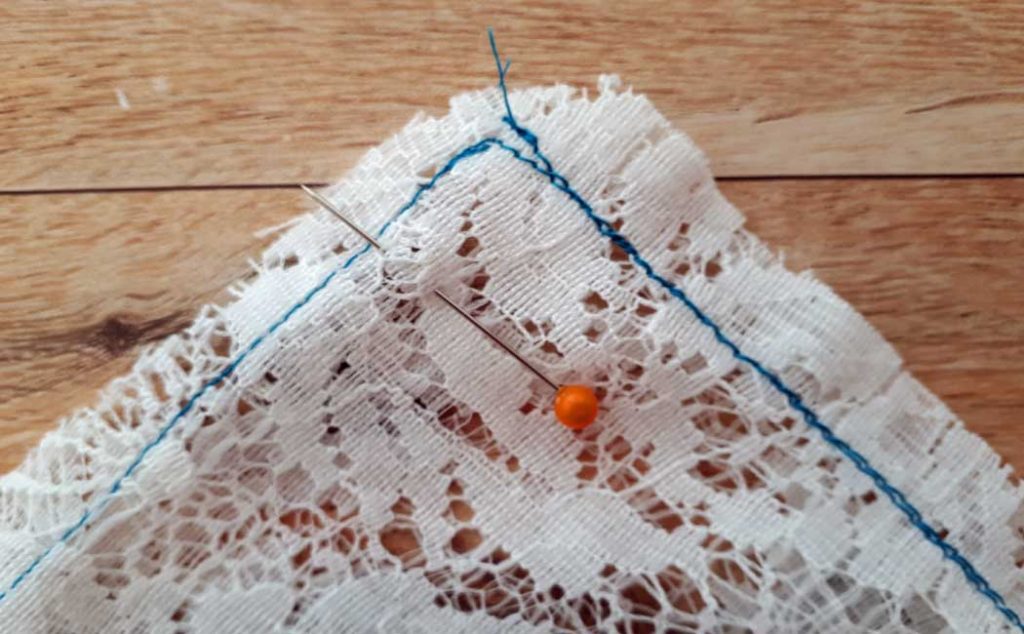
If you choose to use one piece for your pattern, you will only sew the side seams. If you are using two pieces, then you will have a bottom seam. In this case, sew an extra seam to add more strength to the bottom of your bag. If required, finish your raw edges with a zig-zag stitch or cut with pinking shears. My fabric does not fray, so I didn’t need to do this step.
Once you have sewen your bag together, gently press your seams (on low temperature) and turn right side out. Cut two pieces of tee-shirt yarn or cording to fit your size bag.

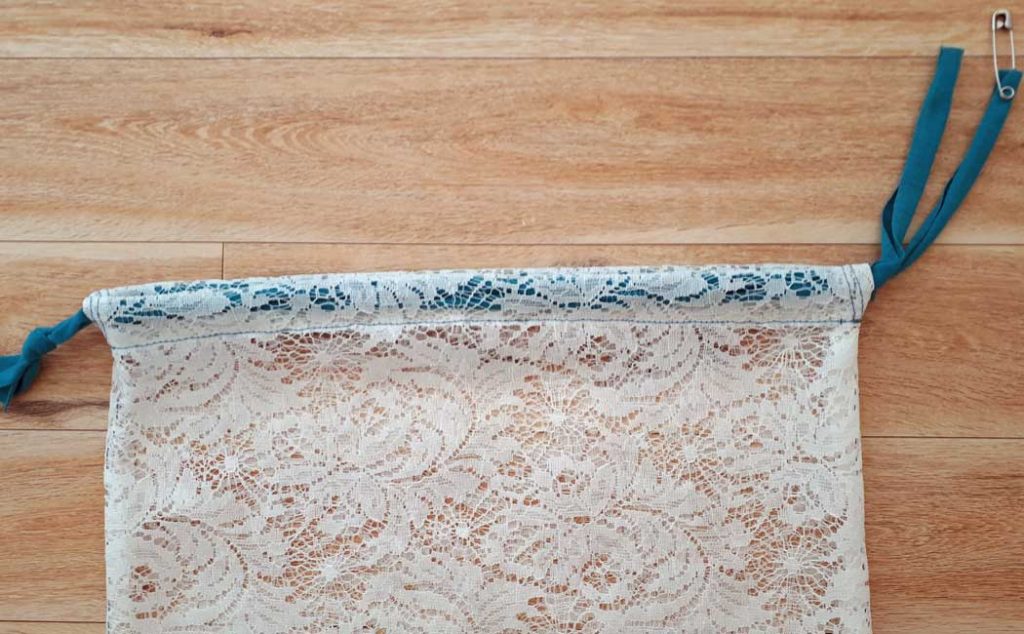
Using the safety pin on one end of the drawstring, feed it through the pocket all the way around. Tie a simple knot in the drawstring. Then feed the other drawstring through the pocket from the opposite end.
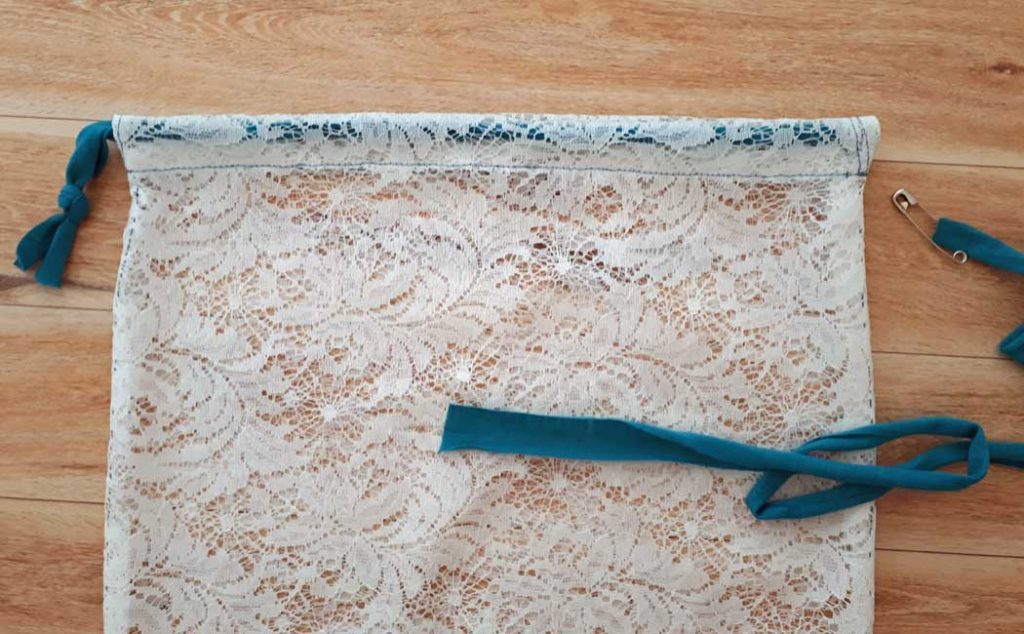
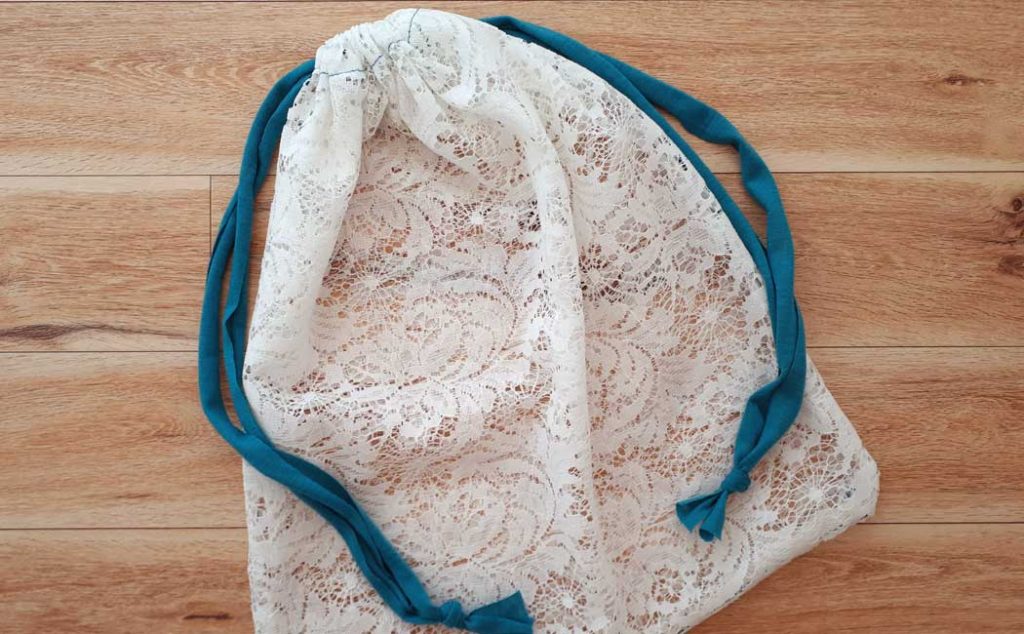
It should look like the image below. Tie a knot in the second drawstring and you are done!
Now you have a fabulous, eco-friendly produce bag! You can make as many as you desire, and even make them as gifts for your family and friends.
So I hope you enjoyed this tutorial. Make sure to subscribe to my newsletter to keep posted for new tutorials and inspiring blog posts. Share this with your friends too! I’ve created a video tutorial if you want more details on this project.