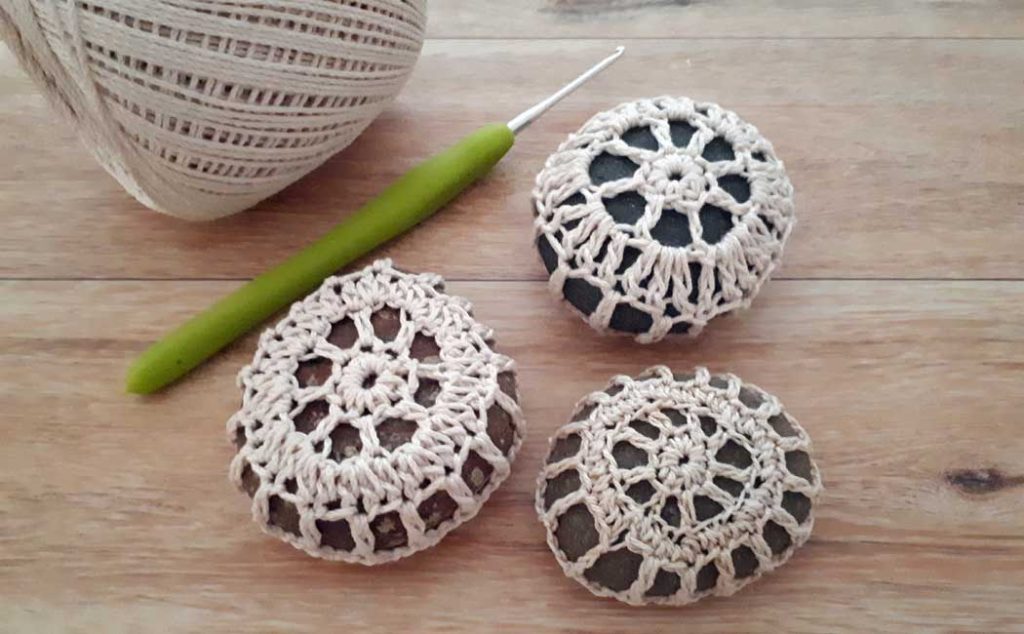
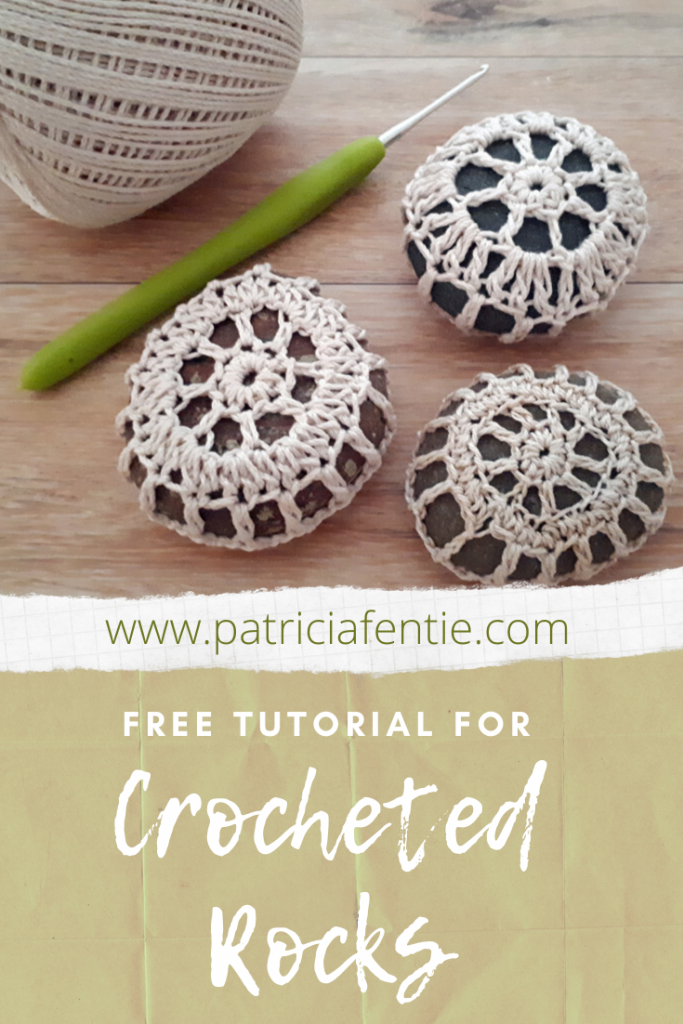
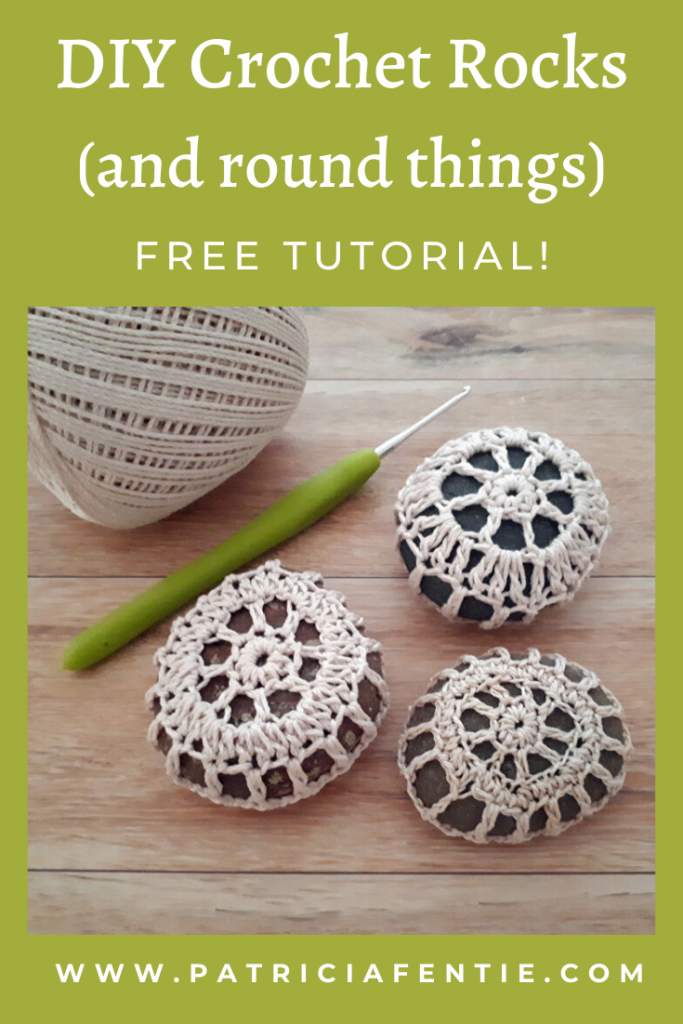
Crocheting around rocks (and other round things) is so much fun! I love how they look, and there are numerous possibilities for this craft. I crocheted around a walnut to create a pendant, and one could create pendants from any sort of round object. I must say, however, I love how crocheted rocks look and enjoy making them the most.
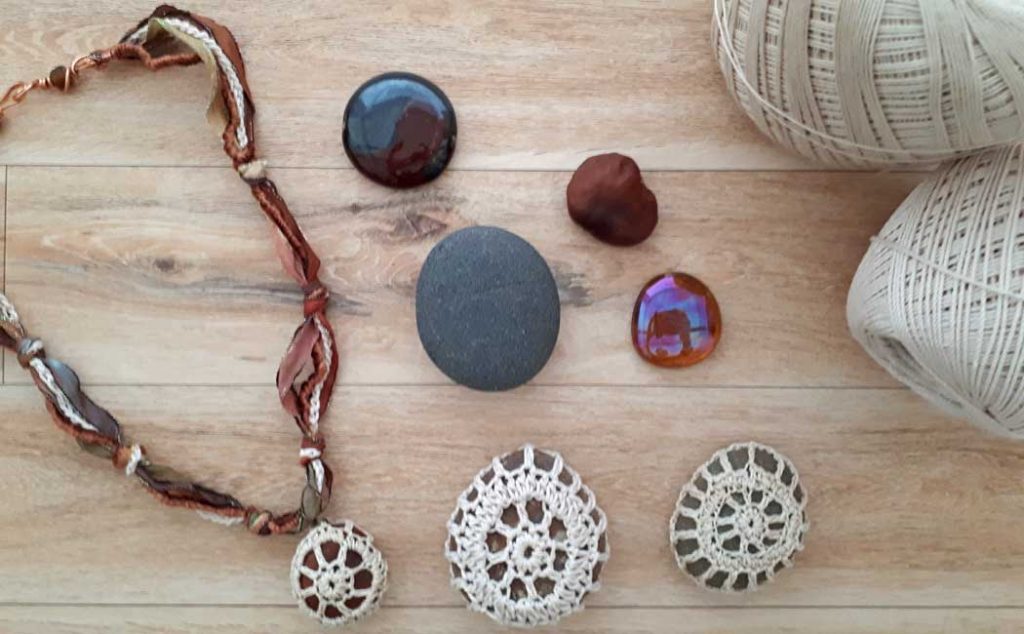
In the image above, you can see a variety of round objects that could be used, as well as the pendant I made for a necklace. I have a tutorial for the bohemian ribbon necklace as well. You can find that here.
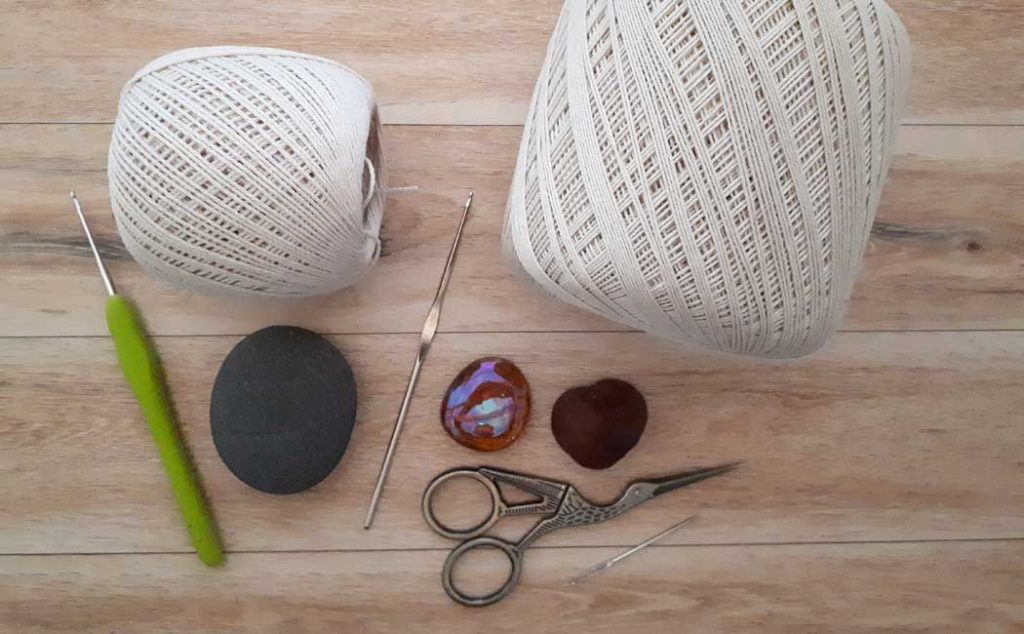
Crochet cotton thread is perfect to use for crocheted rocks because it is fine and strong. While ‘off white’ is the most common color, crochet cotton comes in a variety of colors. The crochet cotton I use comes in two sizes, number 10 for small projects and number 3 for larger projects.
For this project, I am using the number 3 size thread with a 2mm crochet hook. If using number 10 thread, you can use a 1.75mm crochet hook. (I couldn’t find a US conversion for these small size hooks)
Some (but perhaps not all) of the links in this blog are affiliate links to Amazon. As an Amazon Associate, I earn from qualifying purchases. This page contains some affiliate links. Please see my policy page for details. I look for the best possible option for your convenience, however, I encourage you to support your local shops!
The supplies you will need for this project are:
- Rock, bead, walnut or other round object measuring approximately 2.5″ x 3″ (6.5cm x 7.5cm)
- Number 3 crochet cotton
- Optional: Number 10 crochet cotton
- 2mm crochet hook (or 1.75mm for smaller thread)
- Darning Needle (included in the set above)
- Scissors
The directions I am providing here are to fit the size rock recommended above. I have also created a video tutorial, and I explain how to modify this pattern slightly to fit different size rocks. The video is at the bottom of this post. If you are new to crochet, I do have a Beginner Crochet Series that can get you started!
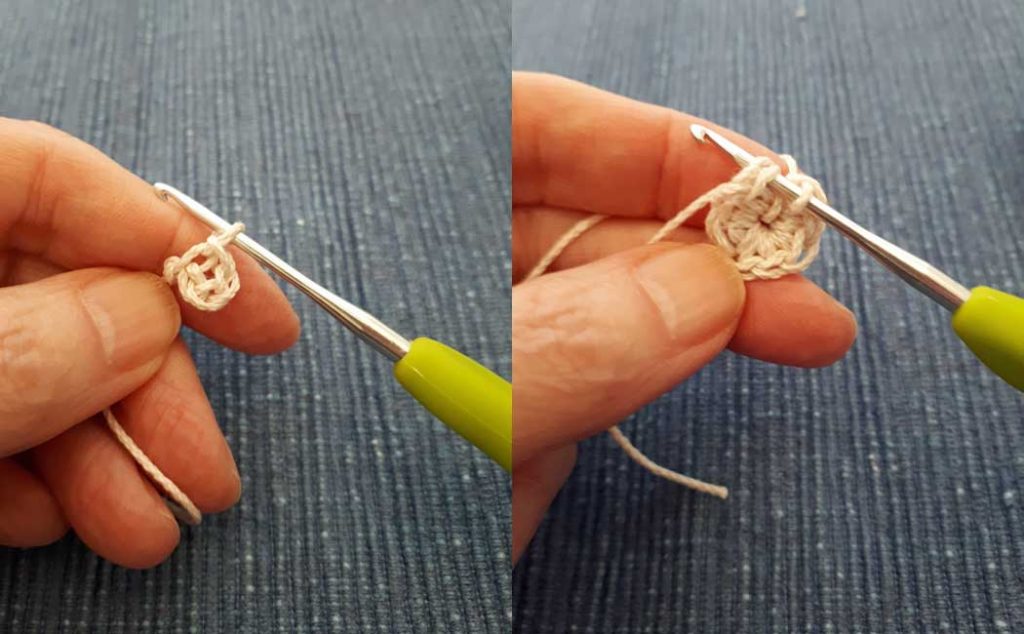
Start with a chain 4 and slip stitch to create a ring.
Row One: 8 sc in center of the ring, join with a sl st to beg sc.
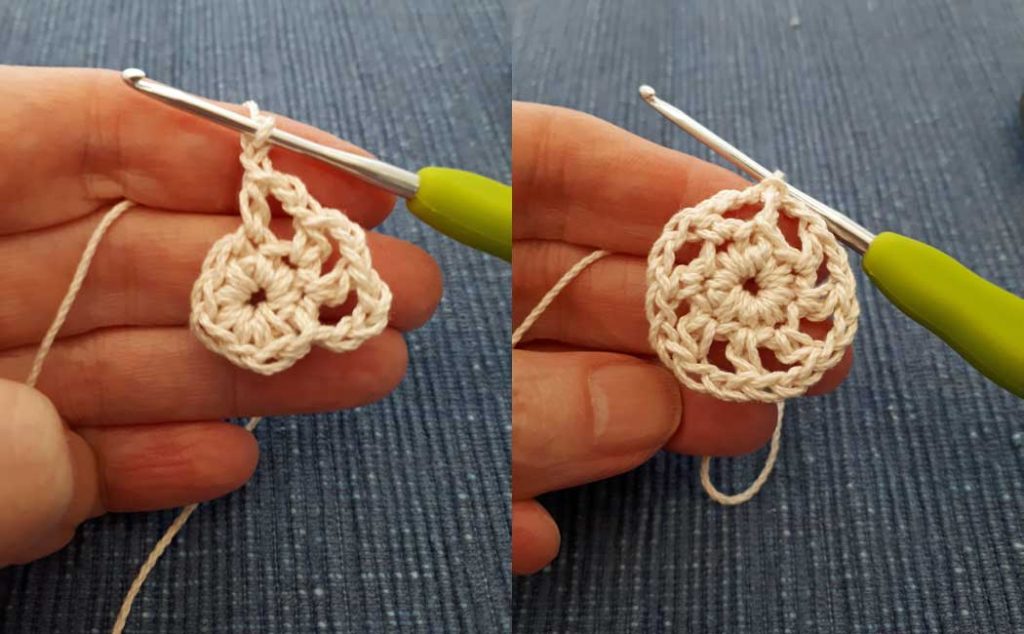
Row Two: Ch 5 (counts as first dc plus ch 2). *1 dc in next st, ch 2. Repeat from * six more times for a total of 8dc (includes first ch3 for dc), join with a sl st into 3rd ch of beg ch5.
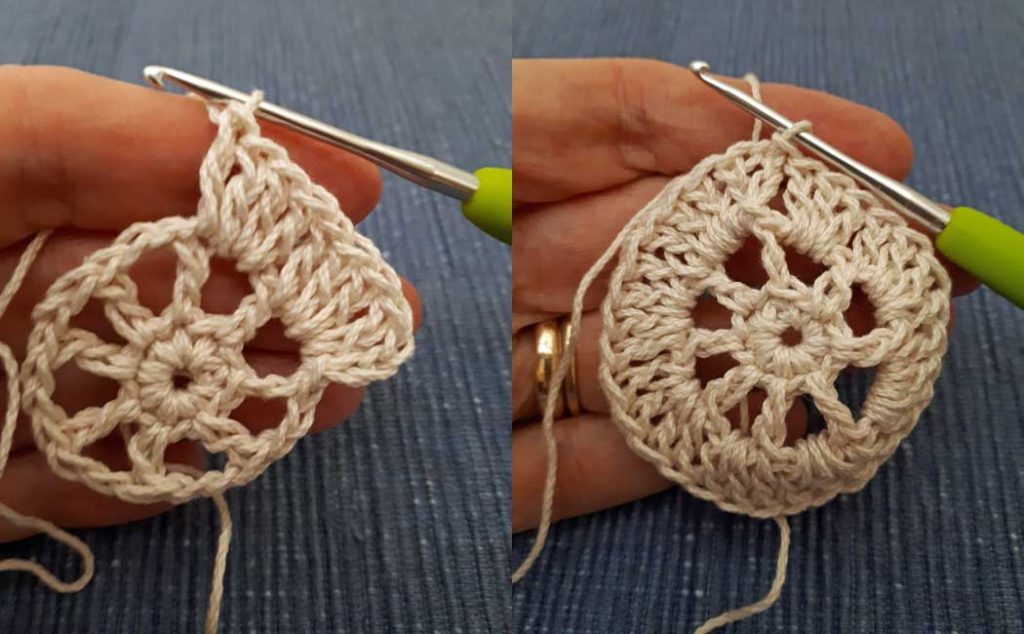
Row Three: Ch 3 (counts as first dc), *3 dc in ch2 sp, 1 dc in top of dc of previous row. Repeat from * all the way around and sl st in beg ch3 to join.

Row Four: Ch 5 (counts as first dc plus ch 2). *Sk st, 1 dc in next st, ch 2. Repeat from * all the way around, join with a sl st into 3rd ch of beg ch5.
Check how the crocheted piece fits on the rock. It should have a gentle wrap and come down the sides of the rock towards the back, fitting loosely.
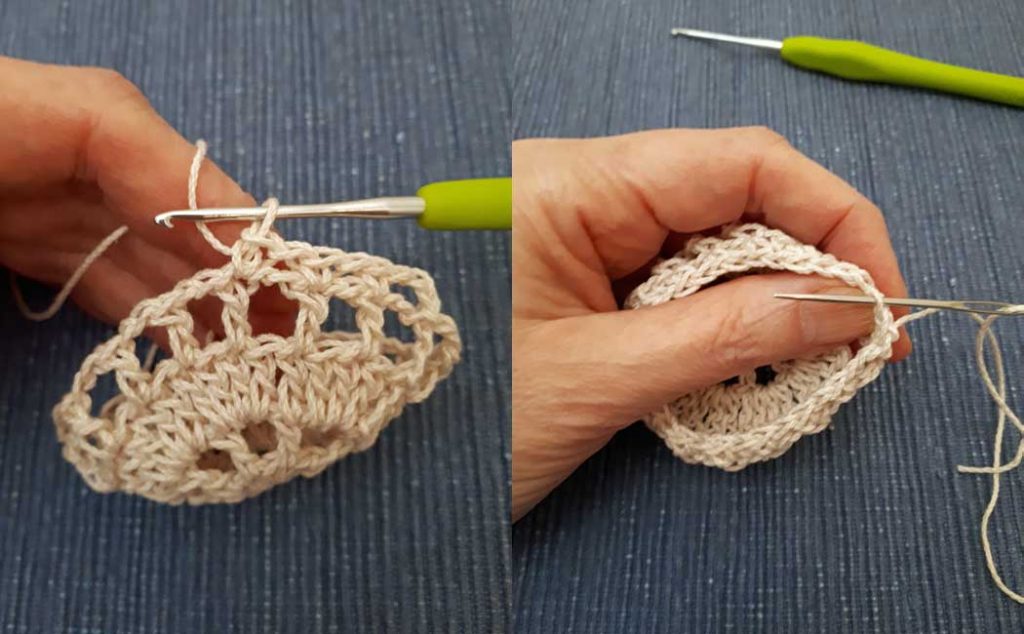
Row Five: Ch 3, sc into top of next dc from the previous row, ch 1. *Sc into the top of next dc from the previous row, ch 1. Repeat from * all the way around. Sl st into 2nd ch of beg ch3. Cut thread about 10″ (25cm) long and pull through the last loop (do not fasten off). Darn in your beginning tail.
Thread on the darning needle, and starting with the first stitch in front of the yarn, place the needle through the back of the top post of that stitch from the right to the left. Skip one stitch and place the needle through the back of the top post of that stitch, again from the right to the left.
Continue to darn the thread into the back of every second stitch all the way around. (You are essentially creating a basting stitch to pull the work tight in the back.)

Gently pull the piece of yarn that was darned in and snug up the back of the crochet. Adjust the crocheted piece around the rock so it is nice and even and fits snugly. Tie a knot to secure the thread and darn in the tail. Tah-dah!! You are done…you have the first of perhaps many crocheted rocks!
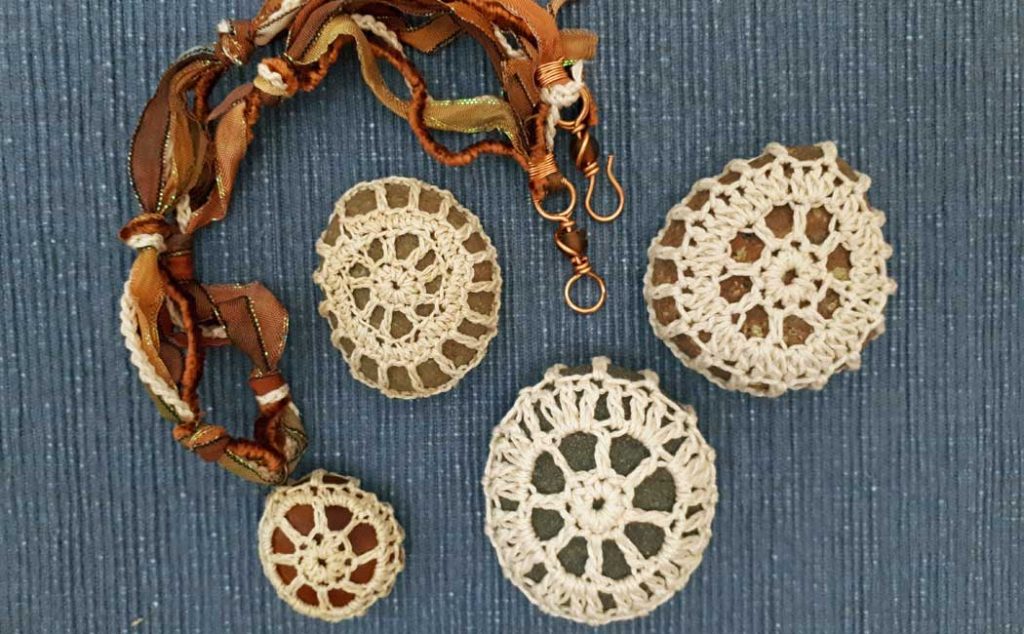
If you are using this technique to make a pendant, then you can attach two jump rings to the ‘top’ of your piece. Attach the first jump ring through one or two double crochets and the second jump ring through the first one so the necklace can thread though in the right direction for the pendant to hang facing forward.
I hope you give this project a try as it is a fairly simple one. You could make a basket full of crocheted rocks! Leave a comment below and please share this post by clicking on the social share buttons and choose a pin or image to share.
If you liked this tutorial, then you may also like:
- Boho Ribbon Necklace Tutorial
- Easy Crochet Cowl for Beginners
- Granny Square Tote Bag (Part One)
- How to Crochet a Granny Square Blanket
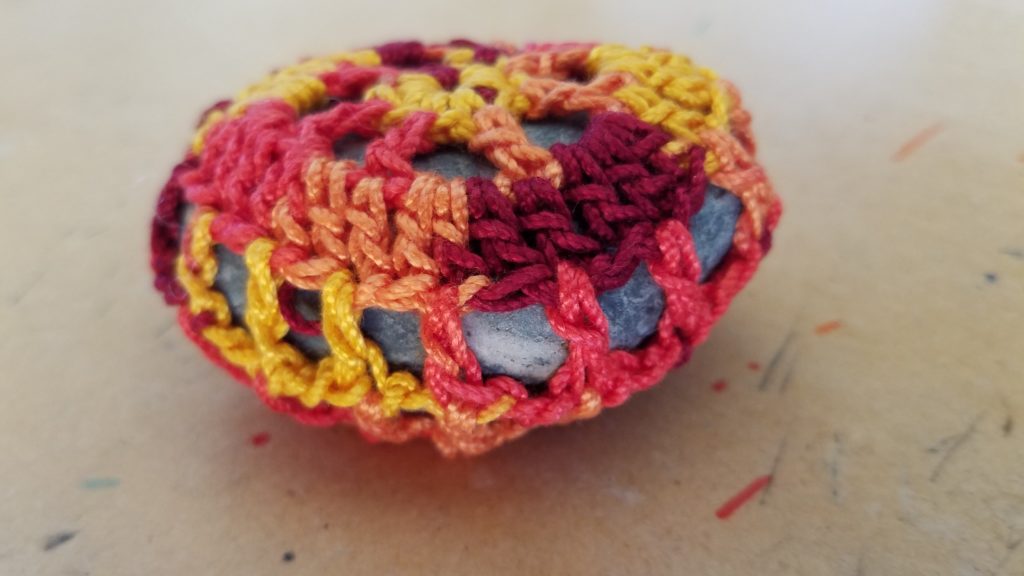
The crocheted rocks below were sent to me by a lovely fellow creator! She used pretty colorful yarn and they turned out so beautiful! Thank you for sharing MJ!