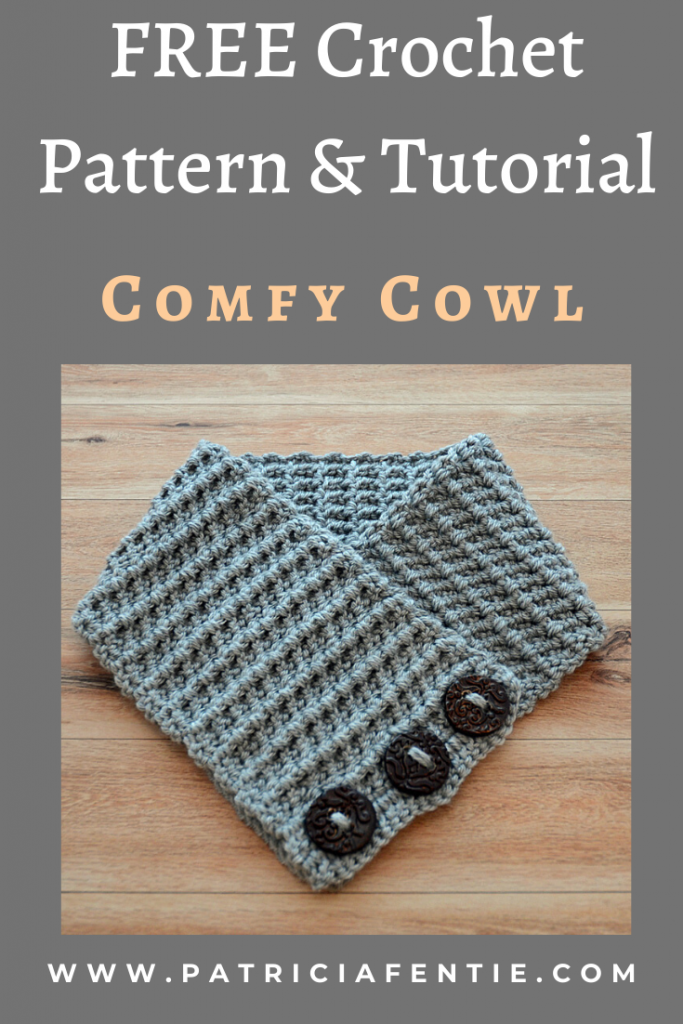
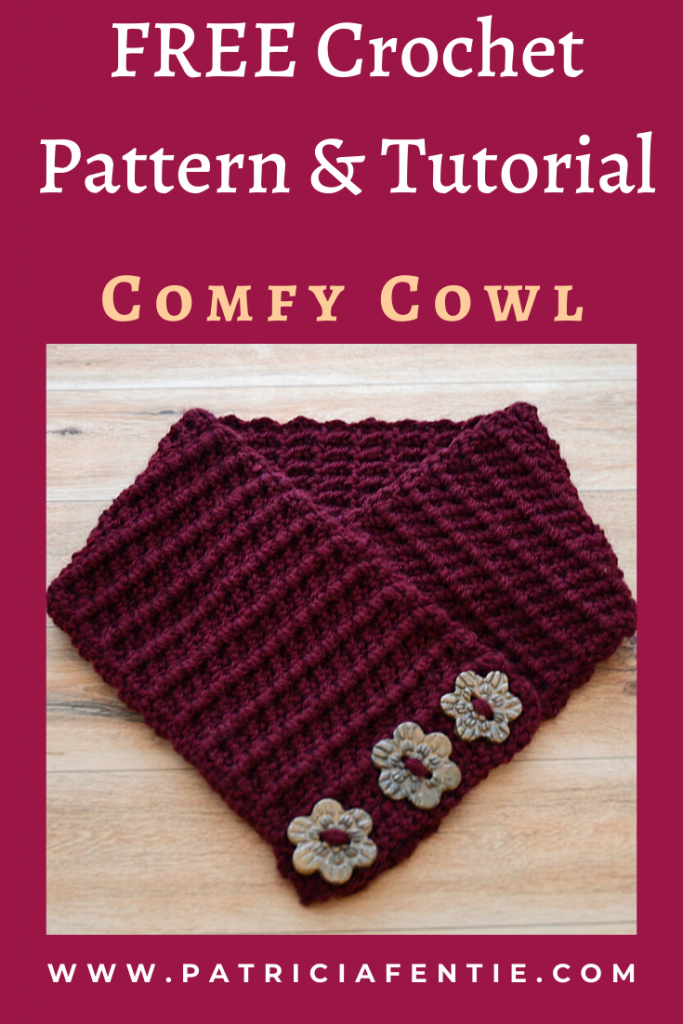
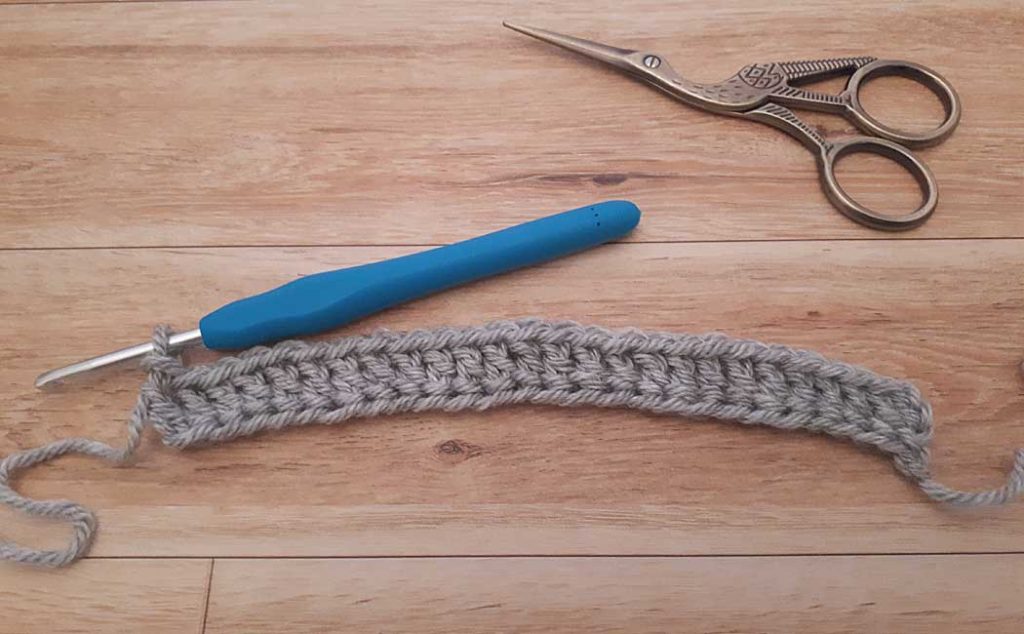
If you have never crocheted before, this crochet cowl pattern is so easy to do, that even a beginner can make it. However…even if you are a more advanced crocheter, you will love this simple, but very pretty pattern. You will need less than a 3.5 oz (100gm) ball of yarn, so it is an economical project as well.
Some (but perhaps not all) of the links in this blog are affiliate links to Amazon.com. As an Amazon Associate, I earn from qualifying purchases. This page contains some affiliate links. Please see my policy page for details. I look for the best possible option for your convenience, however, I encourage you to support your local shops!
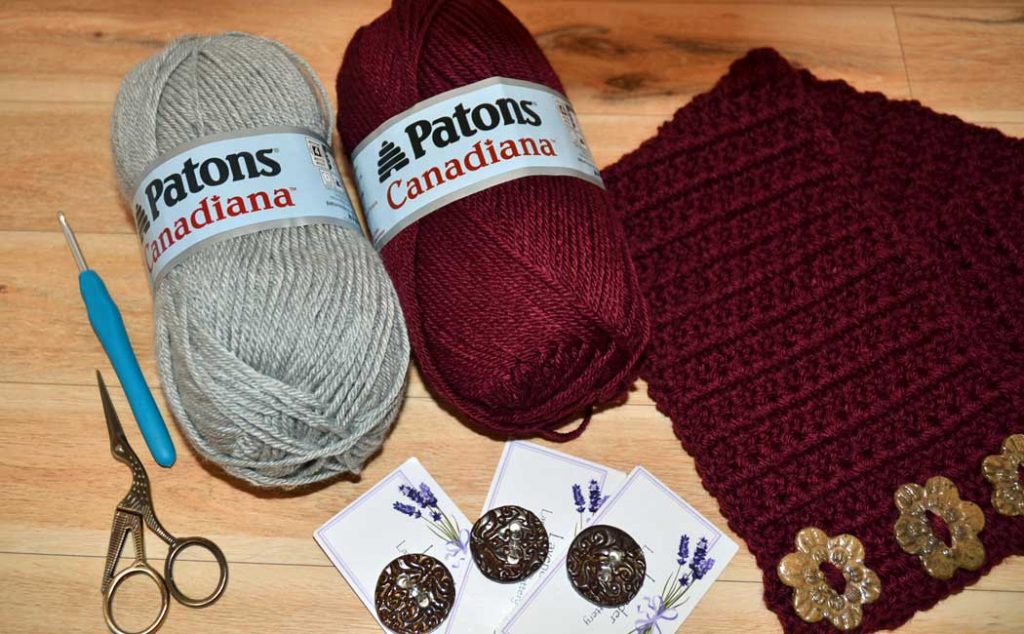
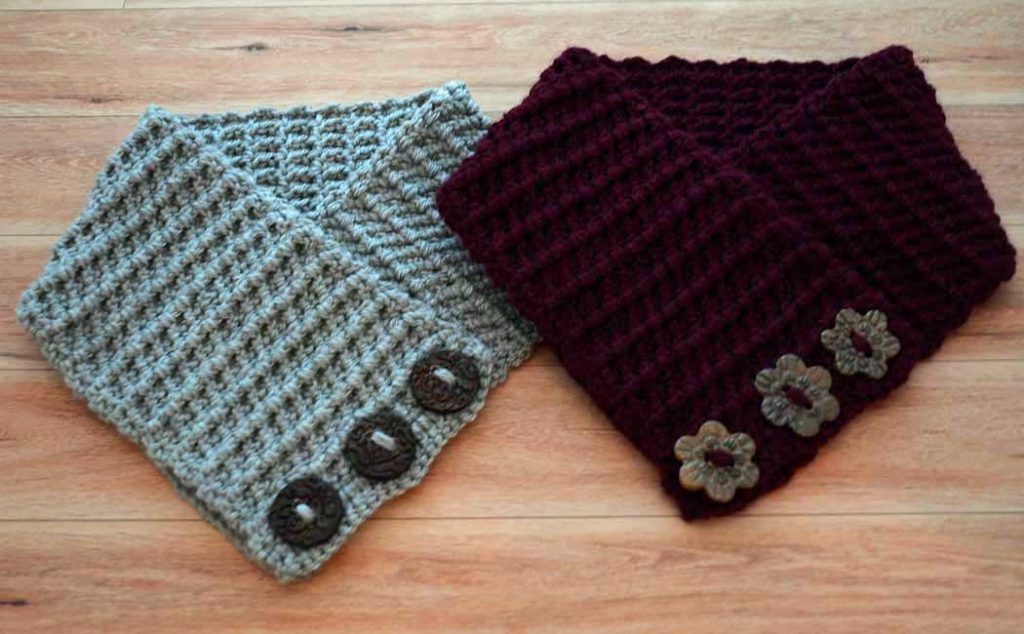
While I recommend Patons Canadiana acrylic yarn for this project, you can use any number 4 worsted yarn you like. The buttons I used were hand-made by a local artisan, Lavender Lampworks and Pottery, and I must say…funky buttons make all the difference! I’m not sure if she does online orders, but you can see her work with the above link. Perhaps you have a local artisan who can make something similar? If not, I’ve offered a link below for some nice wooden buttons in a suitable size.
If you are new to crochet, you can check out my Beginner Crochet Series for some of the basics. There are a couple of stitches here that are not part of that series, but once you know the basics, these new stitches will be easy to do. Also, I have a video tutorial to go along with this project and you can find that at the bottom of this post.
Gauge and Supplies
- Gauge: 9 stitches = 2″ (5cm)
- Finished size = 26″ x 5.25″ (68cm x 13.5cm)
- Crochet hook 4mm or G-6 US to equal gauge
- Yarn: Medium 4 worsted acrylic yarn (less than 200 yds or 185 m)
- The colors shown here are:
- Scissors
- 3 buttons- 1.25″ (3cm) to 1.75″ (4.5cm)
- Darning needle
Stitches Required:
- Chain Stitch: ch
- Single Crochet: sc
- Double Crochet: dc
- Foundation Double Crochet: fdc (see special directions below)
- Front Post Double Crochet: fpdc (see special directions below)
Special Directions:
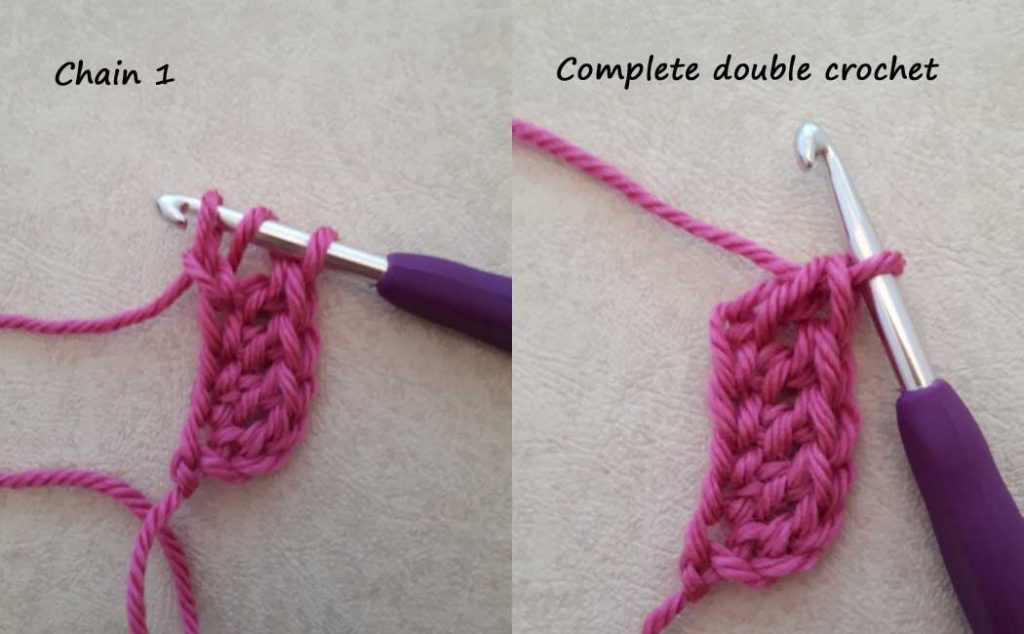
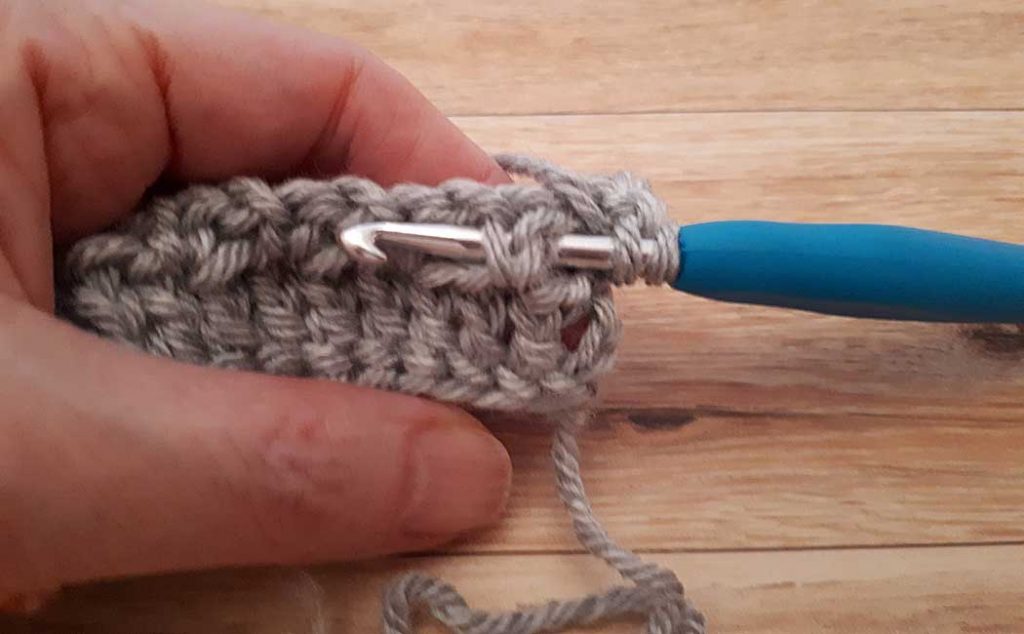
Foundation Double Crochet (fdc)
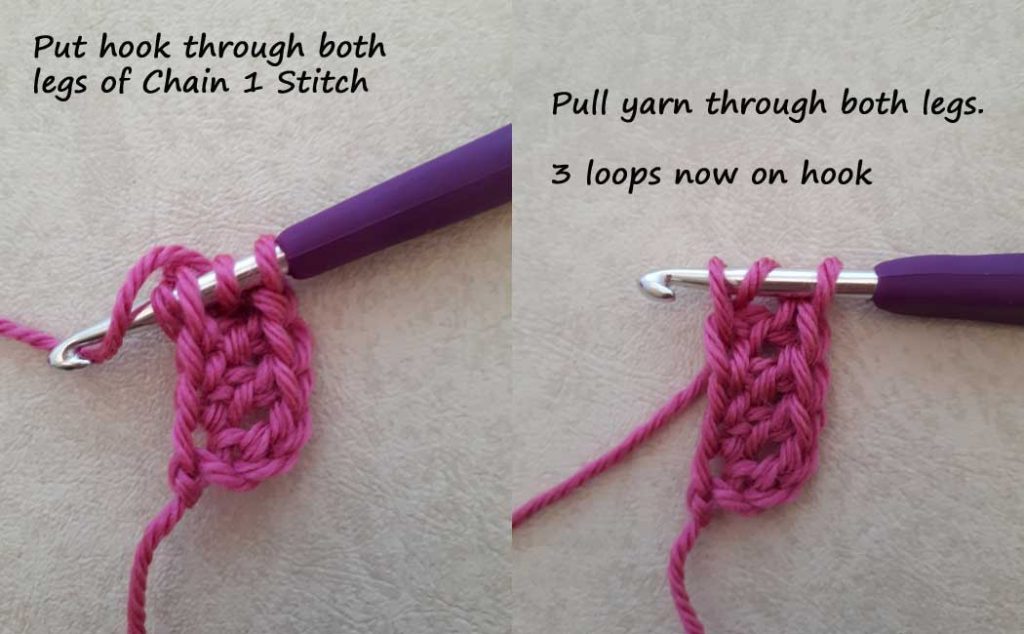
(Images included below) Start with a slip knot and chain 4. Yarn over (yo) and insert hook into the 4th ch from hook (making sure to go underneath the top and back legs…this counts as the first stitch). Yo, pull up 1 loop (making 3 loops on your hook). Yo and pull through 1 loop only. This creates the first ‘chain’. Yo, pull through 2 loops. Yo, pull through remaining 2 loops to finish off the double crochet.
You’ve created your first foundation double crochet stitch!
Next stitch: Yo, insert hook into 2 legs of the ‘chain’ you just created at the bottom of the previous stitch (obvious ‘V’ shape). Yo, pull up a loop (making 3 loops on your hook) yo, pull through 1 loop only (creating the first chain). Yo, pull through 2 loops. Yo, pull through remaining 2 loops to finish off double crochet.
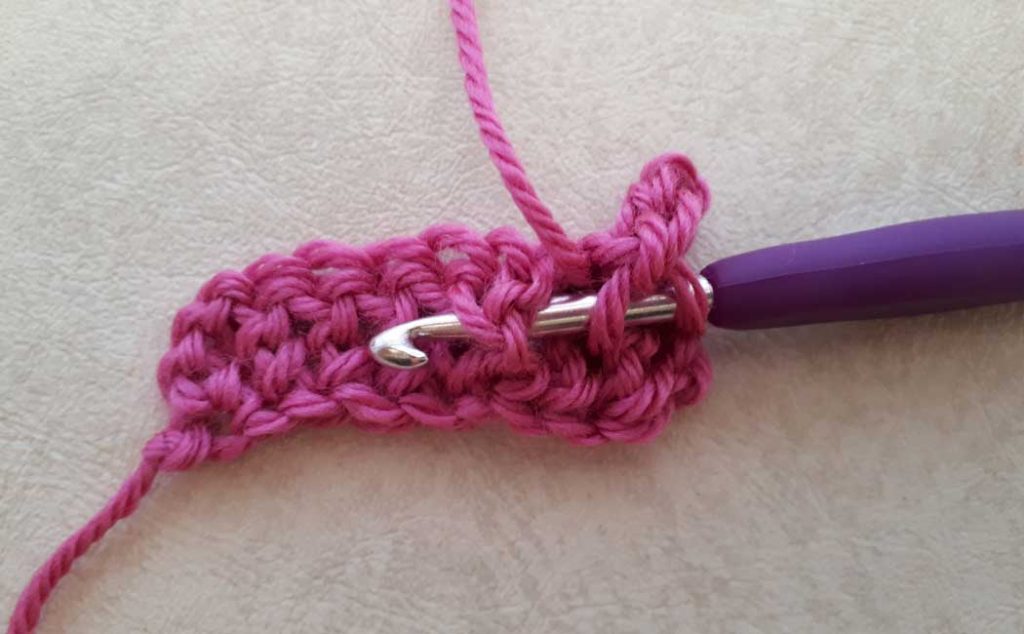
Front Post Double Crochet (fpdc)
(See image below fdc images) Yo, insert hook behind the post of the sc of the previous row, yo, pull loop behind sc post, and complete dc.
Let’s get started!
Row 1: Ch4, yo, put hook through 2 legs of the beginning ch of ch 4 *1Fdc. Repeat from * 23 times to equal 25 stitches. Ch1, turn your work.
You can make your cowl wider at this point by adding more fdc stitches. The pattern repeat requires an odd amount of stitches.
Row 2: 1sc in first st, ch1, skip a stitch, *1sc in next st, ch1, sk st. Repeat from * to end of row. Finish with 1sc in the last stitch of the previous row. Ch1, turn your work.

Row 3: 1dc in first st, *1 dc in next ch 1 sp, 1fpdc behind sc from the previous row (see special directions). Repeat from* to end of row. Finish with 1dc in the last sc of the previous row. Ch1, turn.
Rows 4 to 73: Repeat rows 2 and 3.
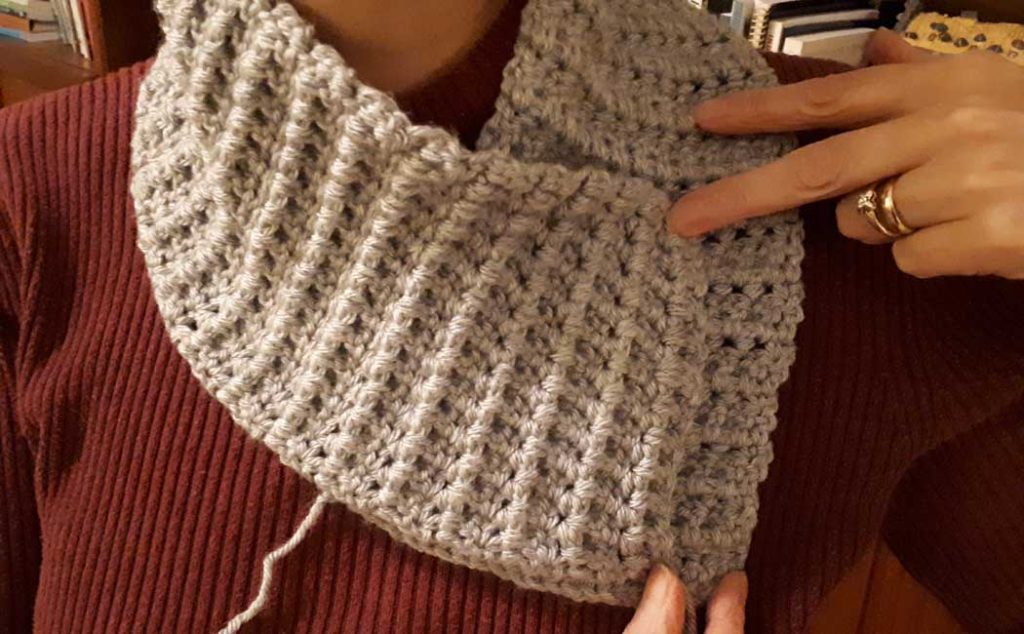
Once you’ve reached row 73, check the fit of your cowl. Place it around your neck like shown below so it fits comfortably. You want to leave about 1″ (2.5cm) overlap for the buttonholes. If you need to make the cowl larger, repeat rows 2 and 3 again until you have your desired fit. Ch1, turn your work.
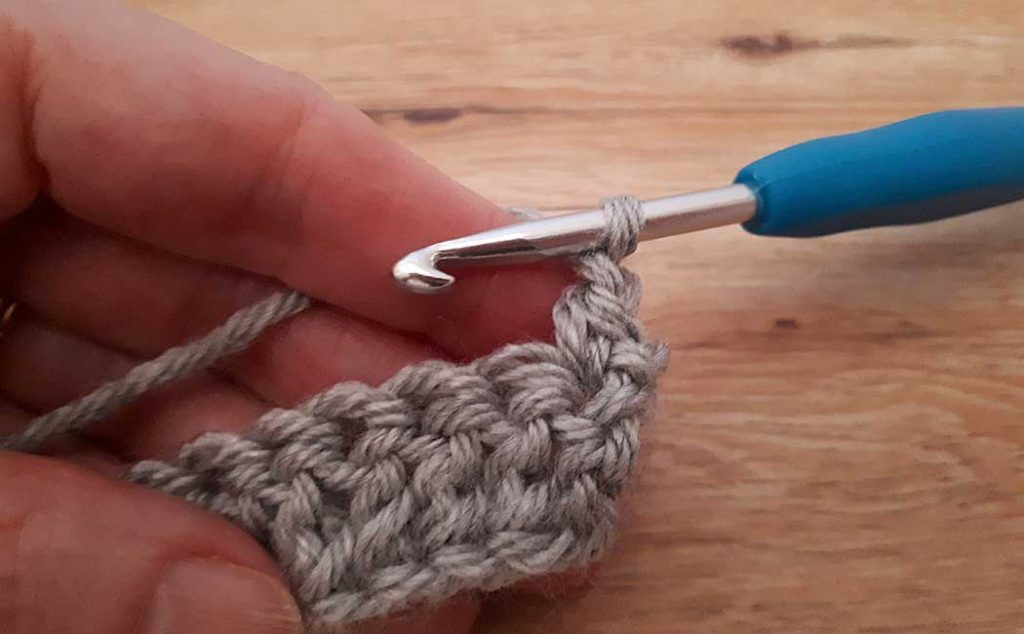
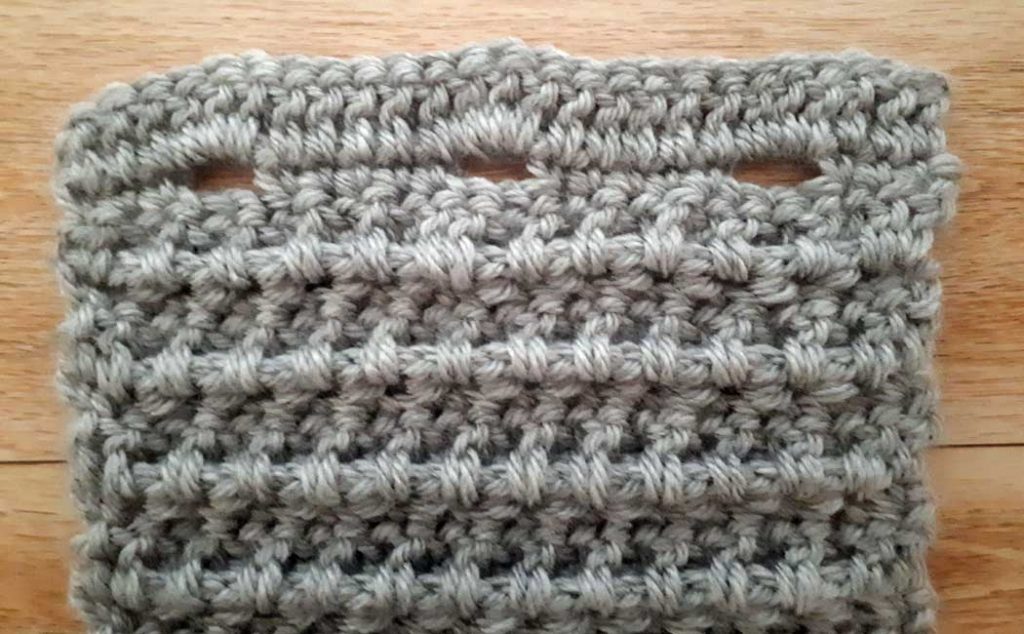
For the buttonholes: next row: 1sc in next 3 sts, ch3, sk 3 sts, *1sc in next 5 sts, ch3, sk 3 sts. Repeat from * one more time, 1sc in next 3 sts. Ch1, turn.
Last row: 1dc in each st, with 3dc in ch 3 sp. Fasten off and darn in all ends.
Lay your finished cowl wrong side up with the buttonholes on the left and the beginning fdc row on the right. Bring the right side over at an angle to the center and then bring the left side over top, lining up the edges of the cowl.

Sew your buttons in place and you are done! Isn’t this so pretty!
And for your convenience, I have also created a video tutorial!
If you choose to watch this tutorial, I must apologize for a sound issue. The segment where I am on screen is very quiet because I was using different equipment. Other than that…it’s a good tutorial! 😉
If you like this tutorial, you may also like:
- How to Crochet a Small Granny Square Blanket
- Easy Crochet Pouch for Beginners
- Crochet a Bohemian Scarf
- Crochet a Bohemian Hat
Sharing is caring! Click on the Share Button and pick an image to share!