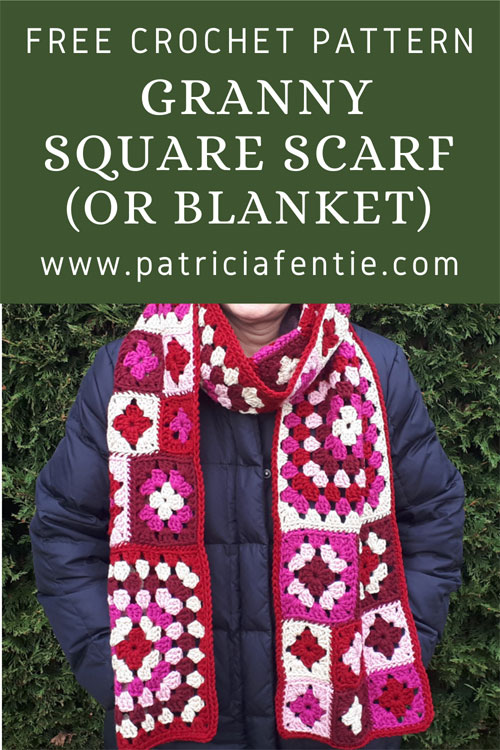
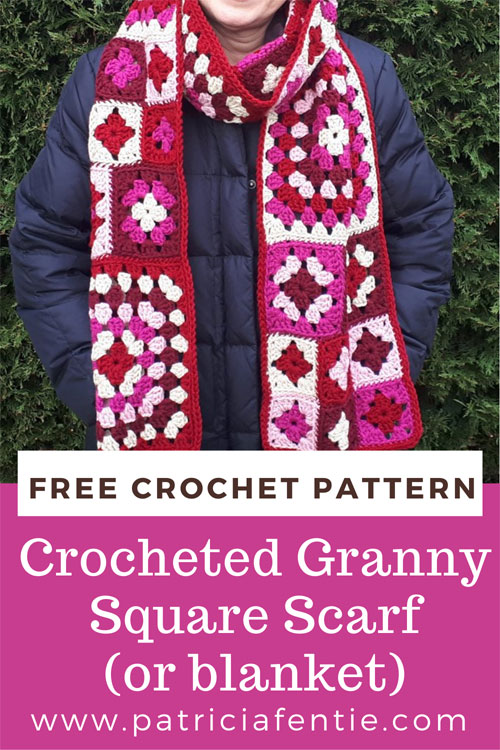
In this tutorial, I will show you how to make a granny square panel using three different sizes of granny squares. The panels can then be used to make a granny square scarf or blanket, or any other project you desire. The trick is to make the different size squares fit together nicely. Each panel is made exactly the same way but I offer two different color schemes which then work to create a fun pattern. The pattern can be repeated in any number of ways for any number of projects!
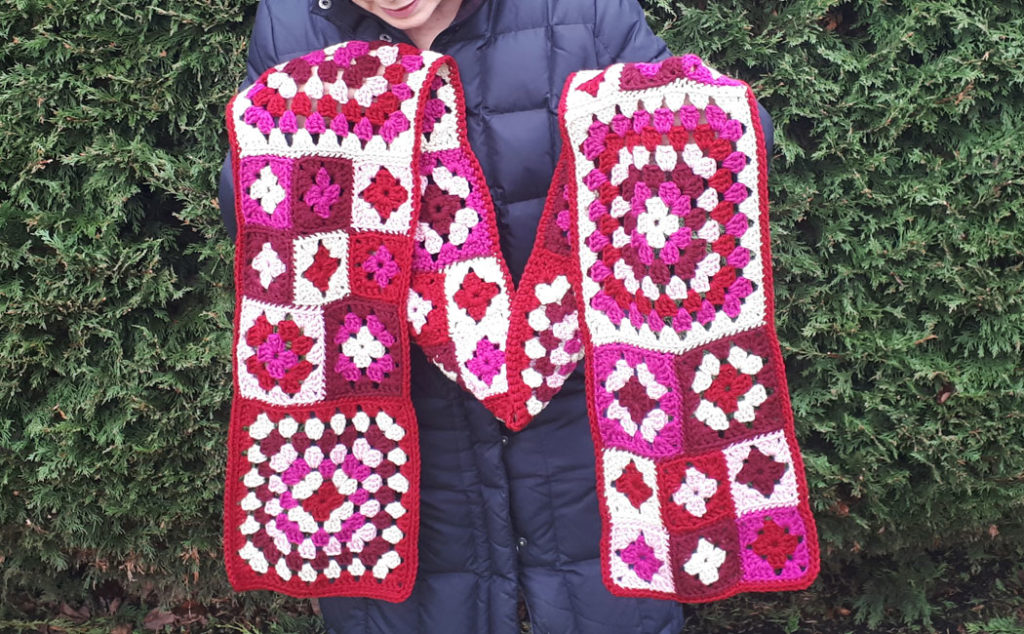
I will provide a pattern for this scarf and for a small blanket. There will be enough yarn with the five balls shown below to make either of these projects. The scarf measures 9″ by 78″ or 23 cm by 197 cm, and the blanket measures 27″ by 39″ 68.5 cm by 99 cm (roughly based on the choice of yarn and crochet tension). This does not include the border because I give you four different options for a border, so that will be different depending on your choice of finish.
If you are new to crocheting, I do suggest starting with my Beginner Crochet Series to learn all the basic stitches and skills required for this project.
The yarn I am using for this project is the Loops and Threads Impeccable line which is exclusive to Michaels. I live in Canada and this is where I got my yarn, but I wasn’t able to get onto a US website for Michaels. So I can only assume that Michaels in the US also carries this line. If not, you can simply choose a similar color scheme in a different brand.
I do suggest, however, that you stay within one brand of yarn because it is important that the yarn is the same weight. This is a number 4 medium-weight acrylic yarn and I have noticed that the rating for this weight of yarn can vary quite a bit. Some are closer to a number 3 weight, and others are closer to a number 5 weight. In order to get the correct size in the granny squares, all the yarn must be the same size.
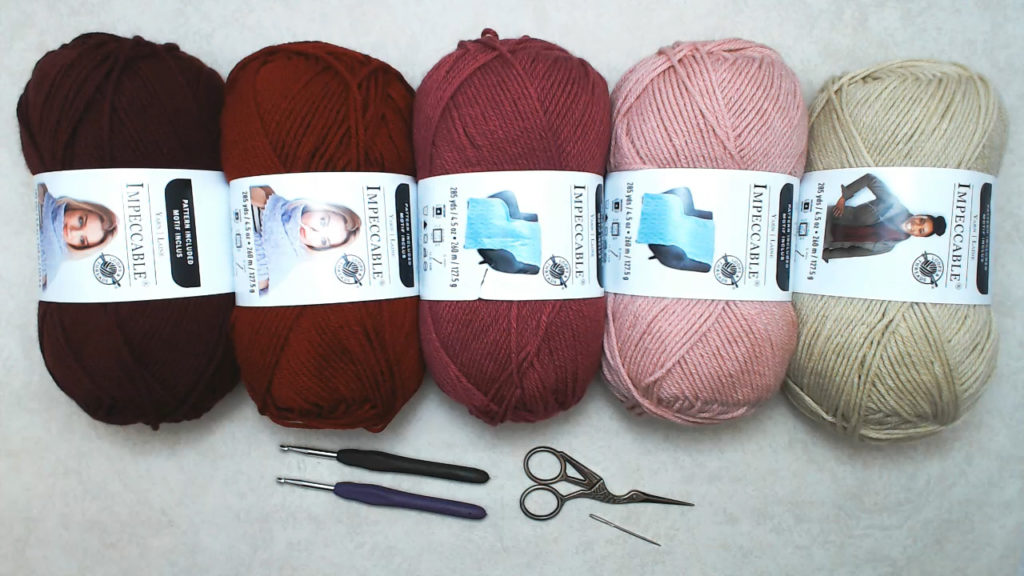
I suggest using five different colors, with four of them being within a given color palate and then one neutral color. Here I chose reds, so I have a deep burgundy, red, dark pink, light pink, and then cream as the neutral. See the exact colors in the supply list below.
Abbreviations
- ch = chain
- st = st
- sl st = slip stitch
- sc = single crochet
- hdc = half-double crochet
- dc = double crochet
The Supplies you will need are:
- 5 balls of number 4 medium weight yarn. The colors (and brand) I used are:
- Michaels Brand Loops and Threads Impeccable yarn: Acrylic 245 yards/ 4.5 oz (260 m/127.5 g) per ball. The links below are for Michaels Canada. See the color chart for individual colors.
- 5 mm H-8 crochet hook
- 5.5 mm to 6 mm (I-9 to J-10) crochet hook
Some (but perhaps not all) of the links in this blog are affiliate links to Amazon.com. As an Amazon Associate, I earn from qualifying purchases. This page contains some affiliate links. Please see my policy page for details. I look for the best possible option for your convenience, however, I encourage you to support your local shops!
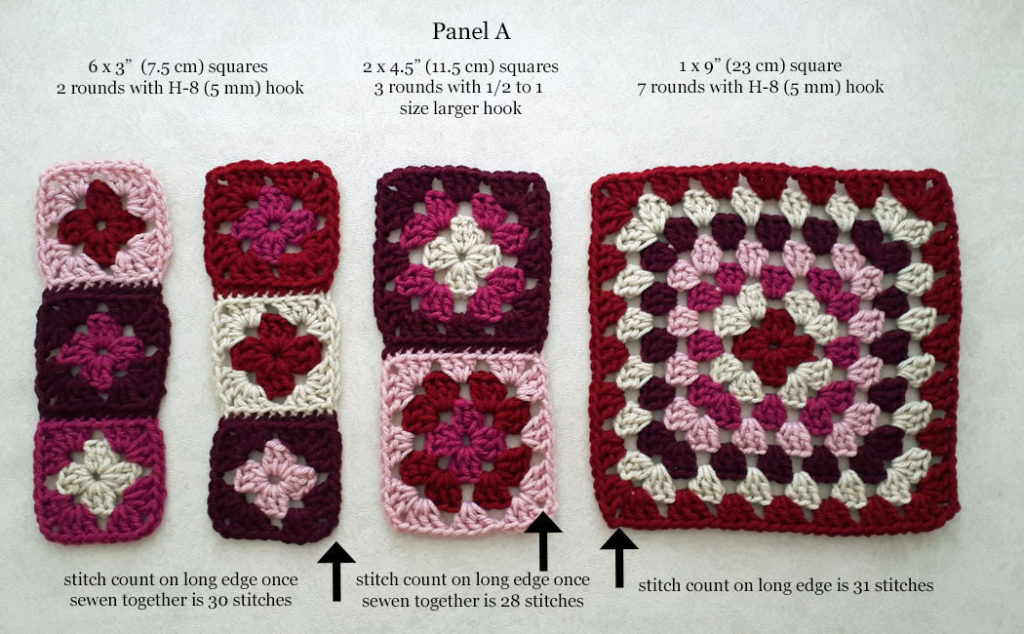
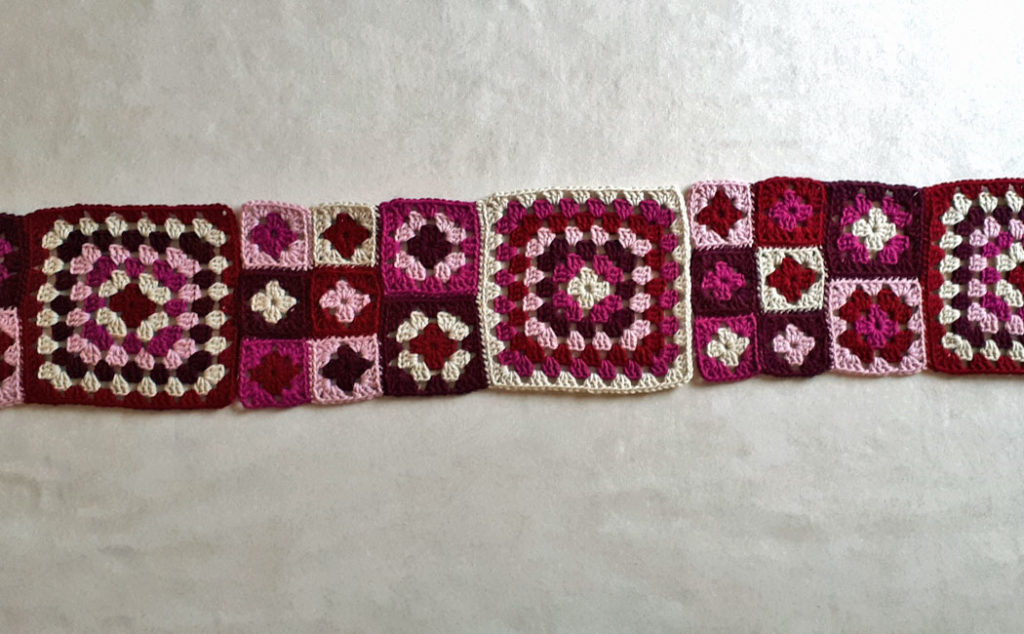
Above is the color scheme for panel A. Each panel is made using one 9″ (23 cm) granny square with 7 rounds, two 4.5″ (11.5 cm) granny squares with 3 rounds, and six 3″ (7.5 cm) granny squares made with 2 rounds. The size of each of the three squares is achieved using different size crochet hooks. The largest square and the smallest squares are made using the 5 mm (H-8) crochet hook and the medium size square is made using a crochet hook that is a half to one size bigger than the large and small squares. I found the 6 mm (J-10) size hook worked best for me, but this will depend on your choice of yarn and crochet tension.
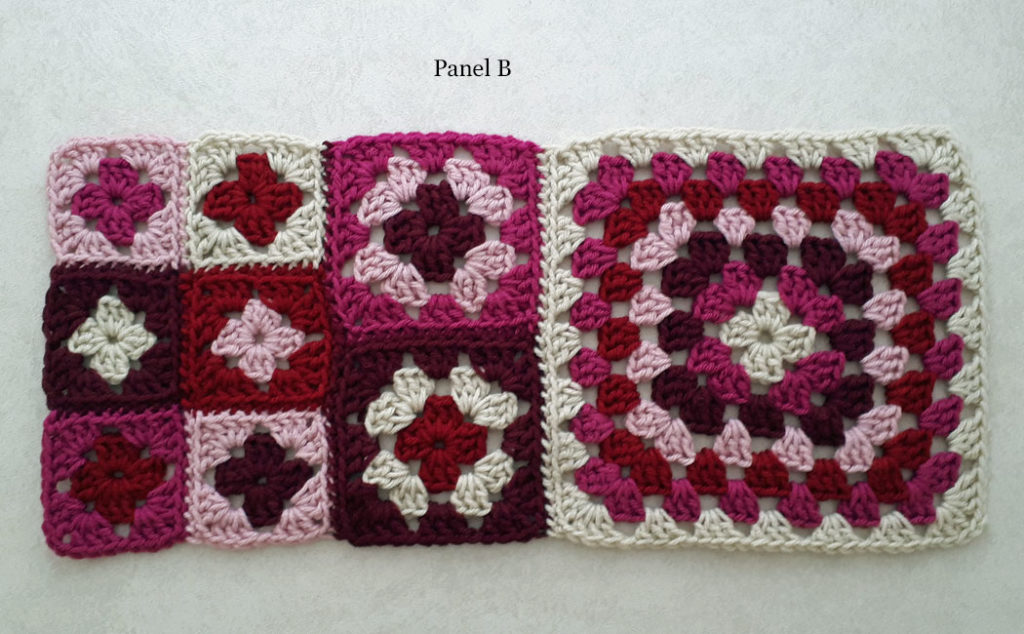
The above panel is the color scheme for panel B. Between these two color schemes, you can make all sorts of projects. You can use a different color palette if you like, but use the tones from darkest to lightest, in the same way that I did here. This ensures you don’t repeat any of the same colored squares side by side throughout any design.
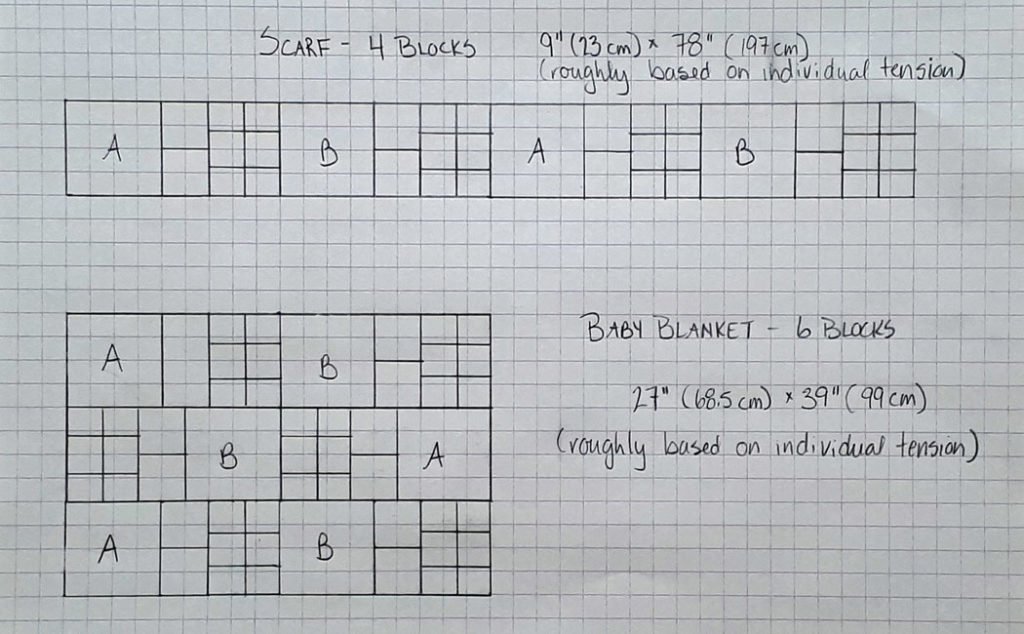
The above drawing shows how to lay the panels out for both the scarf and the baby blanket. If you wanted to make a larger blanket, just continue to add panels in the same way until you have the size you desire. You could use the panels to make a pocket shawl (design not shown) by doing a row just like the scarf but using three panels only. Then create another row laying the panels out starting with panel B. Do B, A, B, and then join those two rows together. You can make a couple of pockets for each end with the granny square pattern, probably with five rounds. You can also add tassels to both the scarf and pocket shawl if desired. Be playful and creative!
You may already know how to crochet granny squares, so you can then use the knowledge to this point to create whatever project you like. I have been perfecting my granny square pattern, and I have a couple of little tips that make for a perfect granny square, so you can check that out in the pattern and directions below. Please forgive the quality of the photos, as I (again) forgot to take photographs as I was filming this pattern. I have grabbed clips from the video footage for these images.
Granny Square Pattern
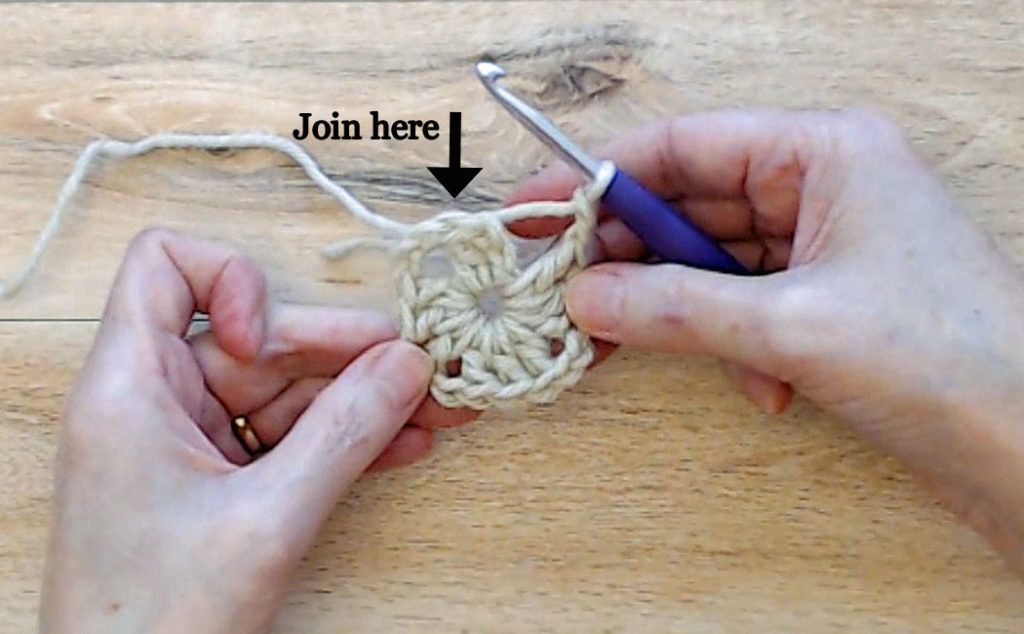
Round one: ch 5, sl st into the first ch to create a ring. Ch 2 (counts as middle dc), 1 dc into the ring, ch 2, *[3 dc, ch 2] into the ring. Repeat from * 2 times. 1 dc into the ring (this completes the first 3dc cluster for a total of four 3dc clusters). Sk 2 ch’s, join with a sl st into the top of the first dc, fasten off.
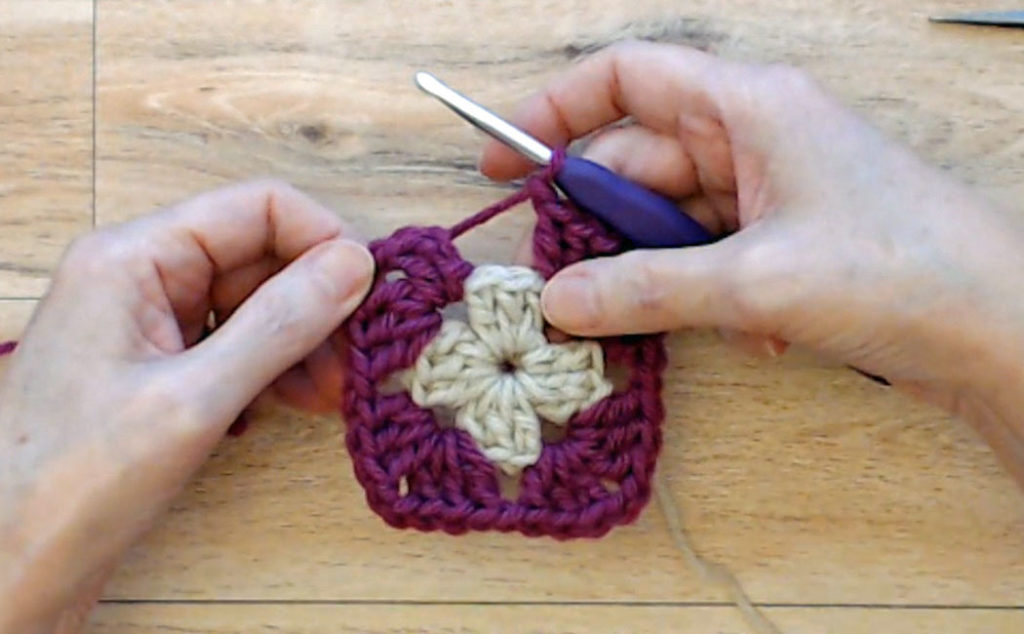
Round two: Join new color into a ch2 sp with a sl st, [ch 2, 1 dc, ch 2, 3 dc, ch 1] into the ch2 sp, *[3 dc, ch 2, 3 dc, ch 1] into the ch2 sp. Repeat from * 2 times, 1 dc into the beg ch2 sp. Sk 2 ch’s, join with a sl st into the top of the first dc, fasten off.
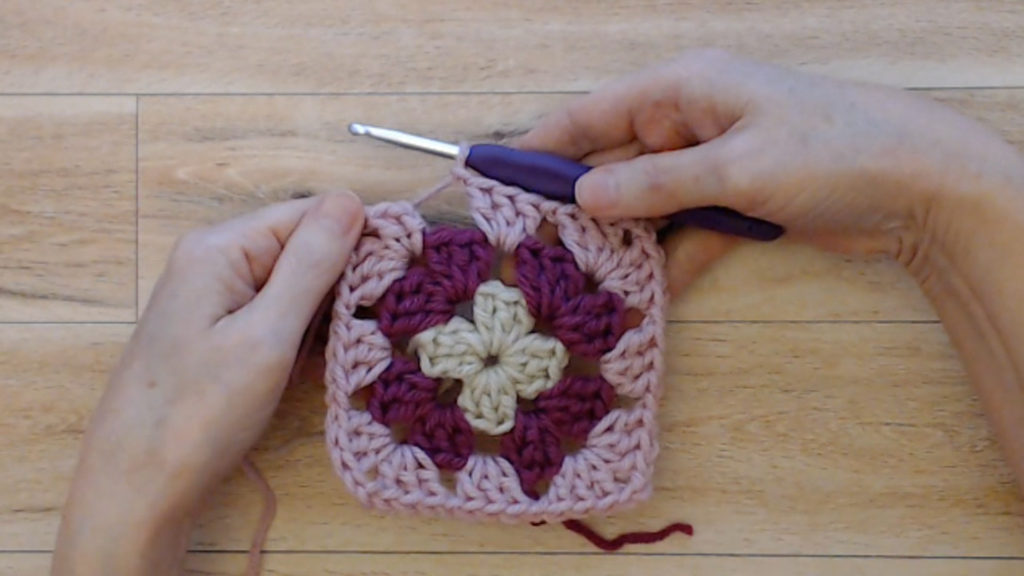
Round three: Join new color into a ch2 sp with a sl st, [ch 2, 1 dc, ch 2, 3 dc, ch 1] into the ch2 sp, 3 dc, ch 1 in next ch1 sp. *[3 dc, ch 2, 3 dc, ch 1] into the ch2 sp, 3 dc, ch 1 in next ch1 sp. Repeat from * 2 times, 1 dc into the beg ch2 sp. Sk 2 ch’s, join with a sl st into the top of the first dc, fasten off.
Rounds four to seven: repeat round three, increasing the number of 3 dc clusters along each straight edge.
For the last round of each size square, finish with an invisible stitch. I have a video tutorial here and directions below.
Rather than finishing the last round with a slip stitch, you can finish with the invisible finish. This eliminates the knot for the last round and makes it easier to join the granny squares together. This is not necessary but is a nice option. Complete the last double crochet of the last round, cut a tail, and pull the yarn through the loop on the hook. Thread on a darning needle and bring the needle from behind under two stitches of the double crochet you normally fasten off into. Bring the needle back down in between the V-stitch of the stitch the yarn is coming out of. Snug up the ‘mock stitch’ and darn in your tail end.

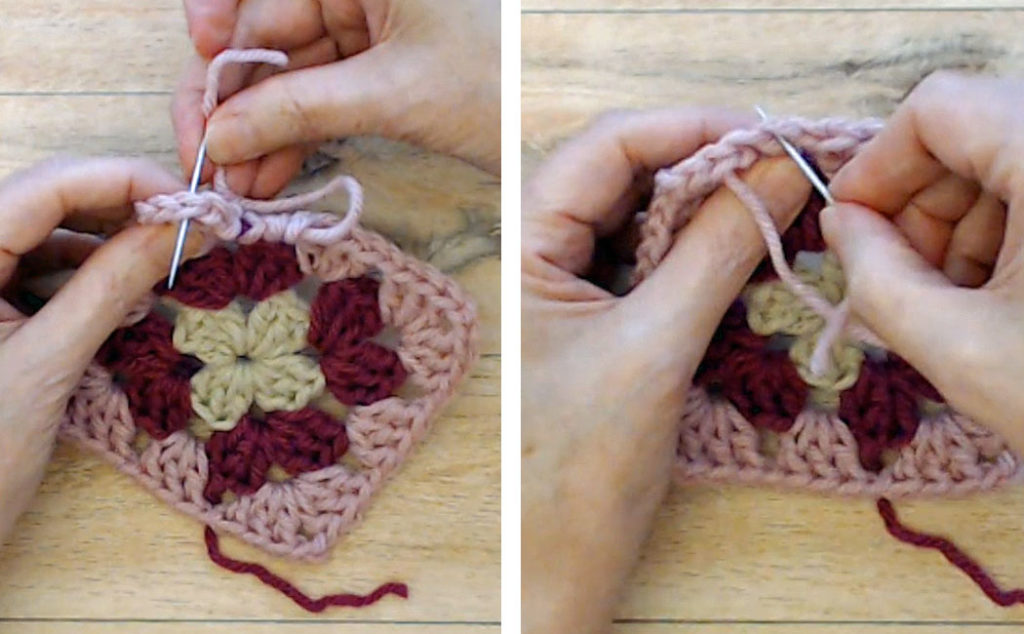
Once you have made all the granny squares for each panel and darned in all your tail ends, you can begin to join the granny squares together. Follow the pattern shown at the top of this post for the layout and use any stitch you like to join the squares together. I am using the whip stitch and picking up the top loop of each square only. This creates a nice frame for each square. You can whip stitch into both loops, or use any other joining technique you like!
Cut a length of yarn that is double the length of the seam you are sewing together, plus a few inches for tails on each end to darn in. I like to lay my squares out as shown above and begin my whip stitch in the outermost chain of the chain two space, coming in from the back of the top square. I then come down to the lower square and bring the needle in from the front of the stitch, going into the next chain of the chain two space.
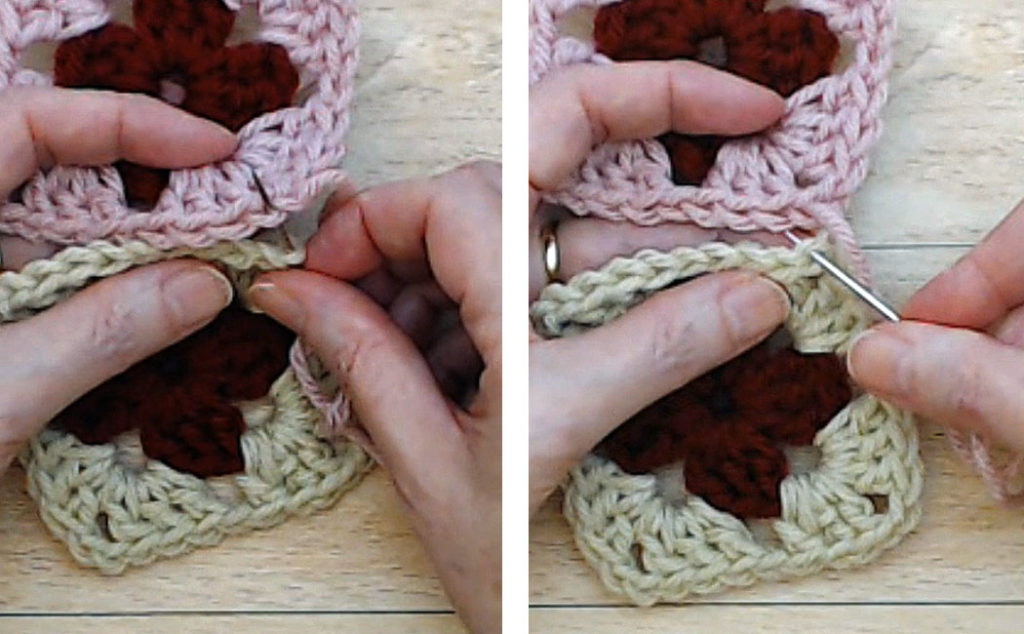
I then bring the needle up into the next stitch of the top square, coming in from the back of the stitch. and then bring the needle down into the next stitch of the bottom square, coming in from the front of the stitch. Repeat this along the full seam and darn in the tail ends.
You will see at the bottom of the image of panel A, the stitch count for each square and sets of squares. Because the squares are different sizes, the stitch count will be different. The 9″ square has 31 stitches, so when you join that to the two 4.5″ squares which have only 28 stitches, you need to make them fit together. I suggest skipping one ch1 stitch on either end of the 9″ square, and using the whip stitch in the seam of the two 4.5″ squares as an extra stitch.
The six 3″ squares will have 30 stitches, so you can skip one ch1 stitch on each end of this section when joining it to the section of 4.5″ squares. I explain this more in the video tutorial if this sounds too complicated. But these are all the little tricks that help to bring different size squares together to create one uniform piece of fabric.
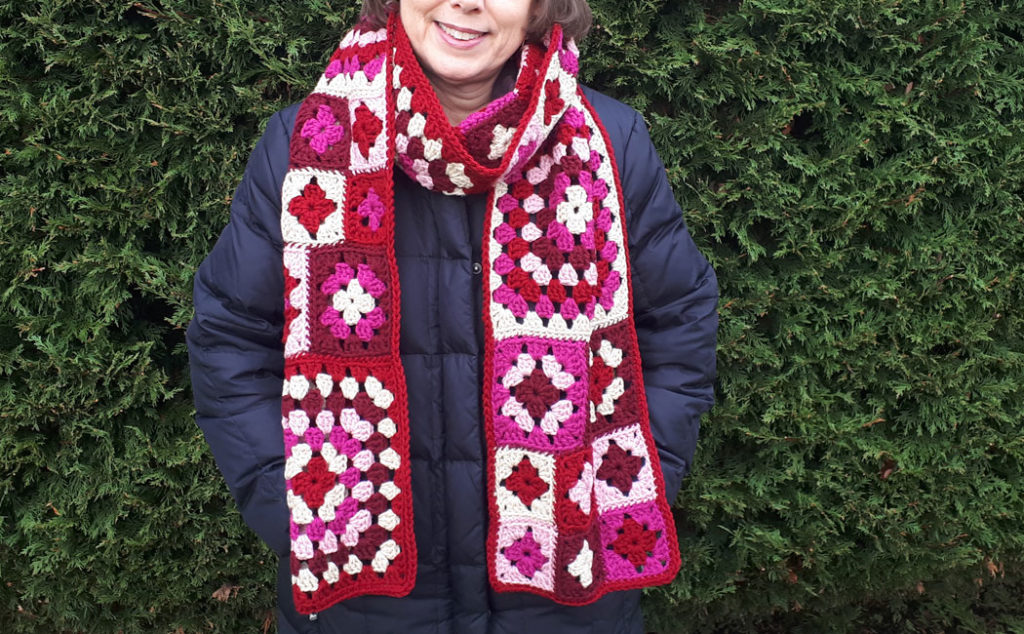
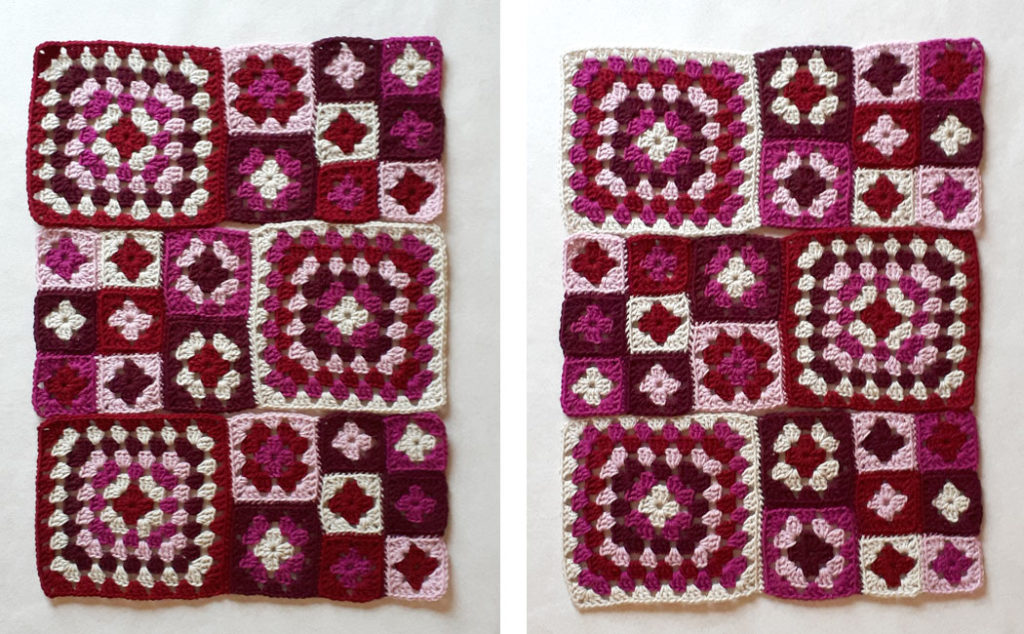
Once you have the panels sewed together, you can use the hand steamer to block the panels. You can also just wait until the project is finished to do this step. Then you can join the panels to create the project of your choice. Here I have joined four panels end to end to create the scarf. You can be done at this point or add a border of some sort.
There will be enough yarn left from the five balls of yarn to create a variety of borders for the scarf, but there may only be enough yarn left to do a simple single crochet border around the blanket. This will depend on your choice of yarn and your tension. You will have to make that call yourself. I have four different border ideas below. You can crochet into just the top loop of each stitch as shown below, or you can pick up both stitches. This is up to you. I like how crocheting into the top loop creates a ‘frame’ so to speak.

Single Crochet Border: join with a sc into the top loop (or both loops) of any st, 1 sc in the top loop (or both loops) of each st to the first corner, 2 sc in each ch of ch2 sp, or 4 sc in ch2 sp if crocheting into both loops (4 sc’s around the corner). Continue all the way around, join with the invisible finish into the beg sc. Darn in the tail ends.
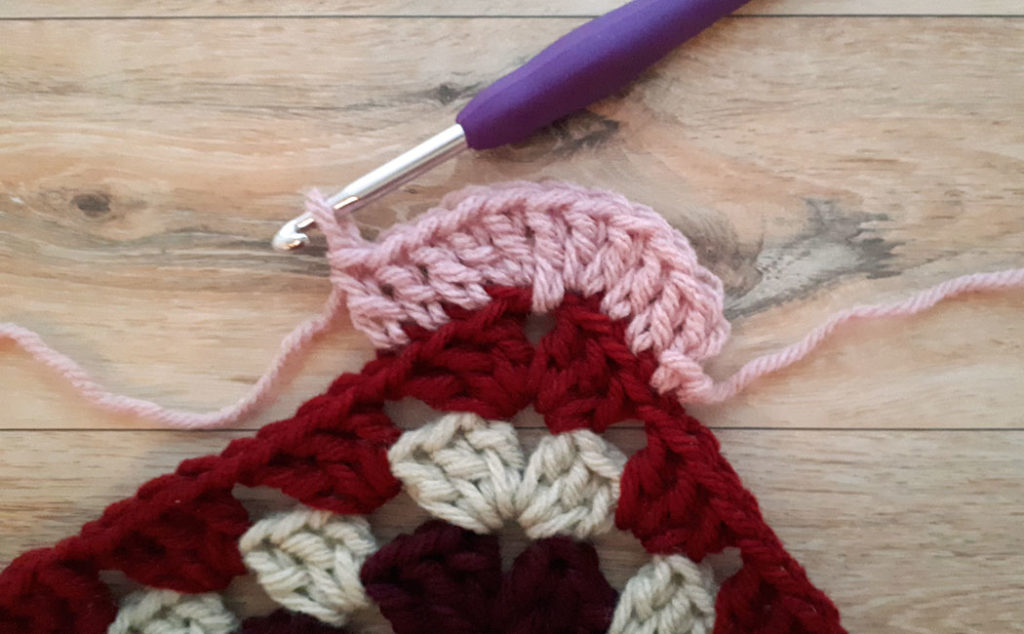
Half-Double Crochet Border: join with a sl st into the top loop (or both loops) of any st, ch 2. 1 hdc into the top loop (or both loops) of each st to the first corner. 2 hdc in each ch of ch2 sp, or 4 hdc in ch2 sp if crocheting into both loops (4 hdc’s around the corner). Continue all the way around, join with the invisible finish as shown with the granny square pattern, but going into the beg hdc. Darn in the tail ends.
Double Crochet Border: join with a sl st into the top loop (or both loops) of any st, ch 2. 1 dc into the top loop (or both loops) of each st to the first corner. 2 dc in 1st ch of ch2 sp, 1 dc into ch2 sp, 2 dc in 2nd ch of ch2 sp, or 5 dc in ch2 sp if crocheting into both loops (5 dc’s around the corner). Continue all the way around, join with the invisible finish as shown with the granny square pattern. Darn in the tail ends.
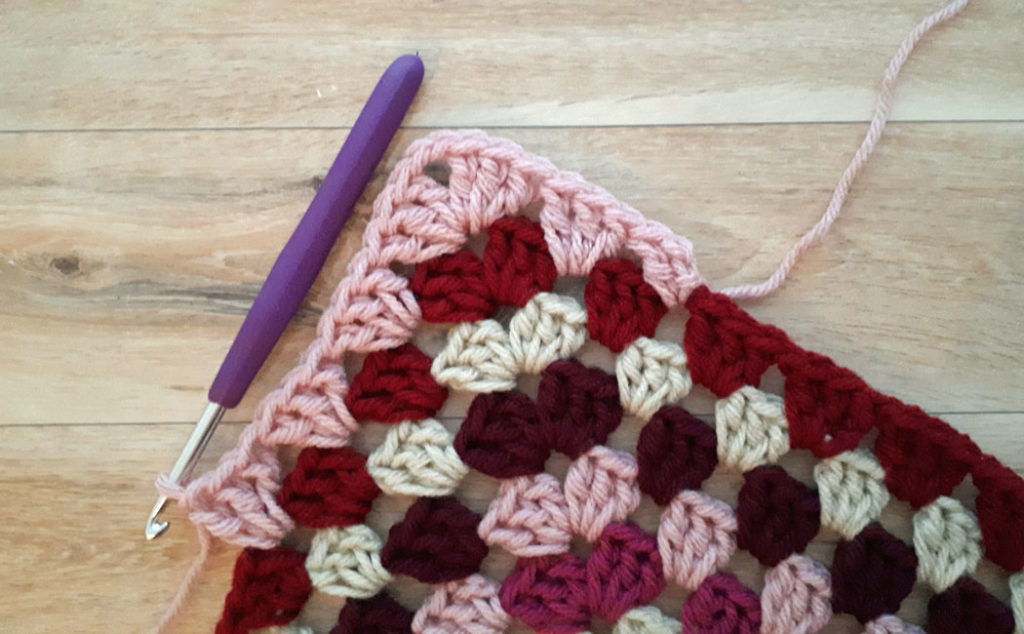
Granny Square Stitch Border: for this border, just follow the same pattern for the granny squares themselves. You can join on with a ch 2 in any ch1 sp or in the corner as before. Finish in the same way. I do, however, have a suggestion for a simple change. I always eliminate the ch 1 in between the clusters of 3dc when doing a border. This sort of ‘snugs up’ the last round. It is totally dependent on your crochet tension, and if you tend to have tight tension, then this may not work for you. Just give it a try and see how it looks, you will be able to tell fairly soon if you like this change. If not, just use the ch 1 as usual.
What I love about crochet is that you can change things up in countless ways. The stitch patterns are guidelines, but there are so many variations that can be used in any crochet project you make. I’ve given you lots of ideas here and lots of room to play around! I hope you enjoy this tutorial, and as I only post one tutorial every three or four weeks, you may want to subscribe to my newsletter so you don’t miss out!
If any of the above directions are unclear, you can find more details in the video tutorial. Enjoy! Please give the video and thumbs up and subscribe to my YouTube channel…I would be most grateful!
If you like this pattern, you may also like:
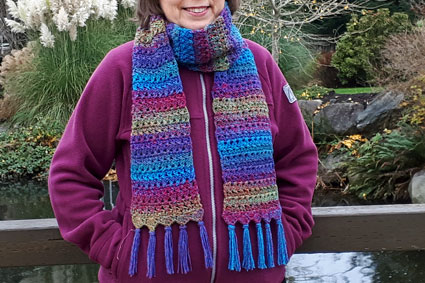
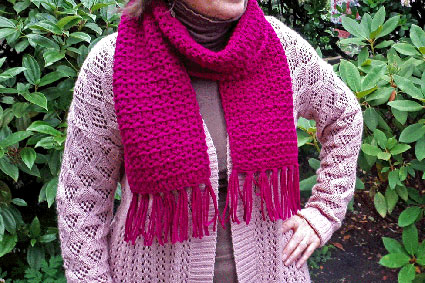
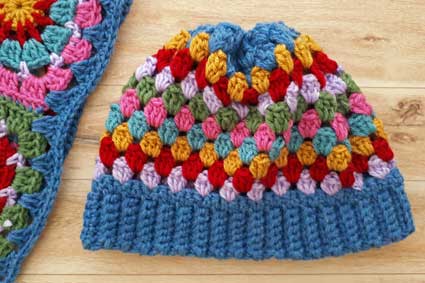
Sharing is caring! Click on the social share button at the top of the blog and choose an image from below to share on social media.