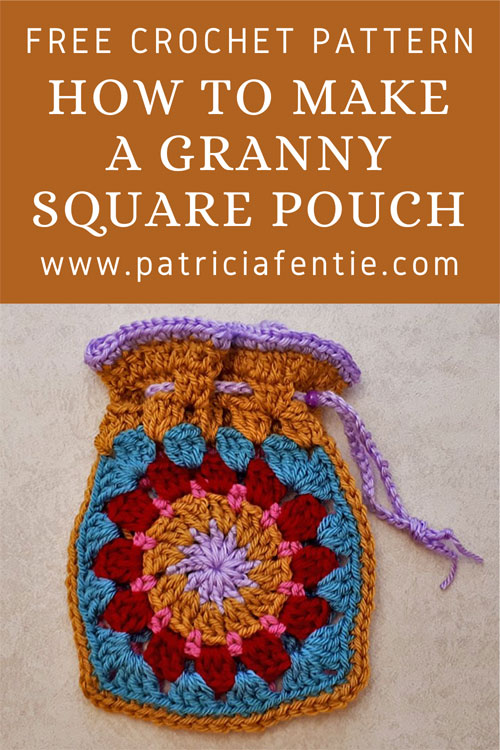
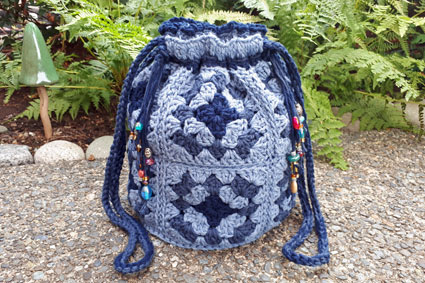
Learn how to make a Granny Square Pouch in this easy crochet tutorial. The pouch can be made using any granny square pattern desired, and as a result, you can make countless variations of this pattern. It is a beginner-friendly crochet project, but as always, if you are new to crocheting, I do recommend starting with my Beginner Crochet Series. In this series, I show all the basics of crochet including how to have proper crochet tension, how to darn in tail ends, and how to do all the basic stitches of crochet.
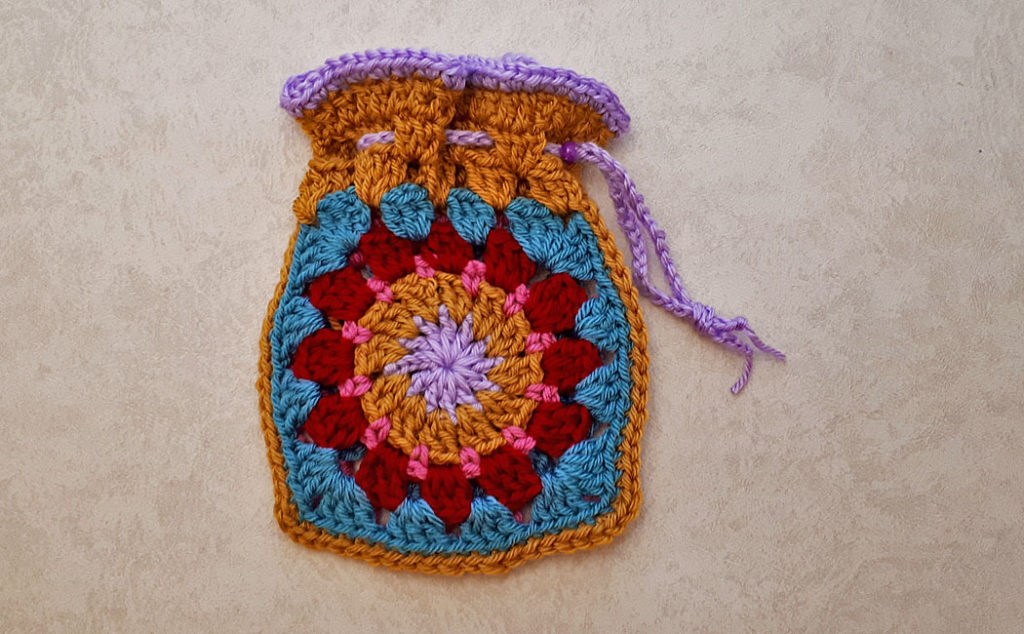
I am using the Color Wheel Granny Square for this project and you can find the written pattern here. If you prefer, you can watch the video tutorial below. As mentioned above, you can use any granny square pattern you like, but the only requirement is that the last round needs to be in the traditional granny square pattern, meaning clusters of three double crochets all the way around.

The supplies you will need are:
- Two granny squares of any design. If using the Color Wheel Pattern, these are the yarns used:
- Number 4 medium-weight yarn in assorted colors.
- Bernat Satin-Mia Tai (pink)
- Bernat Satin-Stardust (light purple)
- Patons Canadiana-Medium Teal
- Patons Canadian-Fools Gold
- Cascade Anthum-#44 (green)
- Red from the thrift shop
- 4 mm or G-6US crochet hook
- Darning needle
- Scissors
- Hand steamer (optional)
- Wooden or plastic bead with 1/8″ (4mm-5mm) hole
Some (but perhaps not all) of the links in this blog are affiliate links to Amazon.com. As an Amazon Associate, I earn from qualifying purchases. This page contains some affiliate links. Please see my policy page for details. I look for the best possible option for your convenience, however, I encourage you to support your local shops!
Abbreviations
- ch = chain
- sc = single crochet
- dc = double crochet
- st = stitch
- sl st = slip stitch
As always, I have a video tutorial at the bottom of this post, so if any of the following instructions are not clear, you can check out the video to clarify. To begin, place the two squares wrong sides together.
Join with 1 sc into the first ch of the ch2 sps of each motif, going into the top loops only, 1 sc in the top loops of the second ch of the ch2 sp, 1 sc in the top loop of each st of each motif (joining them together) to the first corner.
At the corner, 2 sc in the top loop of each ch of ch2 sp (4 sc’s), 1 sc in the top loop of each st to the next corner, 2 sc in the top loop of each ch of ch2 sp (4 sc’s), 1 sc in the top loop of each st to the next corner (3 sides complete).
At the third corner, 1 sc in the top loops of the first ch of the ch2 sp, sl st into the ch2 sp of the front motif only.
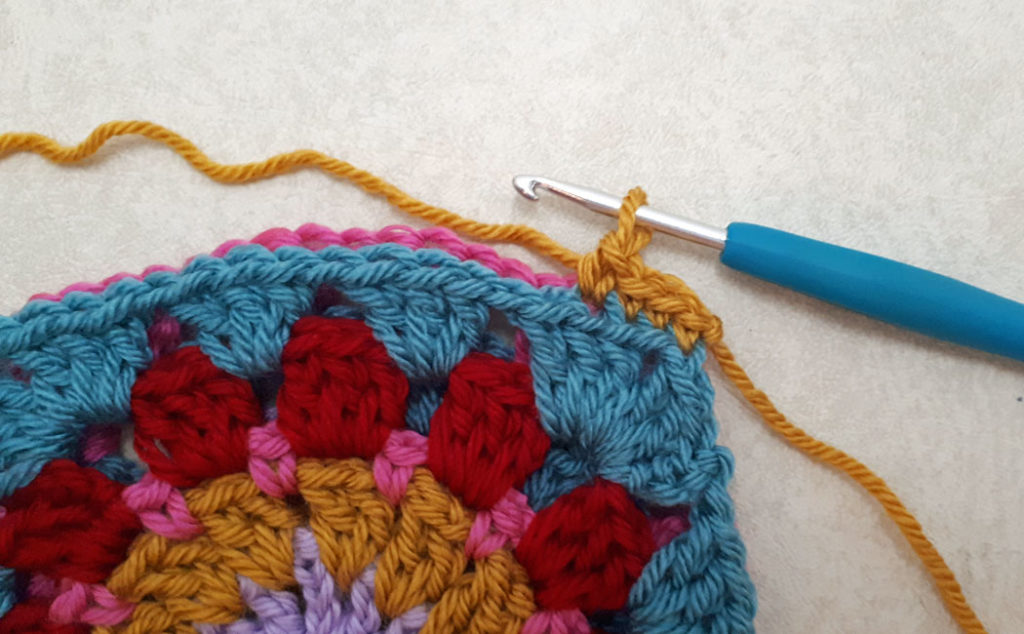
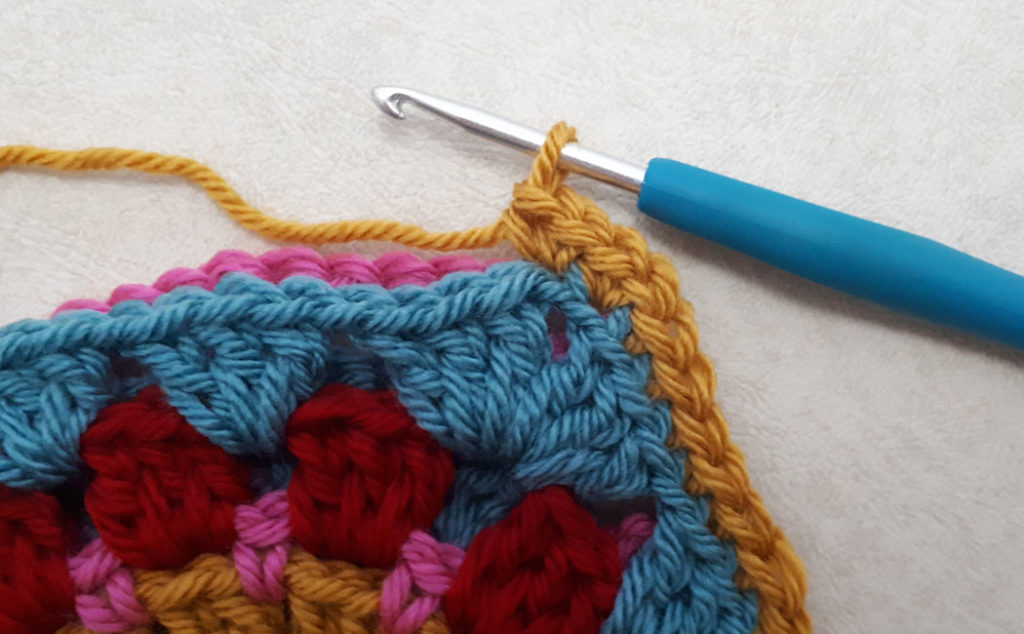
Round one: Ch 3 (counts as your first dc), 2 dc, ch 1 in ch2 sp, *3 dc, ch 1 in next ch 1 sp, repeat from * all the way around. (note: treat the ch 2 spaces of each corner like a ch 1 space). Join with a sl st to the 3rd ch of beg ch3.
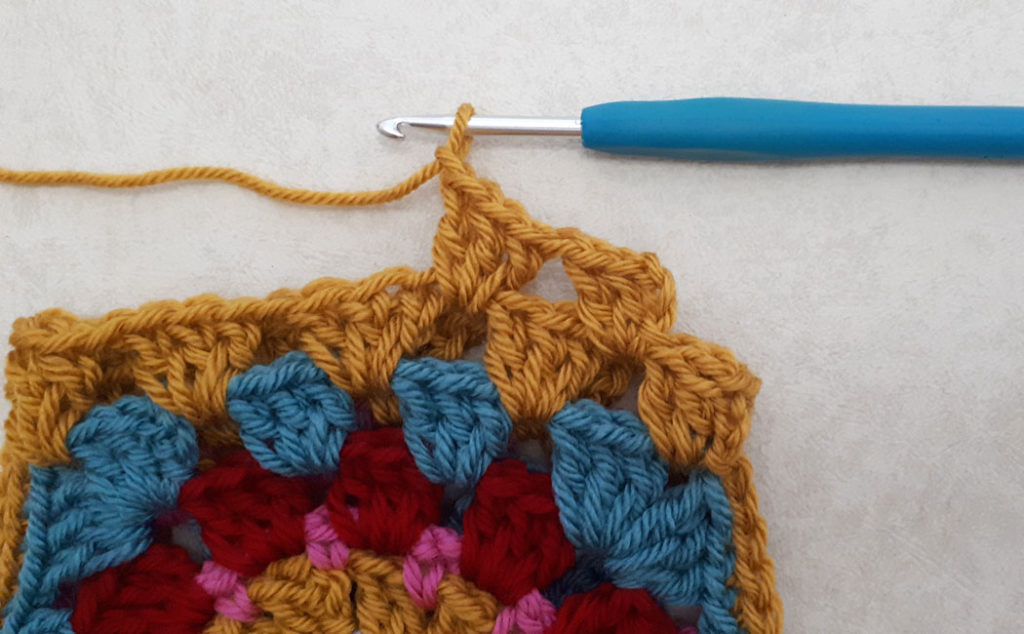
Round two: sl st into the top 2 sts of the first 3dc cluster over to the first ch1 sp, sl st into the ch1 sp. Ch 3 (counts as your first dc), 2 dc, ch 1 in same ch1 sp, *3 dc, ch 1 in next ch1 sp, repeat from* all the way around. Join with a sl st to the 3rd ch of beg ch3.
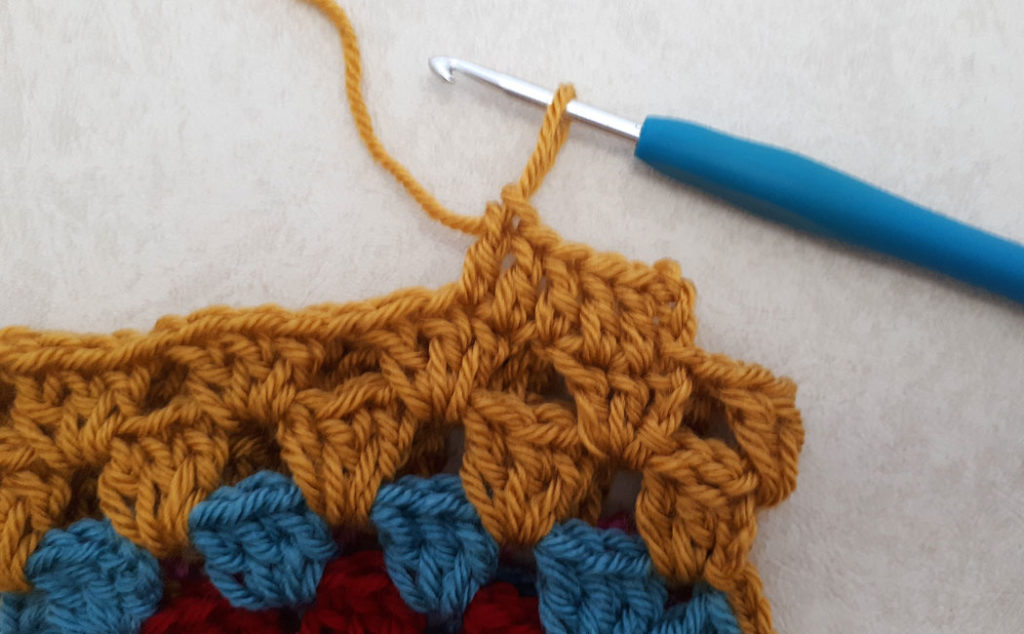
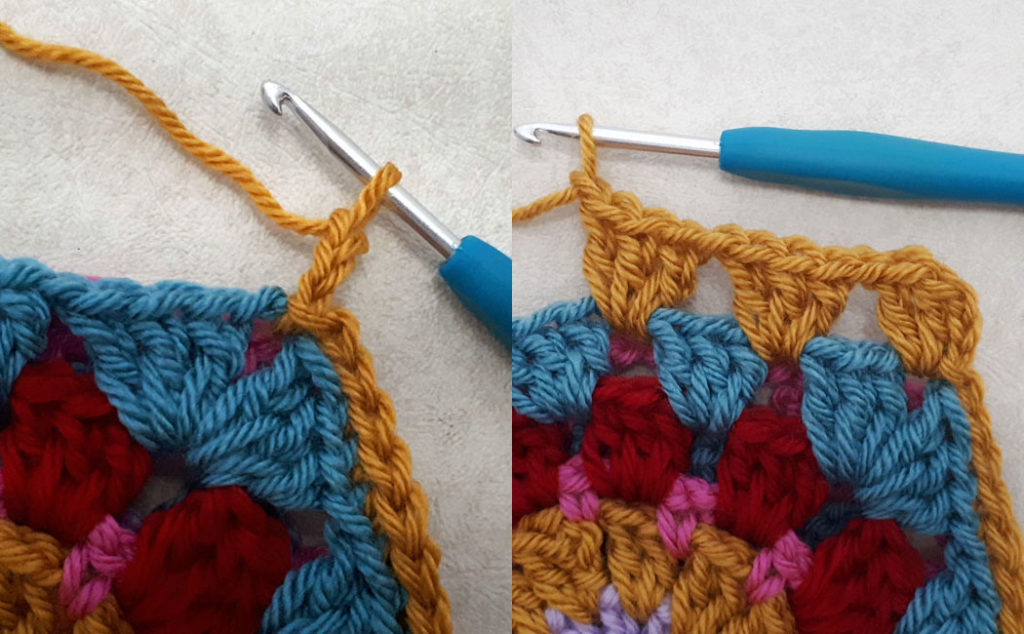
Round three: Ch 3 (counts as first dc), 1 dc in both loops of each st all the way around. Join with a sl st to the 3rd ch of beg ch3 and fasten off. If desired, finish this round with the invisible finish, so there won’t be a knot to crochet into. I have a video tutorial here on how to do that.
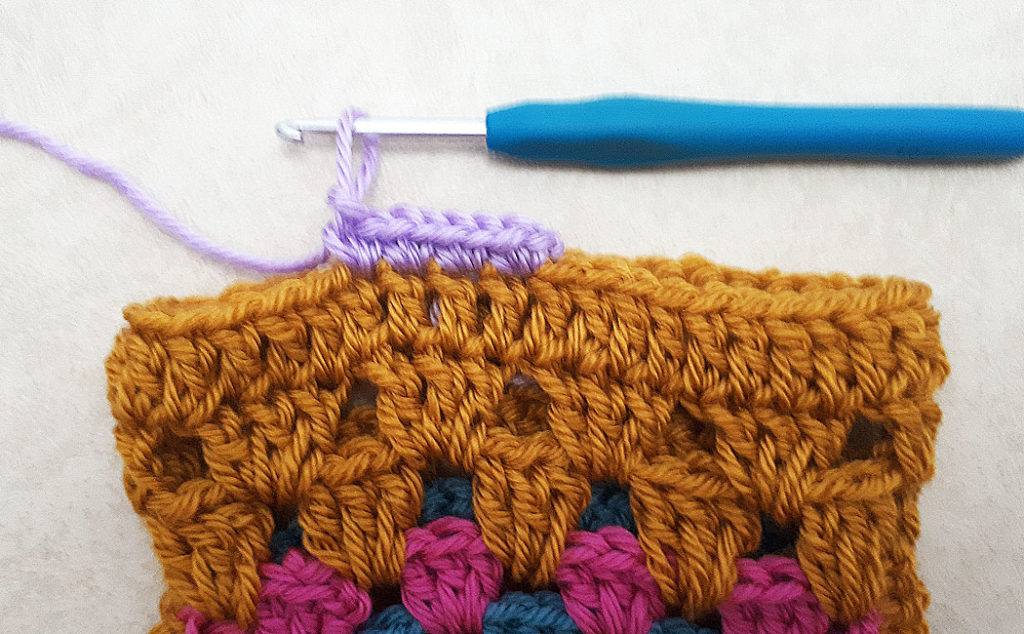
Round four: Using a new color, join into any st with 1 sc, 1 sc in the same st, *2 sc in the next st, repeat from* all the way around, fasten off as usual or with the invisible finish. Darn in all the tail ends.
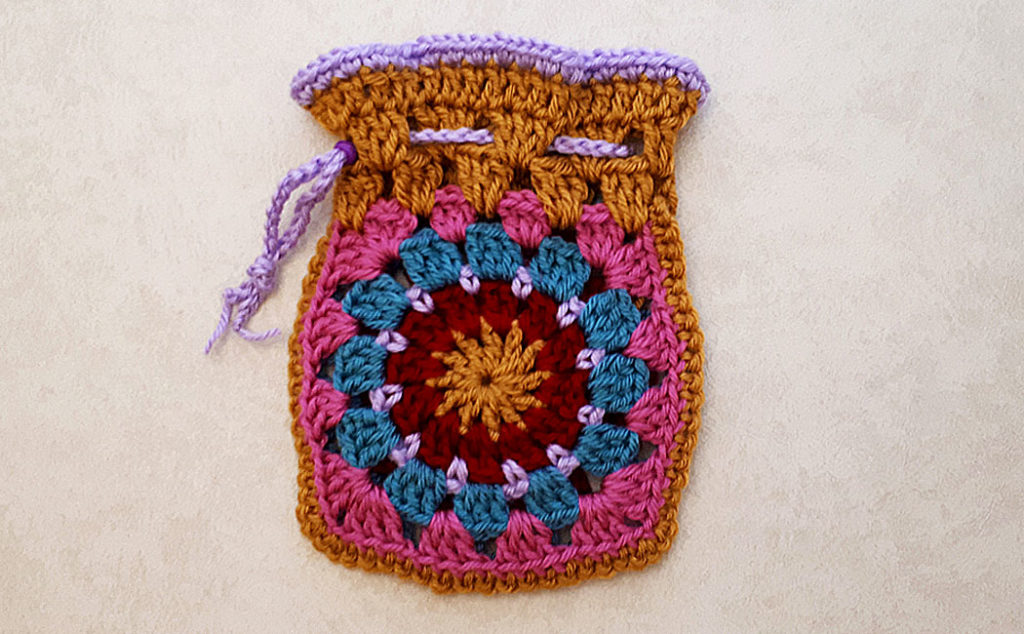
For the drawstring: crochet a chain that is long enough to go all the way around the pouch, with about 2 inches for tails on each side. Thread the drawstring through each chain one space of round two. Use the darning needle to thread the two tail ends through the bead. Tie a knot at the end of the tails and you are done!
If you like, you can make a lining for the pouch and I have a video tutorial here that shows how to make a hand-stitched lining. I would bring the lining to the height of the last round of the granny square motifs (not the rounds for the top section).
Sharing is caring! Click on the social share button at the top of the blog and choose an image from below to share on social media.