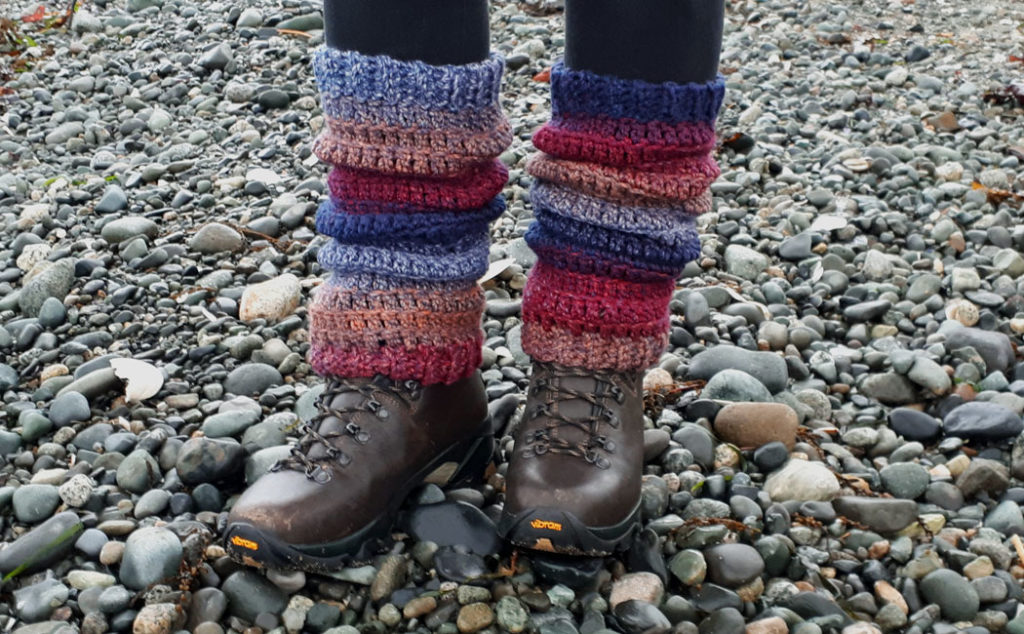
Leg warmers have to be one of the coziest crocheted items to wear! I personally love them and I have created a pattern on how to crochet leg warmers for beginners. The pattern is very simple using only the single crochet and the double crochet stitches. You can custom fit this pattern, or follow along with the pattern here. I am using a super fun self-striping yarn that gives the leg warmers a wonderful bohemian style.

I have also created a video tutorial to go along with this pattern, so if you get stuck with any of the written directions, you can always check out the video. You can find that tutorial at the bottom of this blog post. If you are new to crocheting, I do recommend starting with my Beginner Crochet Series which will show you all the basic stitches required for this pattern. There is one special stitch in this pattern, and again, if you get stuck, just check out the video.
I love to create patterns that are suited for beginners, yet don’t look like beginner projects. Yarn choice can make all the difference and self-striping or variegated yarns can create a wonderful look while using a simple stitch pattern.
Helpful Information
- Guage (based on Bernat Wavelength yarn)
- 11 sts = 4″ (10 cm), 5.75 rows = 4″ (10 cm)
- ch = chain
- st = stitch
- sts = stitches
- slst = slip stitch
- sc = single crochet
- dc = double crochet
- bl = back loop (top loop)
- tch = turning chain
- dctog = double crochet two together
Special stitch: dctog Yo, place hook through next st, pull yarn through (3 loops on your hook), yo and pull through 2 loops, yo, place hook through next st, pull yarn through, (4 loops on your hook), yo, pull through 2 loops, yo, pull through 3 loops.
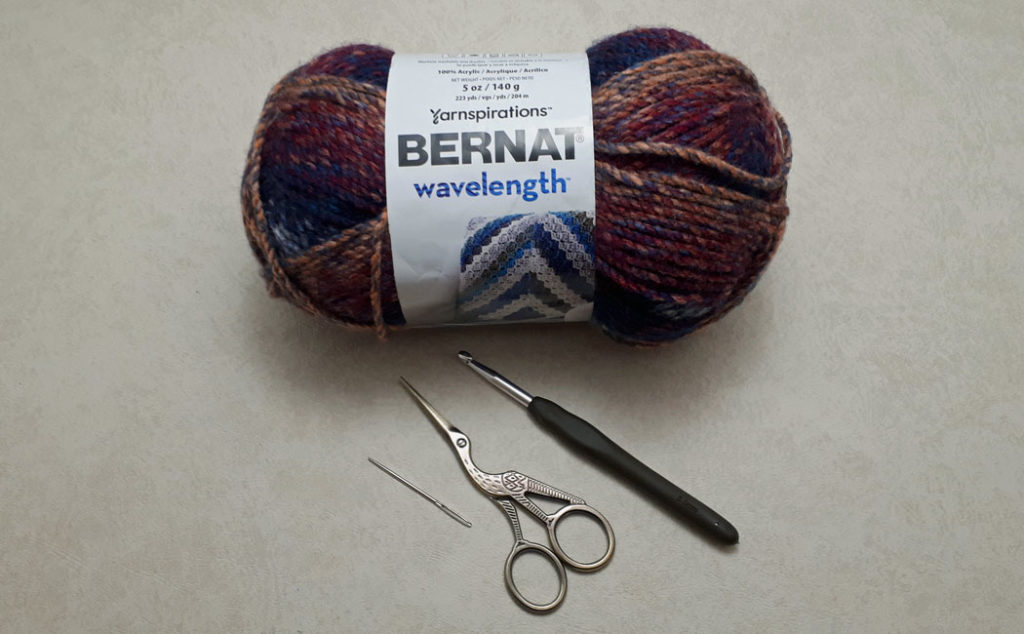
The supplies you will need are:
- Bernat Wavelength yarn in Orange Sodalite or equivalant number 5 bulky weight yarn
- 5 oz (140 g) 223 yrds (204 m) {see note below about custom size or different weight yarn}
- Available from Yarnspirations (USA)
- Available from Walmart in Canada
- I-9 (5.5 mm) crochet hook
- scissors
- darning needle
- hand steamer (optional)
Some (but perhaps not all) of the links in this blog are affiliate links to Amazon.com. As an Amazon Associate, I earn from qualifying purchases. This page contains some affiliate links. Please see my policy page for details. I look for the best possible option for your convenience, however, I encourage you to support your local shops!
These leg warmers will fit any average size leg and you can follow the pattern as written below, or you can customize the leg warmers to fit any size leg. You can make them shorter, longer, or even use a different weight yarn. This pattern uses exactly one ball of Bernat Wavelength yarn, so if you make the pattern larger, or use a lighter weight yarn, then you will have to use more yarn than 223 yards (204 meters). I can’t say how much this would be because, of course, it depends on what adjustments are made. The measurements of these leg warmers are 11.5″ (29 cm) in circumference for the lower cuff, 13.5″ (34.5 cm) for the upper cuff, and 13.5″ (34.5 cm) in height.
If you want to make your leg warmers a custom size, then follow these directions. If not, just scroll down to the pattern below and follow the stitch count there.
Custom-fit: Measure the widest part of your calf and subtract 3″ (7.5 cm). This will be the length of your lower cuff. The height of the lower cuff for this pattern is 1″ (2.5 cm), using 4 chains to create that height. If you want a chunkier cuff, or if you are using a lighter-weight yarn, then just make however many chains required to give you the height you want. As we crochet the body of the leg warmers, you can add or subtract however many rows you like. I will show you how to increase rounds to make the leg warmers wider around the calf area. This too can be modified. Let’s get started on how to crochet leg warmers for beginners!
The Pattern
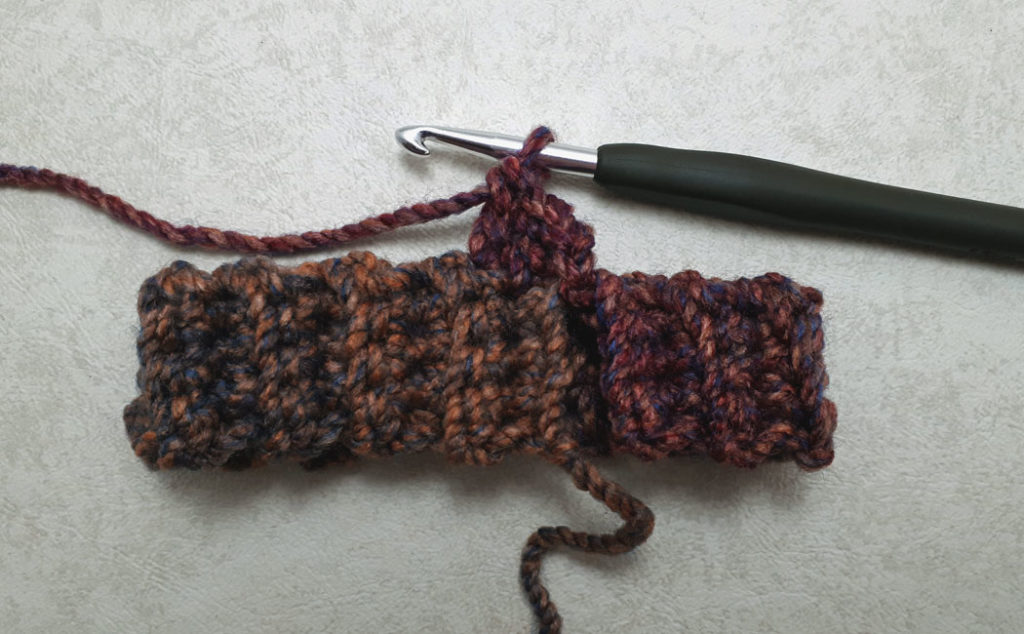
The Bottom Cuff: ch 4 (or whatever number you choose if custom fitting to equal 1″ or 2.5 cm).
Row one: ch 1, sk tch, 1 sc in bl of each ch (4 sc’s)
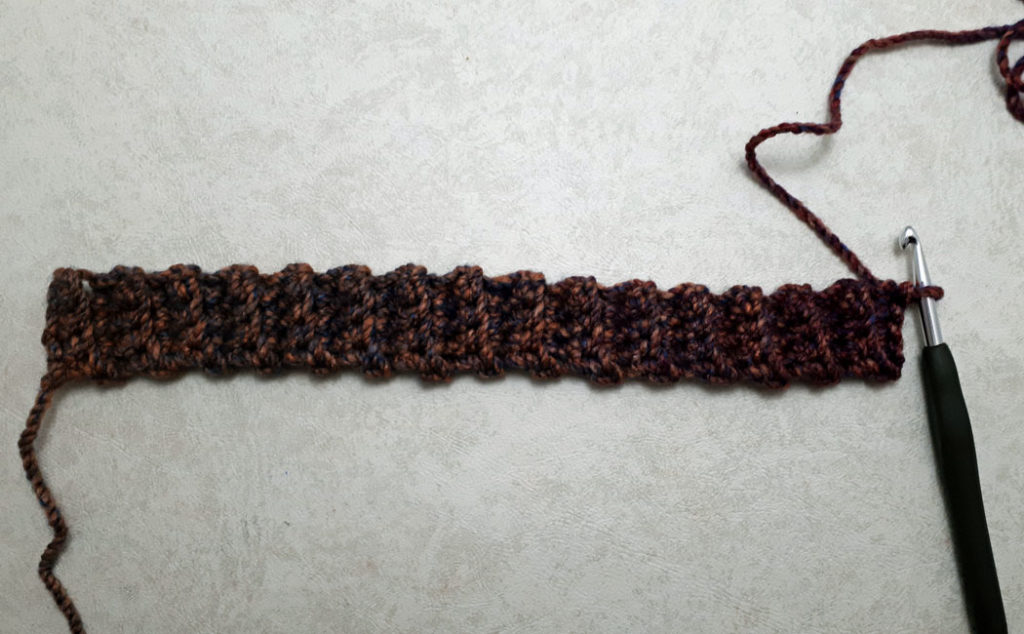
Row two: ch 1, turn your work. Sk tch, 1 sc in bl of each st (4 sc’s)
Row three to thirty-two: repeat row two. This should equal 11″ (28 cm). If you are custom fitting the pattern, make the cuff the length required based on the calculations above. Join cuff with a sl st into the first st of the beginning side to create a tube shape. Use the beginning tail to stitch the cuff seam together.
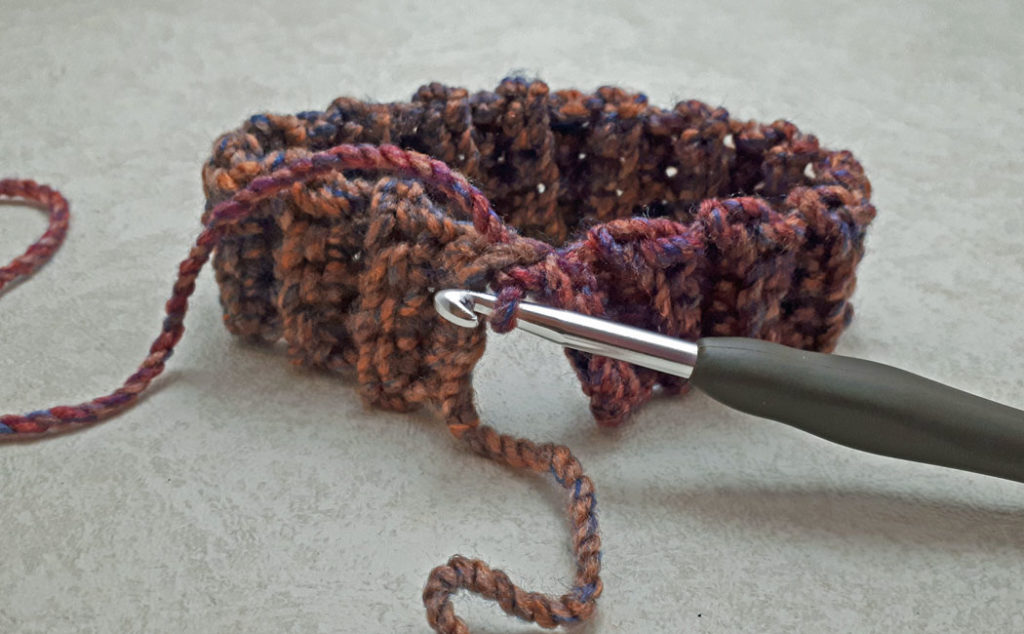
The Body
Round one is crocheted into the end of each row of the cuff. There will not be an actual stitch to crochet into, but you will notice that the cuff has a row that is like a peak and another row that is like a valley. You will place one double crochet stitch into each peak and each valley, picking up one “stitch” only along the cuff edge. The stitch count at the end of this round should equal your row count for your cuff.
Round one: Ch 2 (counts as first dc), 1 dc in each peak and each valley all the way around (32 dc’s), join with a sl st into the second ch of beg ch2.
Round two: Ch 2 (counts as first dc), 1 dc in bl of each stitch all the way around (32 dc’s), join with a sl st into the second ch of beg ch2.
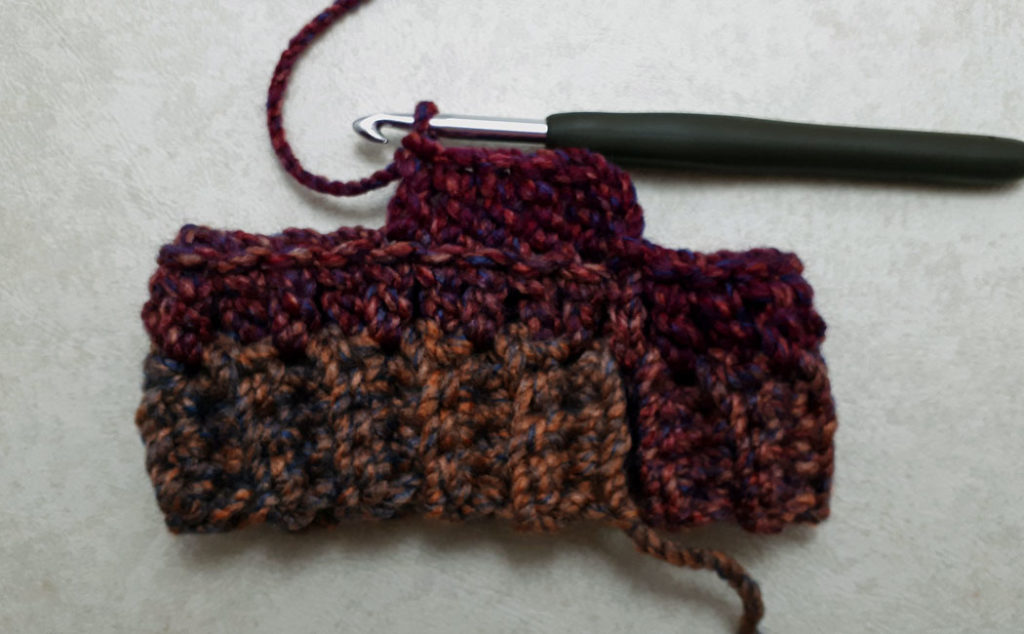
Rounds three to seven: repeat round two (height including cuff is 6″ (15 cm) at this point.
If you want to make the leg warmers longer, or if you are using a lighter-weight yarn, you can repeat round two until you have the desired height.
Round eight: Ch 2 (counts as first dc), 1 dc in bl of the next st, 2 dc in the bl of the next st, 1 dc in the bl 26 times, 2 dc in the next st, 1 dc in last 2 sts (34 dc’s), join with a sl st into the second ch of beg ch2.
Round nine: Ch 2 (counts as first dc), 1 dc in bl of the next st, 2 times, 2 dc in the bl of the next st, 1 dc in the bl of the next st, 26 times, 2 dc in the next st, 1 dc in last 3 sts (36 dc’s), join with a sl st into the second ch of beg ch2.
Round ten: repeat round two, but with 36 dc’s.
Round eleven: Ch 2 (counts as first dc), 1 dc in bl of each stitch 32 times, 2 dc in the next st, 1 dc in last 2 sts (37 dc’s), join with a sl st into the second ch of beg ch2.
Round twelve: Ch 2 (counts as first dc), 1 dc in bl of next st, twice, 2 dc in the bl of next st, 1 dc in the bl of each st all the way around (38, dc’s), join with a sl st into the second ch of beg ch2.
So you can increase each round as desired to get a custom fit. I used an increase stitch (2 dc’s in one st) at the beginning and end of rounds eight and nine, but just used one increase stitch at the end of round eleven and then another increase stitch at the beginning of round twelve.
Rounds thirteen to fifteen: repeat round two, with 38 dc’s.
Round sixteen or final round: Ch 2 (counts as first dc), 1 dc in bl of next st, 1 dctog in bl of next two sts, 1 dc in bl of next st, 30 times, 1 dctog in bl of next two sts, 1 dc in bl of last two sts (34 dc’s plus 2 dctog’s), join with a sl st into the second ch of beg ch2.
If you want to taper the top of the leg warmers, even more, you can add an extra dctog or two to this round, or do another round using this reducing stitch.
Top Cuff
Ch 4 (or number of chains used for lower cuff), ch 1 for turning ch

Row one: 1 sc in bl of first ch (not the turning ch), 1 sc in bl of next 3 ch’s (4 sc’s). You are now at the body of the leg warmer. Sk 1 st of that round (a dc), slst through 2 loops of the next st (dc) to fasten the cuff to the body of the leg warmer, turn your work.
Row two: place working yarn from the left to the right behind your hook, 1 sc in the bl of each st to the end of the row (4 sc’s), ch 1, turn your work.
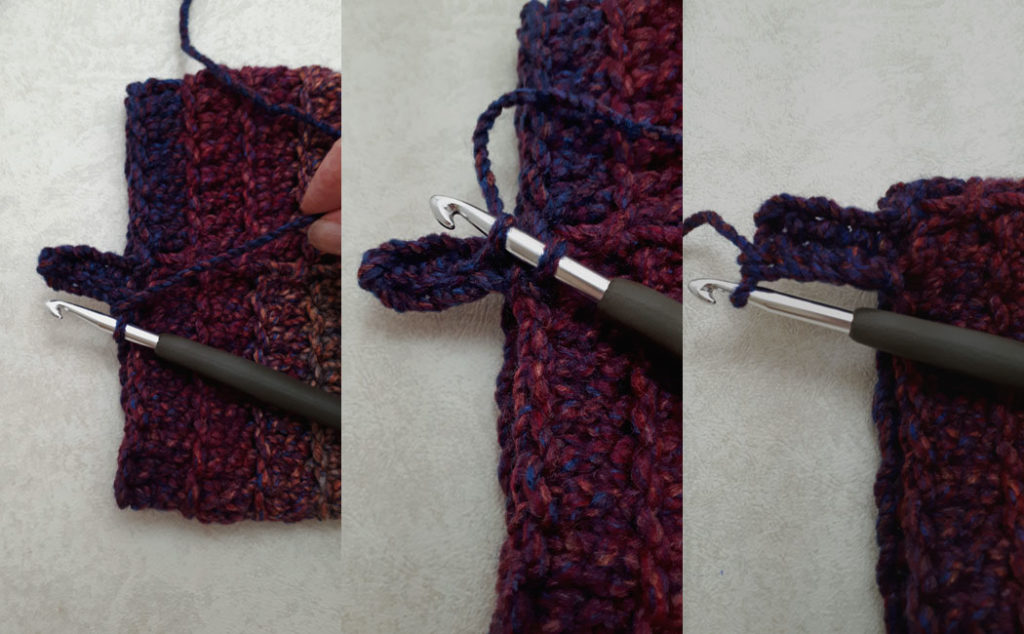
Row three: 1 sc in bl of each st (4 sc’s), Sk 1 dc at the top of the last round of the body, slst through 2 loops of the next st (dc) to fasten the cuff to the body of the leg warmer, turn your work.
Repeat rows two and three until you’ve worked your way around the top of the leg warmer. Slst the last row three rpt into the last st, fasten off leaving a tail about five to six inches long. Use the tail to sew the cuff together, doing a double stitch at the outside edge of the cuff. Darn in your tail ends. Sew the cuff together at the bottom end, doing a double stitch at the outside edge of the cuff as well.

This concludes the pattern on How to Crochet Leg Warmers for Beginners and I do hope you enjoy this project. The pair of leg warmers crochet up quite quickly and would make a perfect gift or a great item to sell at craft fairs. Subscribe to my newsletter so you don’t miss out on future projects!
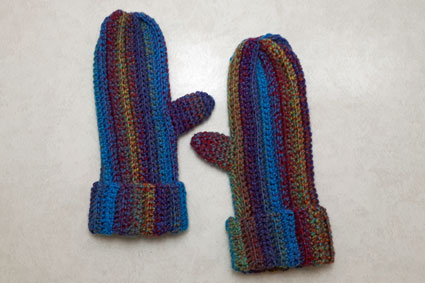
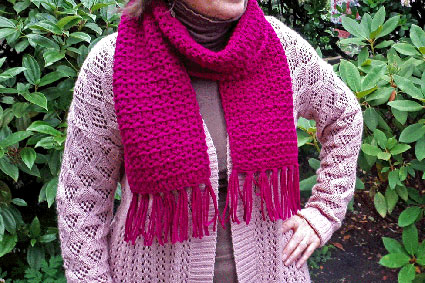
If you like this pattern, you may also like:
Sharing is caring! Click on the social share button at the top of the blog and choose an image from below to share on social media.

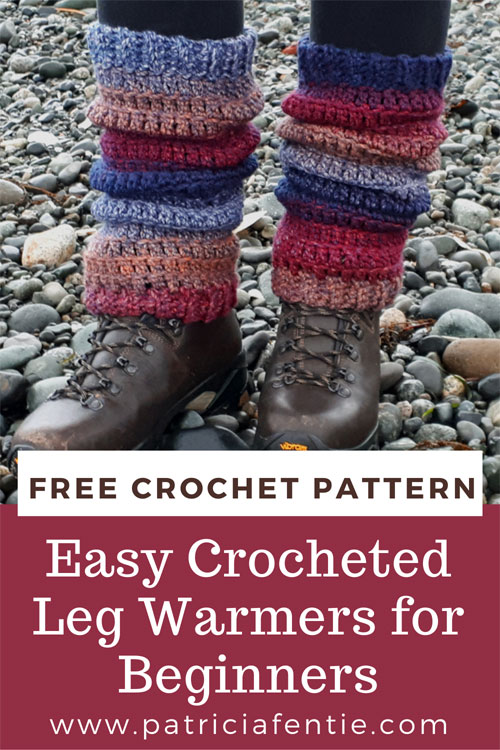
How to Crochet Leg Warmers for Beginners