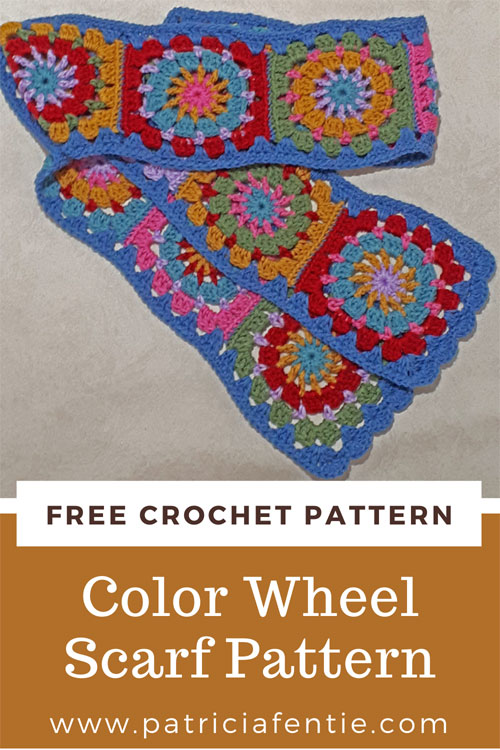
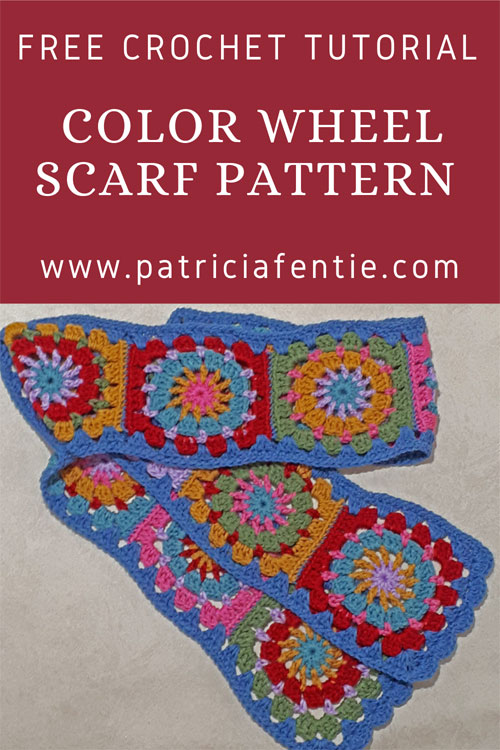
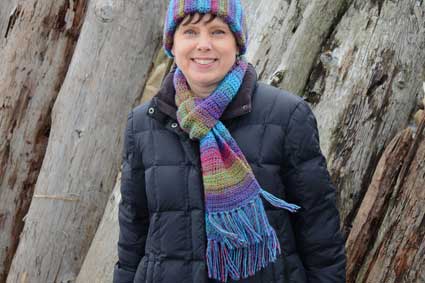
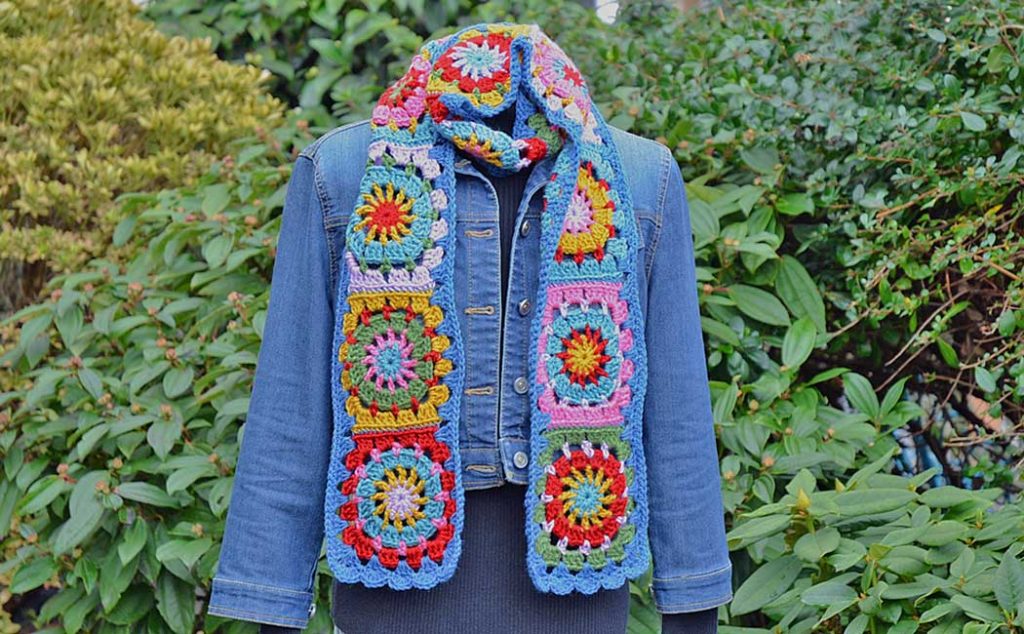
Learn how to make this gorgeous crocheted Color Wheel Scarf! The colors I used for this pattern are truly colorful, however, you can use any color combination you like. I published this pattern a couple of years ago, but about a year ago, there was a copyright claim on the granny square pattern motif. As a result, I had to remove this pattern and the granny square motif from my blog and YouTube channel.
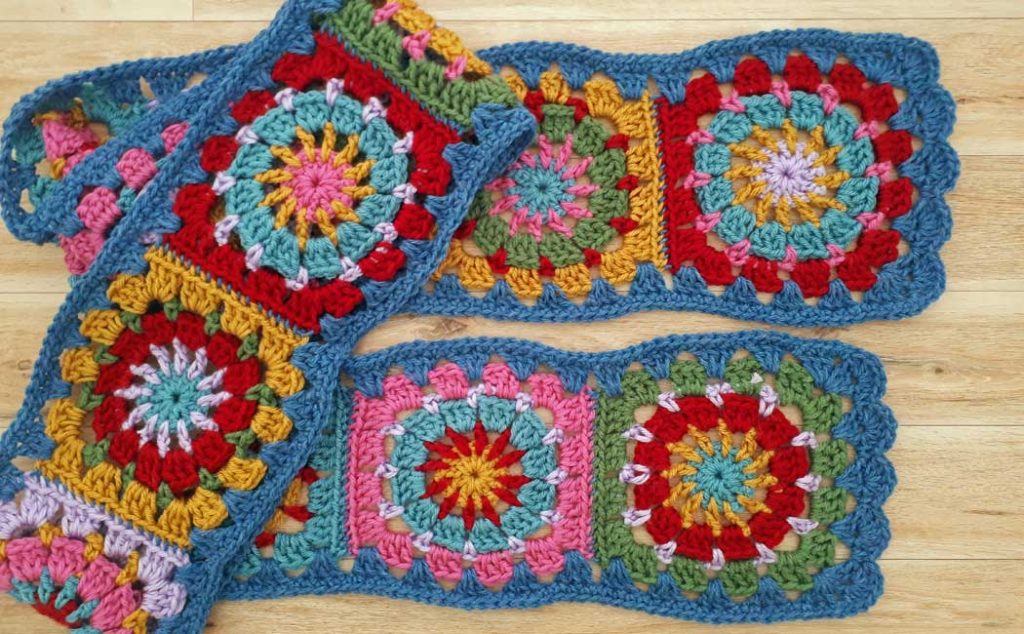
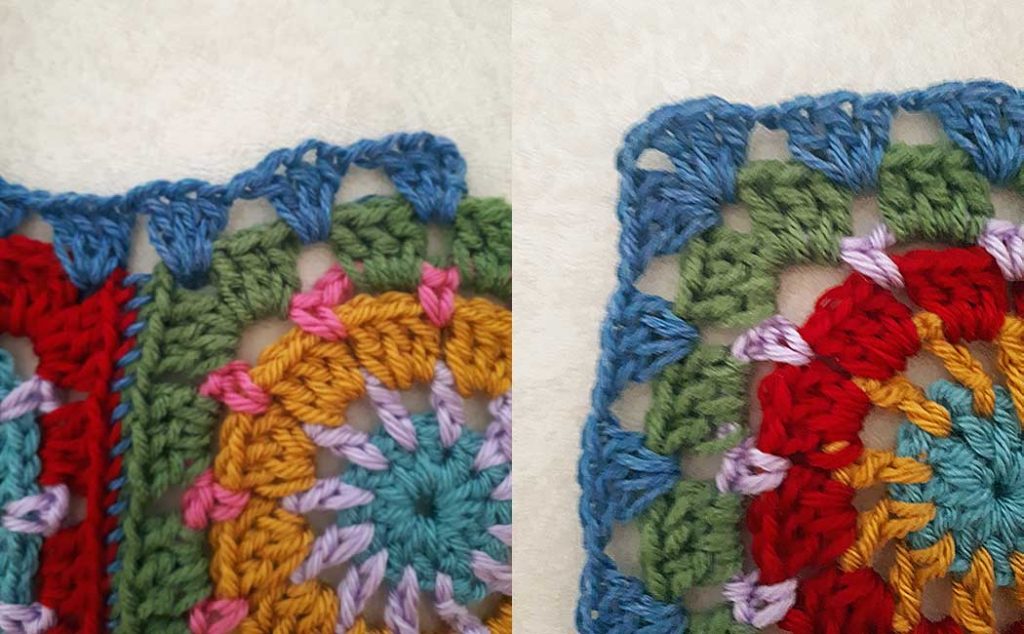
But because the scarf pattern is so lovely, and there is no copyright claim on my design, I decided to rework the granny square pattern and offer this scarf tutorial again using the new pattern. You can see in the image below the difference between the original granny square design and the new one I have created.
You can find the “Color Wheel Granny Square Pattern” here, and using that pattern, you can proceed with the rest of the tutorial for the crocheted Color Wheel Scarf. So, while the following images are from the design I removed, the new granny square design (or any other granny square pattern), can be used in its place.
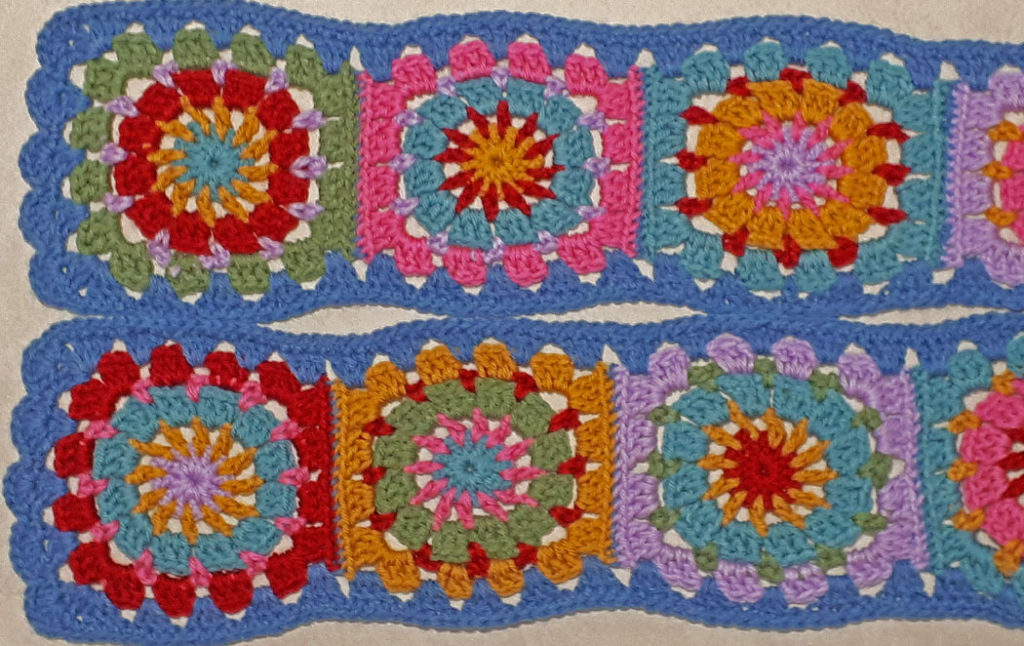
There are 12 granny squares in total for this scarf pattern, and the motif measured 5.25″ x 5.25″. A traditional granny square with 4 rounds comes out the same size for me. They are joined together with a denim color yarn. The scarf is then trimmed in a simple granny square stitch with a nice scalloped pattern on the ends. The finished scarf is 70″ x 6.5″.
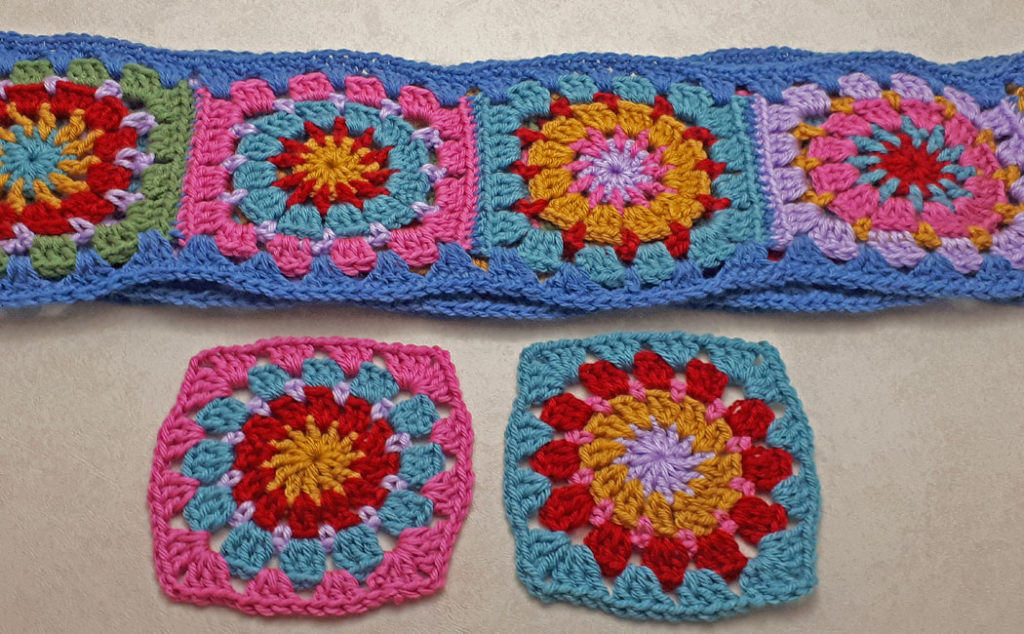
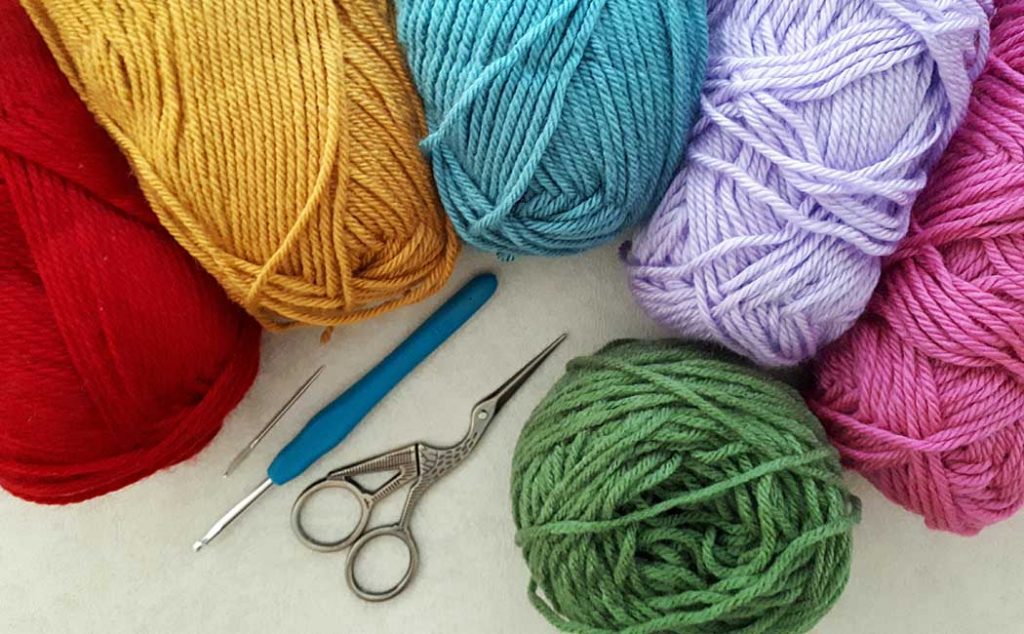
For the granny squares, I used an assortment of acrylic yarns that I had in my stash, but you can use any number 4 medium-weight yarn you like. Wool blends, cotton or bamboo yarn would all be lovely choices. You can see the various color combinations I used in the image above with the six different colors I chose. I created all different color combinations, but I did make sure to use one of each color for the final round of each square. I repeated this two times so that I had consistent color repeats for the final rounds.
The supplies you will need for the Crocheted Color Wheel Scarf are:
- Number 4 medium-weight yarn in assorted colors. I used the following:
- Bernat Satin-Mia Tai (pink)
- Bernat Satin-Stardust (light purple)
- Patons Canadiana-Medium Teal
- Patons Canadian-Fools Gold
- Cascade Anthum-#44 (green)
- Red from the thrift shop
- 4 mm or G-6US crochet hook
- Darning needle
- Scissors
- Hand steamer (optional)
Some (but perhaps not all) of the links in this blog are affiliate links to Amazon. As an Amazon Associate, I earn from qualifying purchases. This page contains some affiliate links. Please see my policy page for details. I look for the best possible option for your convenience, however, I encourage you to support your local shops!
The yarn I used to join all the squares together and to crochet around the border is actually a finer-weight yarn. I really wanted a denim color yarn and I couldn’t find this color in a number 4 medium weight acrylic (or any other blend) yarn. I did find something close in the Bernat Premium, but I find this brand of yarn quite chunky for a number 4, and it was too heavy for the border.
I recommend using at least the same weight yarn that you make the granny squares with, or something a little lighter. I used the Berroco Vintage DK in color number 2170. This is actually a number 3 lightweight yarn, but it worked very well for the border. There are several online yarn shops that carry this yarn including Yarnatopia. I love the look of the denim color, but you could use any neutral color such as tan, grey, or black.
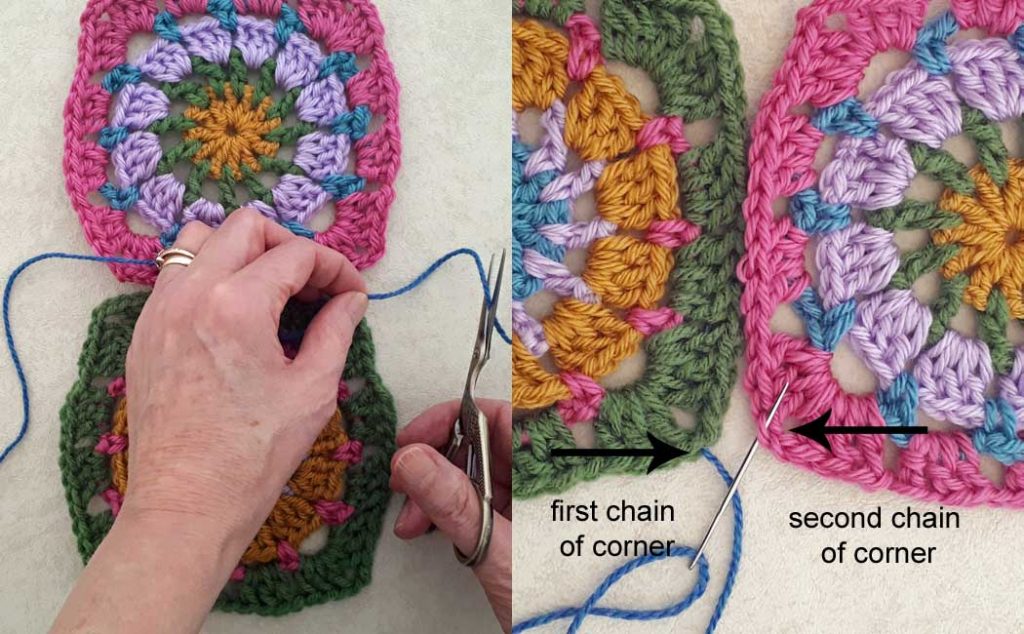
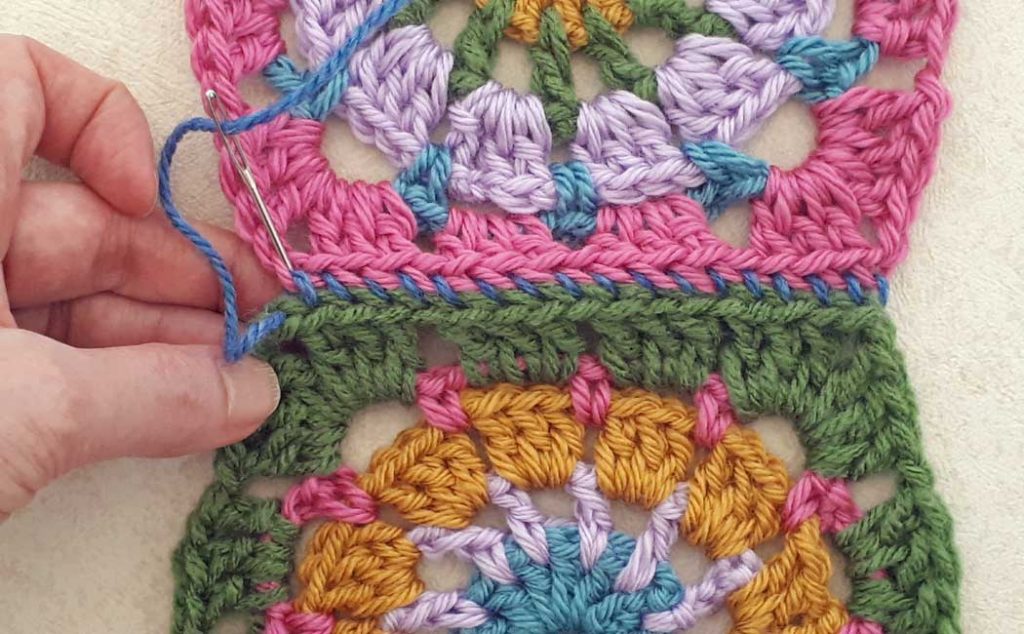
To join the squares together, I used what I call a “visible whip stitch”. This is done by stitching the squares together by going through the top posts only on the edge of the squares. This creates a nice ‘frame’ so to speak once the squares are joined. Start by cutting a piece of yarn in the color to be used to crochet around the border. Measure about 2.5 lengths of one side of the square and thread that onto a darning needle.
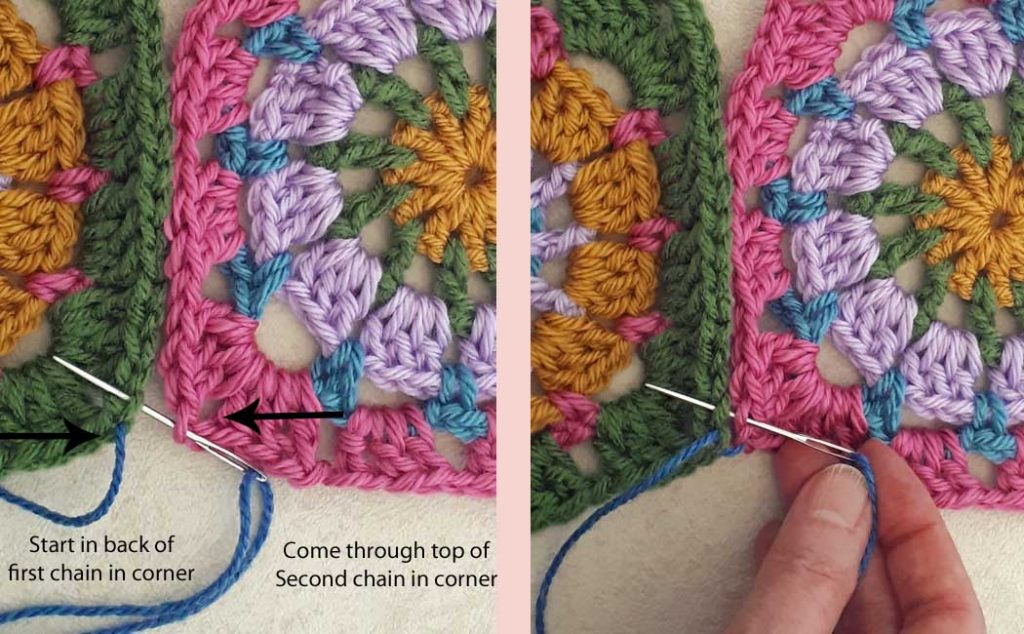
Lay two squares side by side, right sides facing up. Bring the needle in from the back of the first chain in the corner of the square on the left side. Just pick up one post…the top one. Then put the needle through the top of the second chain in the corner of the square on the right, going from the right to the left…again, just picking up the top post. Pick up the next stitch of the square on the left, going under the post (see image above on the left and where the black arrows are pointing).
Pull the yarn through both posts and bring the needle around to the square on the right. Put the needle under the top posts of each square, sewing from the right to the left (see image above on the right).
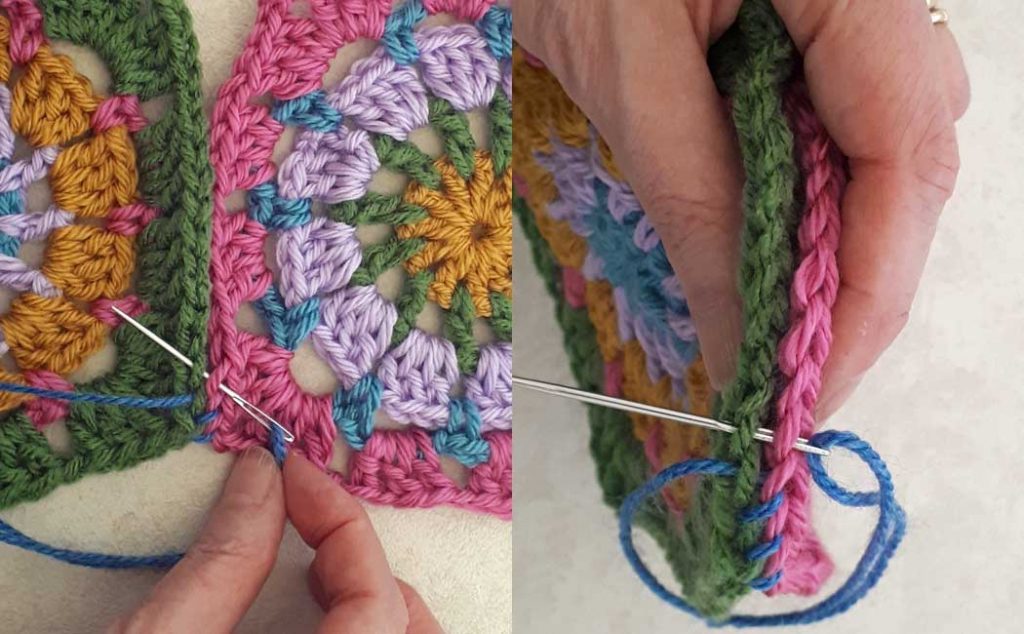
Continue to join the squares, sewing from the right to the left, picking up the corresponding posts on each square (see above).
When you reach the end, bring the needle back down into the previous stitch and darn the end into the back of the square. Darn in the tail on the other side. Continue to join all 12 squares together in a row (or whatever number of squares you need for the size you want.)
The border for the scarf is a basic granny square stitch. Begin in any chain one space along the straight edge of the scarf.
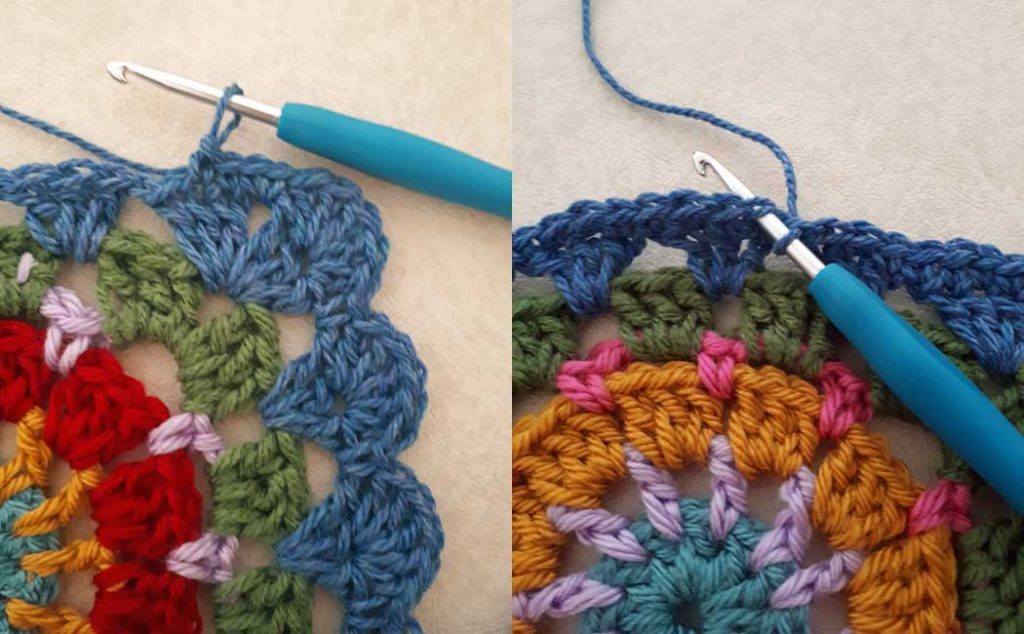
Round One: Join with a sl st into a ch 1 sp, ch 3 (counts as first dc), 2 dc, ch 1 in same ch1 sp. *3 dc, ch 1 in next ch1 sp. Repeat from * to corner. (note that you will be working into the ch2 spaces where the squares are joined and those will be treated the same as a ch1 sp…see image above on the left)
Work corner (3 dc, ch 2, 3 dc, ch 1) in the ch2 sp. Continue to work clusters of 3 dc, ch 1 in each ch1 sp, and work each corner as directed.
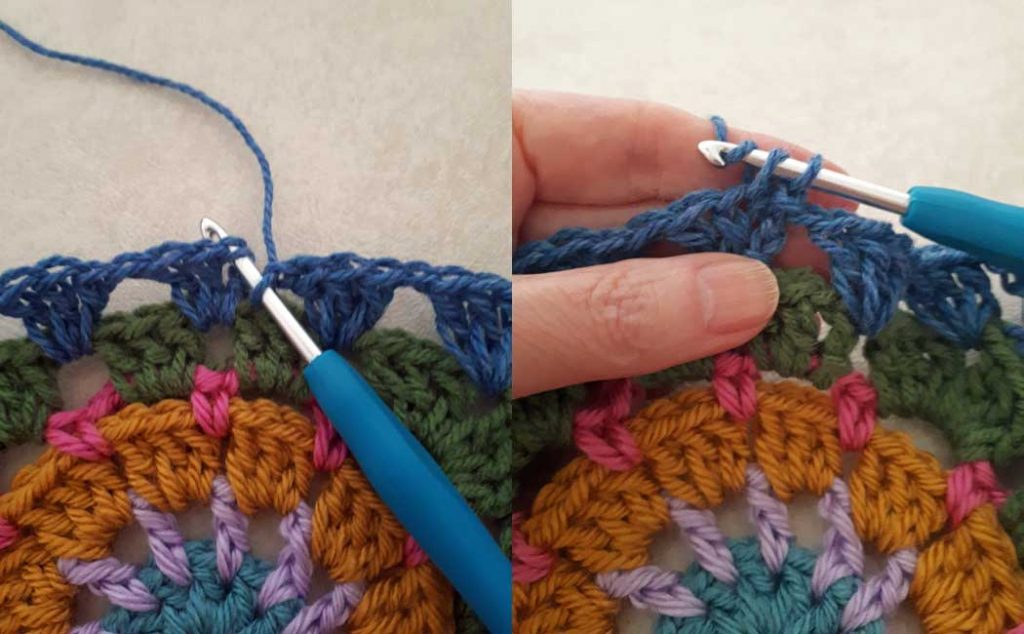
Join the first round with a sl st into the 3rd ch of the beg ch3 (see image above left)
Round Two: Ch 1, 1 sc in next st (going under 2 loops…see image above right), 1 sc in each st to corner.
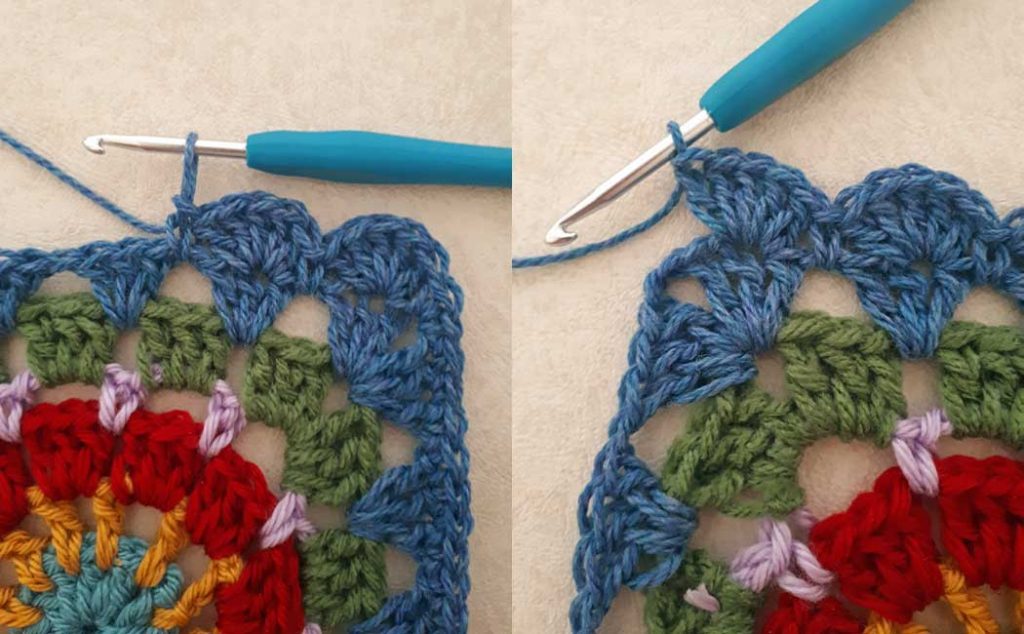
Work 2 sc in ch2 sp of the first corner, sk 1 st, 5 dc in next st to create a shell, 1 sc in ch1 sp. *sk 1 st, 5 dc in next st, 1 sc in next ch1 sp. Repeat from * 3 more times to the next corner.
2 sc in ch2 sp, 1 sc in each stitch to the next corner. Repeat directions for scallops for the other end and continue with 1 sc in each stitch to complete round, sl st to join round. Darn in ends.
You can block or steam the scarf when you are done. To block it, follow the washing instructions for the yarn you used and lay it flat to dry. Hand press it to shape. If you have a hand steamer, you can use that to press and block your scarf. This is the one I have and I love it!
I love this crocheted Color Wheel scarf and I hope you do too! It is a perfect spring scarf and looks fabulous with a denim jacket. Make sure to subscribe to my newsletter so you don’t miss out on any great projects!
As always, I have a video tutorial for this project as well and if there is anything you are uncertain of, I’m sure you will find the answer in the video. Enjoy and be playful!
Make sure to check out the new design for the Color Wheel Granny Square Motif here, which includes written directions, but I will also share the direct link to the YouTube video if you prefer the video tutorial.
Sharing is caring! Click on the social share button at the top of the blog and choose an image from below to share on social media.