If you are new to crochet then this Easy Crocheted Headband is the perfect project to start with. It may look complicated, but the headband is made using a single crochet stitch only, and it is so simple that even a child could make it! I love how something so easy, can look so pretty.
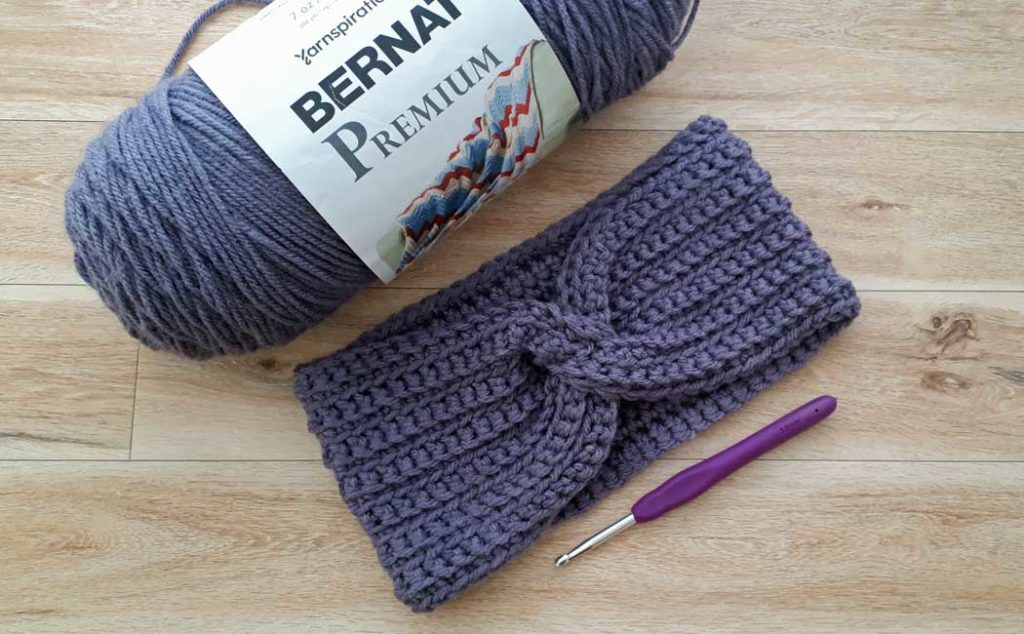
This easy crocheted headband can be made to fit any size head. You will just make the foundation chain long enough to fit whoever you are making it for, and the height (or depth) of the band can be any size you like! This is a simple two-row repeat using single crochets.
You can use up partial balls of yarn for the headband because it doesn’t require a lot of yarn. And because this pattern is made to fit any size head, you can use any size or weight of yarn you like. I am using a number 4 medium-weight yarn (also called worsted) from a previous project I made (the Lavender Fields Pocket Shawl).
Buy the downloadable PDF pattern from my Ravelry Store! Click here to go to the pattern 🙂
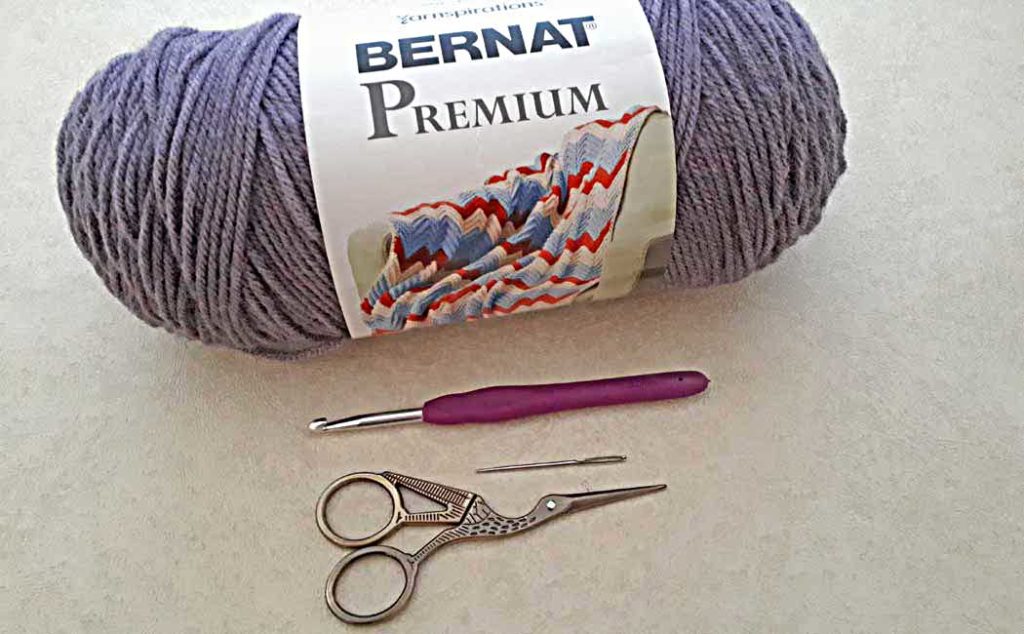
The supplies you will need for this project are:
- Yarn of your choice
- I’m using Bernat Premium yarn in Grand Purple (#4 medium weight and approximately 60-65 yards or 55-60 meters)
- Crochet hook (5 mm or H-8 for this yarn)
- Darning needle
- Scissors
- Hand Steamer (optional)
Some (but perhaps not all) of the links in this blog are affiliate links to Amazon.com. As an Amazon Associate, I earn from qualifying purchases. This page contains some affiliate links. Please see my policy page for details. I look for the best possible option for your convenience, however, I encourage you to support your local shops!
I have created basic written directions for the band below, but I also have a video tutorial that shows how to sew the band in such a way to create a pretty twisted design. If you are new to crochet, then you can check out my Beginner Crochet Series to learn all the basics!
You will start with a foundation chain that fits comfortably around your head. Mine was 19″ (47.5 cm) in length with 65 chains. Then you add one extra chain for the turning chain (66 chains).
Pattern:
Foundation chain of the desired length, plus one chain
Row one: 1 sc in the back bump of each chain stitch (65 sc), ch 1 turn (you can double check the fit at this point, you may have to unravel to add or subtract a few chain stitches).
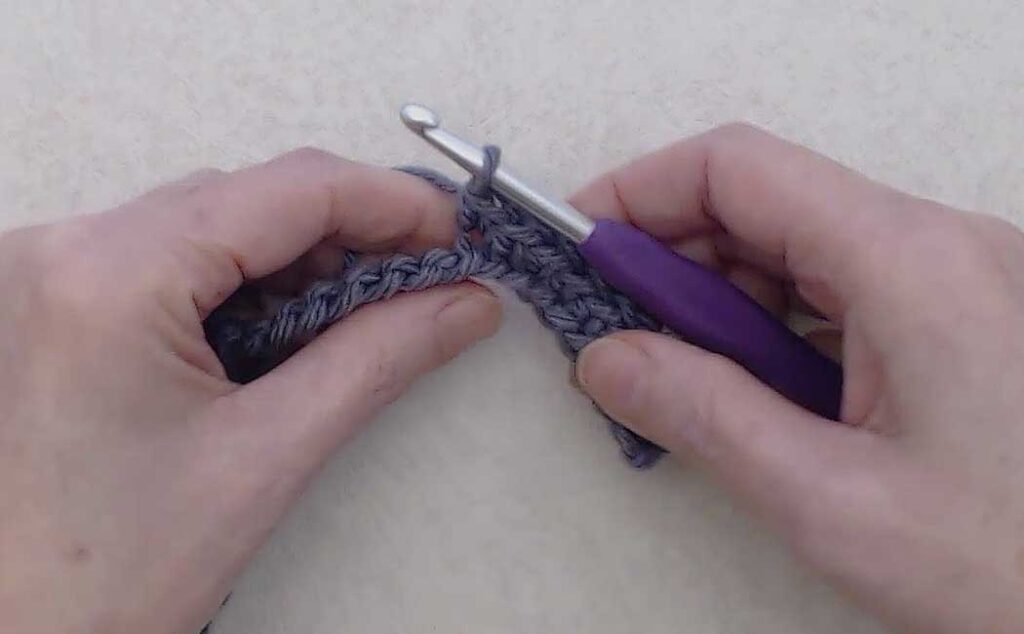
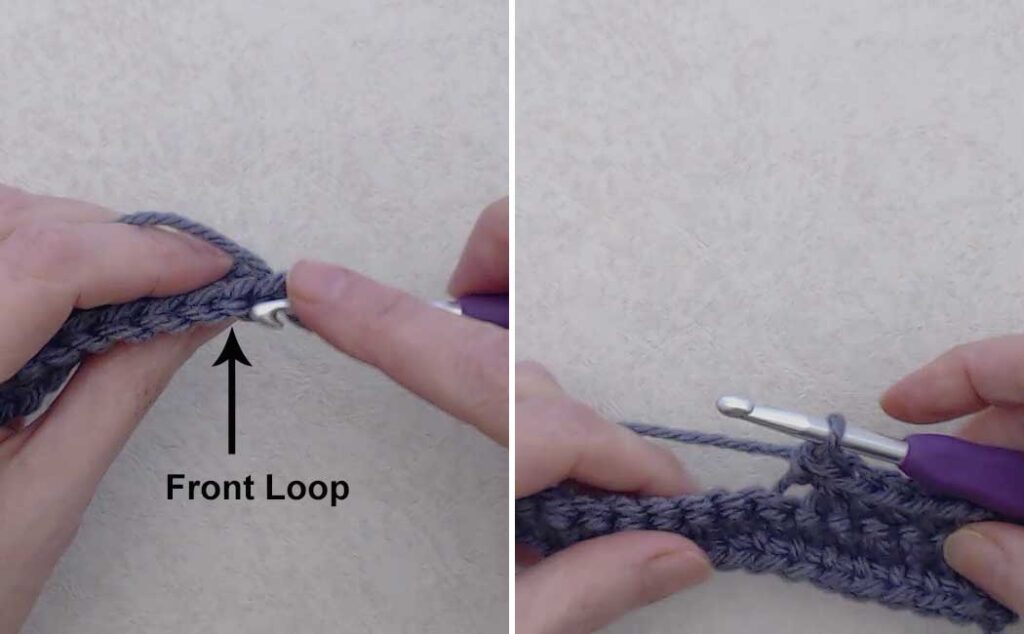
Row two: 1 sc in the back loop (top stitch) of each stitch (65 sc), ch 1, turn.
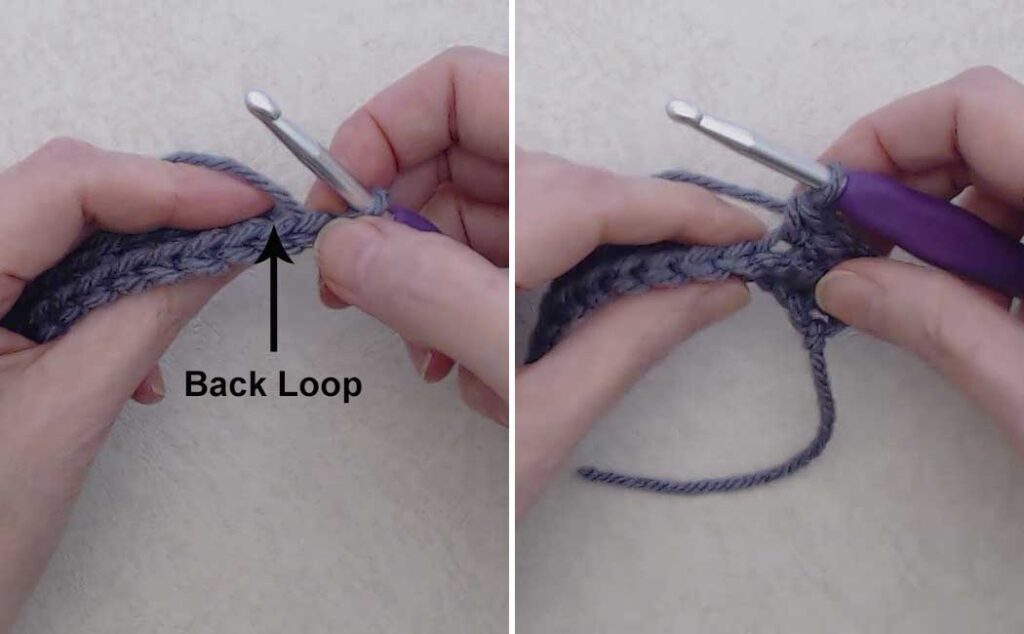
Row three: 1 sc in the front loop (bottom stitch) of each stitch (65 sc), ch 1, turn.
Row four onward: Repeat rows two and three until the band is the desired depth. Finish the last row with the row two repeat. Mine was 14 rows in total with a finished depth of 4.5″ (11.5 cm). Unfortunately, I forgot to take photos at this point, but this is where you can go to the video tutorial to see how to sew the band together. This part of the tutorial begins at 9:45 in the video.
Buy the Downloadable PDF version of this pattern in my Ravelry Store. Just click here!
If you like this tutorial, then you may also like:

Sharing is caring! Click on the social share button at the top of the blog and choose an image from below to share on social media.