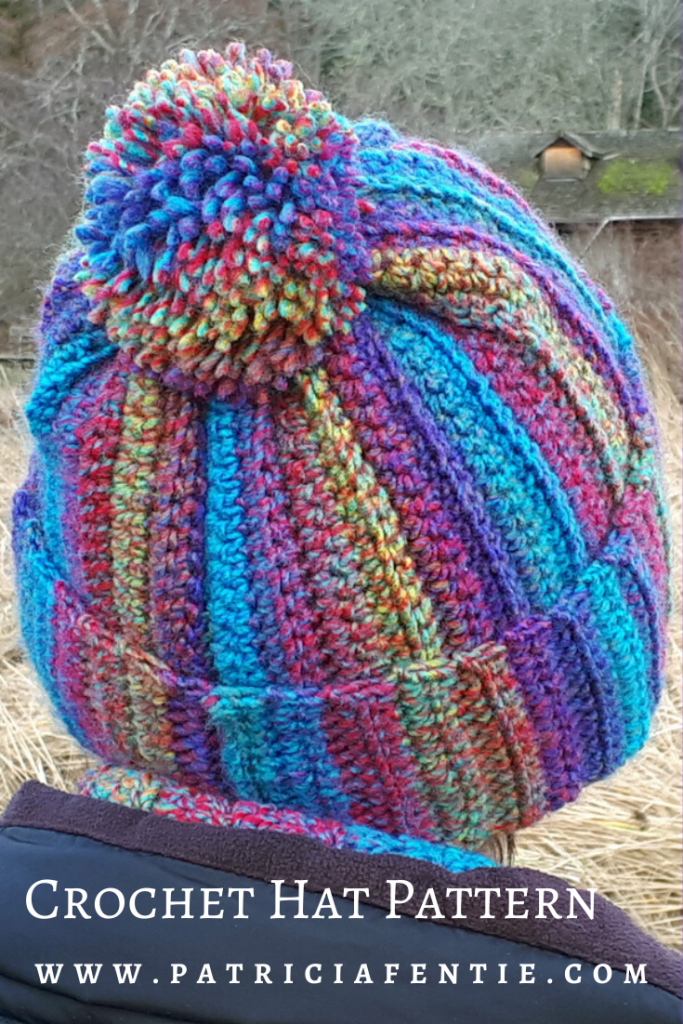
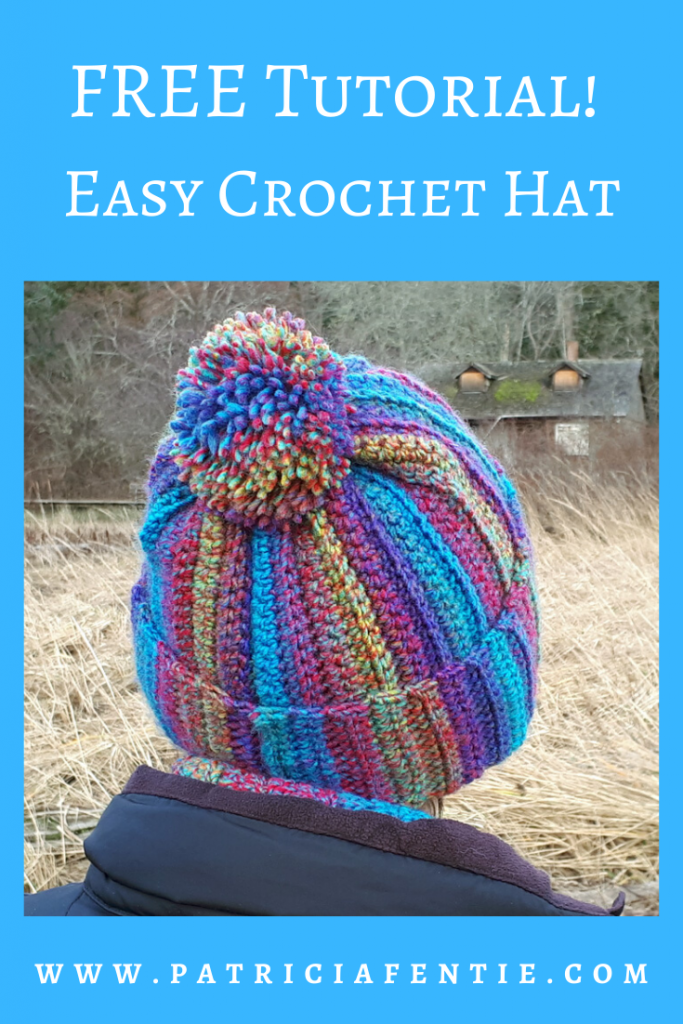
This crochet hat pattern is so easy! I’m actually amazed at how such an easy pattern can create such a snazzy looking hat! The yarn really adds to how nice this hat is, and I do recommend the yarn I used, but you can choose any yarn you like!

Did I mention this is an easy pattern? All you need to know is how to do a chain stitch, a single crochet, and a slip stitch. If you are new to crochet, you can check out my Beginners Crochet Series to learn the basics. There is also a video tutorial at the bottom of this post if you prefer to follow that!
Some (but perhaps not all) of the links in this blog are affiliate links to Amazon.com. As an Amazon Associate, I earn from qualifying purchases. This page contains some affiliate links. Please see my policy page for details. I look for the best possible option for your convenience, however, I encourage you to support your local shops!
I LOVE this yarn! It is made by Lion Brand and the color is Vintage Carousel. They have several other colors, but this is my favorite. The yarn is a #4 medium weight acrylic yarn, and I’m so impressed with the yarn that I did a review on it. I bought mine at Michaels and it is also available through Lion Brand directly, as well as through Amazon.
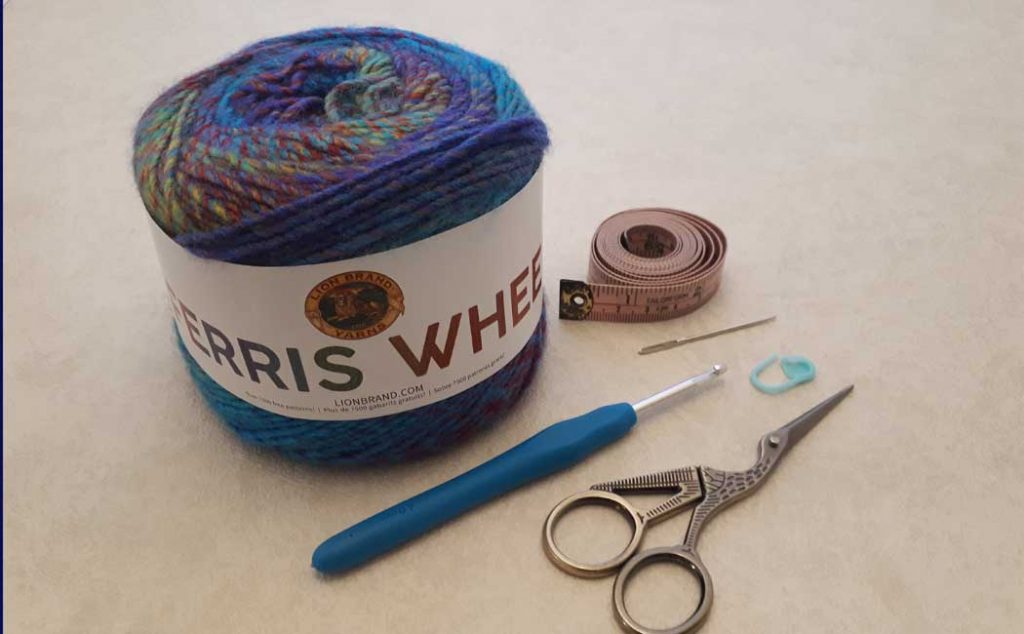
The supplies you will need for this pattern are:
- 1 ball of Lion Brand Ferris Wheel yarn in Vintage Carousel (or equivalent choice)
- 4mm (G-6) crochet hook
- Scissors
- Darning Needle
- 1 stitch marker (optional)
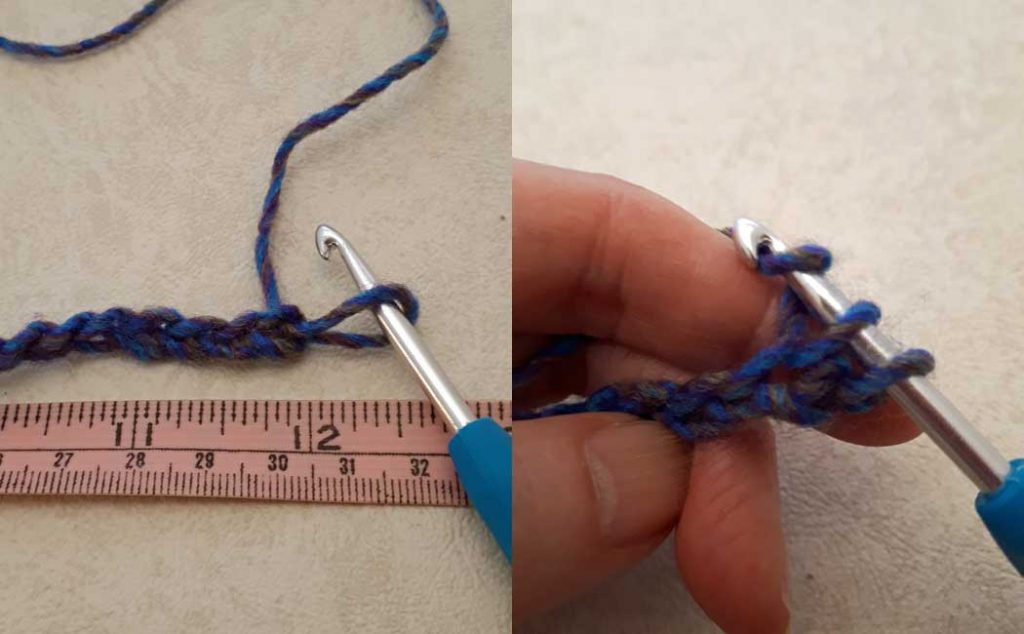
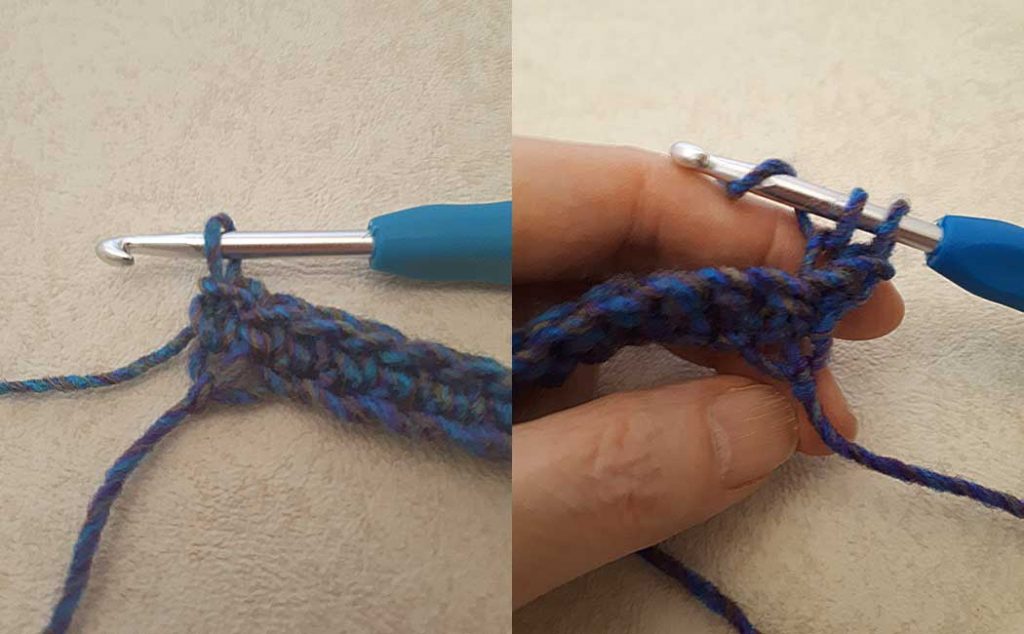
Row 1: Ch 45 or make the chain 12″ (30cm) long. Make the chain stitches quite loose for this row. If you tend to have tight tension, just use a slightly larger crochet hook for this row. Count your stitches.
Row 2: Ch1, 1sc in back post of 2nd stitch from hook. *1sc in back post of next stitch. Repeat from * to end of the row, ch1 and turn.
Row 3: 1sc in the back post of the first stitch (not the turning chain). *1sc in the back post of the next stitch. Repeat from * to second last stitch of the row. 1sc in both posts of last stitch, ch1, turn your work. This side will be the hat brim (which is why you do the sc in both posts at the end of this row).
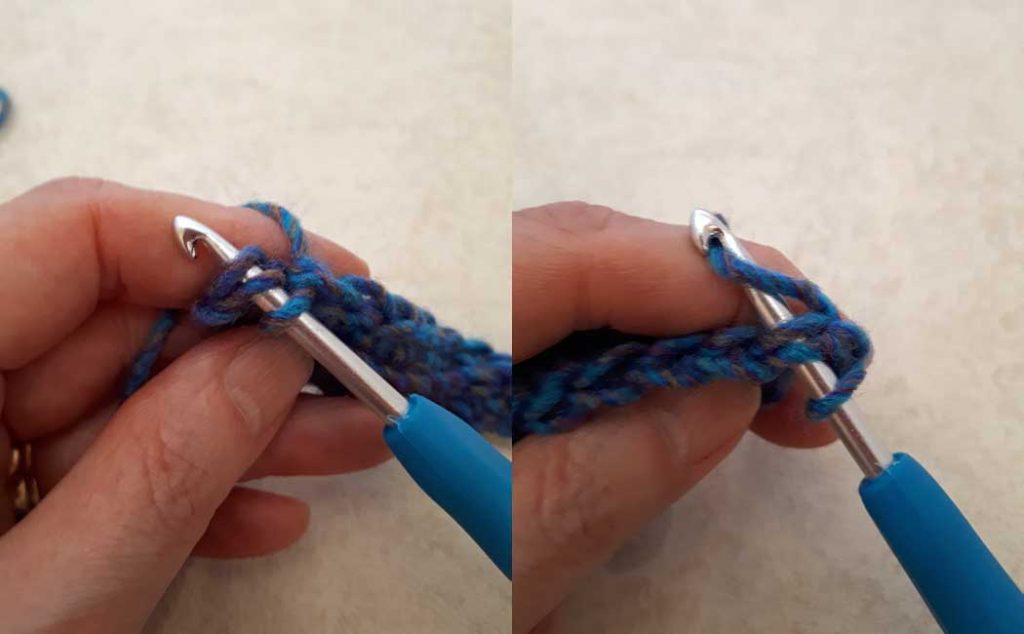
Row 4: 1sc in both posts of the first stitch. *1sc in both posts of next stitch. Repeat from * to the end of the row, ch1, turn your work. (count your stitches every now and then to make sure you are staying on track)
Row 5: Repeat row 4.
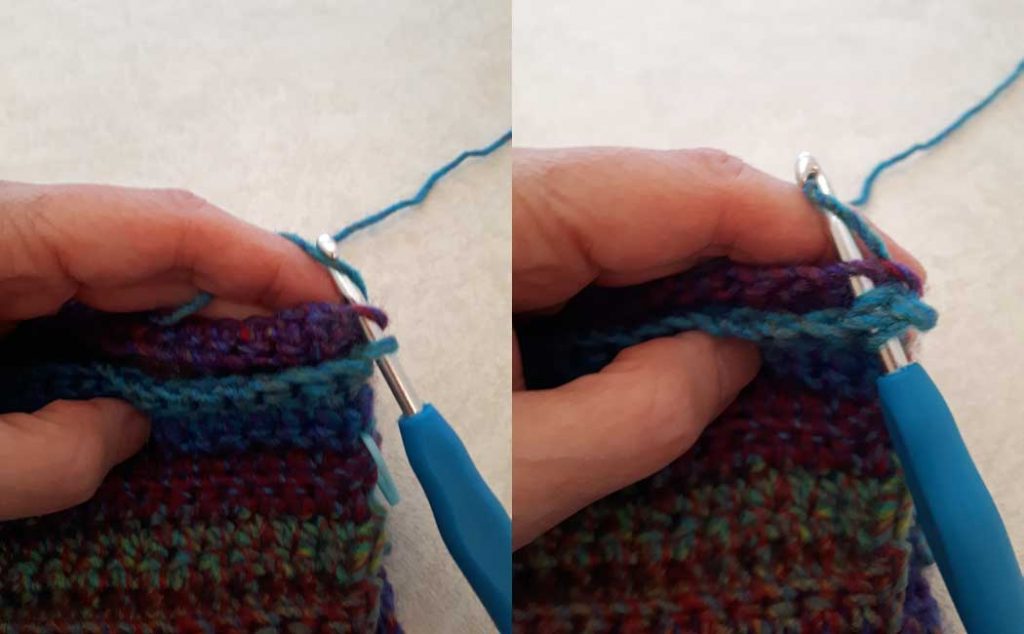
Continue to repeat rows 2 to 5 using a stitch marker on the brim side (if required) to keep track of your pattern repeat until you have reached your desired length. Finish with the repeat of rows 4 and 5. You want the fabric to fit comfortably around your head, but it should be a little bit snug as the fabric will relax and stretch out. Mine was 19″ (48.5cm) in length.

Turn your work (don’t do a ch1), and bring the two short sides of your panel together (the 12″ (30cm) sides). These will be your beginning row and last row.
Have the beginning row at the back. Slip stitch into the top post of the very first stitch of row 1. There will be 2 loops on your hook. Then slip stitch through 2 posts of the next stitch of your last row (the row facing you) and through 1 post of the next stitch of row 1 (the back row). There will be 4 loops on your hook.
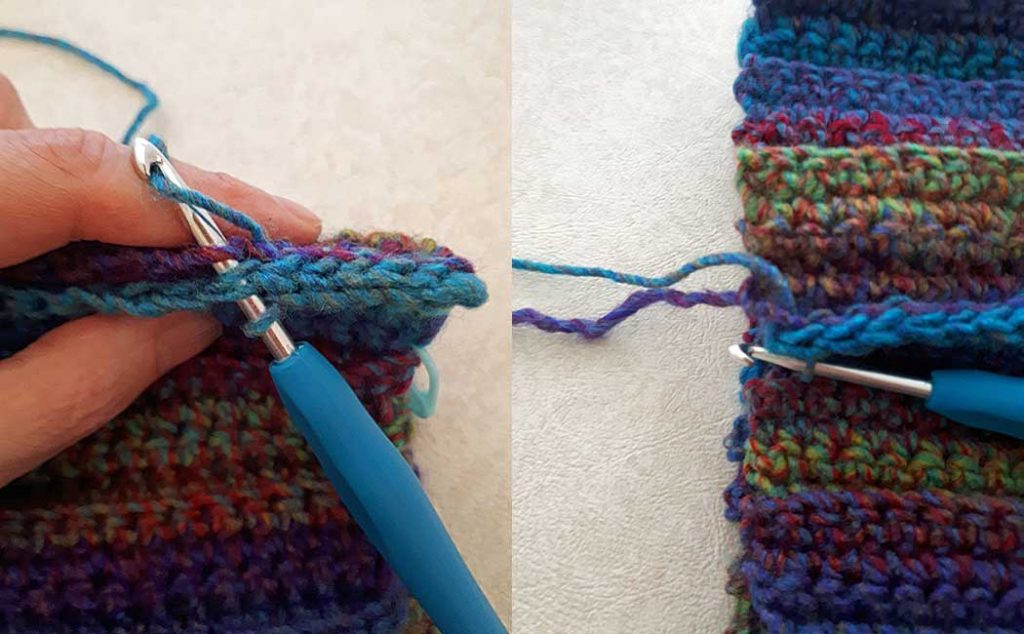
Continue to slip stitch through the 2 posts from the front row and 1 post of the back row. Repeat this until you’ve joined the 2 sides together. You will now be at the crown of the hat (this is also the inside). Fasten off and leave a tail about 15″ (37cm) long. Darn in your beginning tail from row 1.
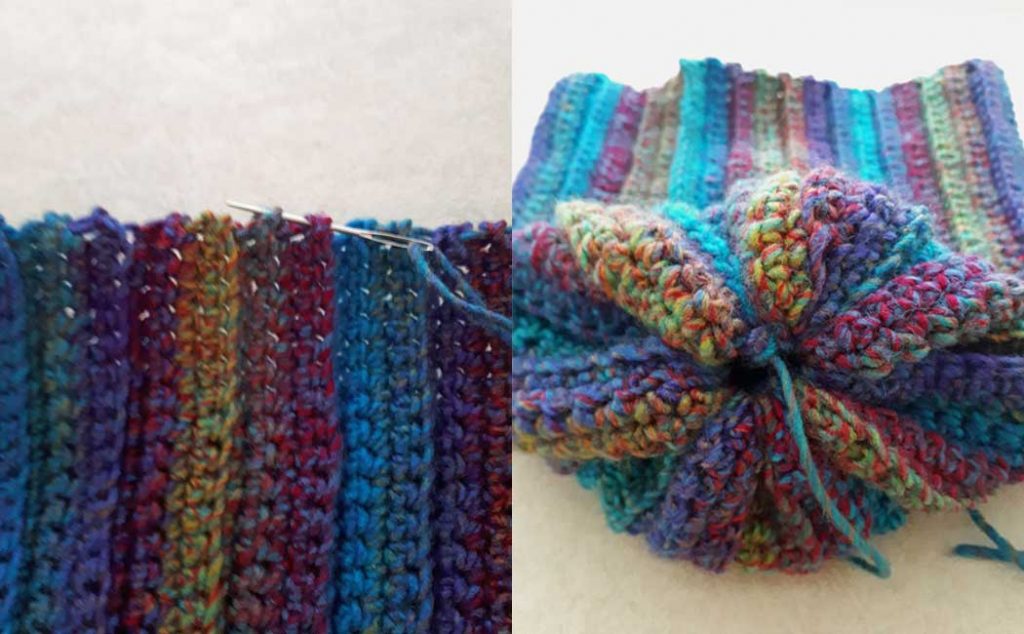
Baste the long tail through the top stitches of the hat. Gently gather the top of the hat closed.
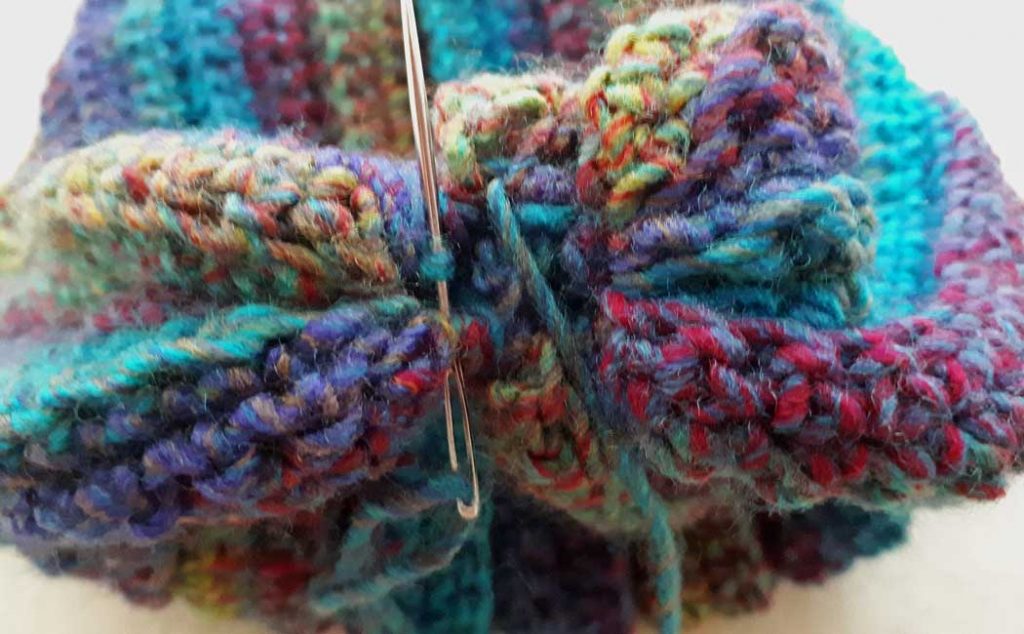
Sew back and forth to close the crown completely, then tie and knot and darn in the end. If you want to add a pom-pom, you can check out this video, and just attach it at the top!
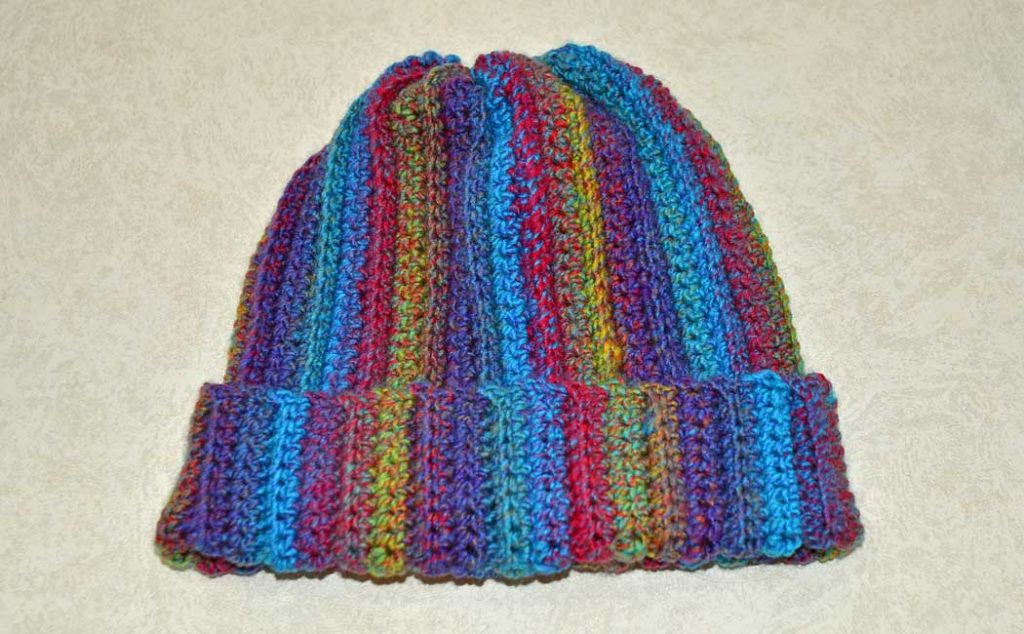
Turn the hat right side out and roll up the brim to a comfortable height and you are done! Congratulations! I’d love to hear from you…leave a note in the comments below 🙂
And for your convenience, I have created a video tutorial as well!
If you like this tutorial, you may also like: