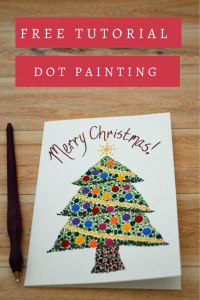
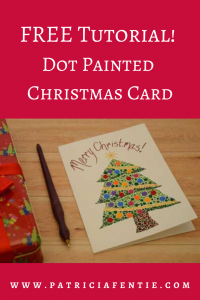
Creating homemade Christmas cards can be so much fun, especially using dot painting. This tutorial demonstrates how to dot paint a Christmas tree, but you could use the same idea to paint any Christmas symbol such as a snowman, a reindeer, a star or any number of shapes. I have created a video tutorial as well and you can find that at the bottom of this post.

Some (but perhaps not all) of the links in this blog are affiliate links to Amazon.com. As an Amazon Associate, I earn from qualifying purchases. This page contains some affiliate links. Please see my policy page for details. I look for the best possible option for your convenience, however, I encourage you to support your local shops!
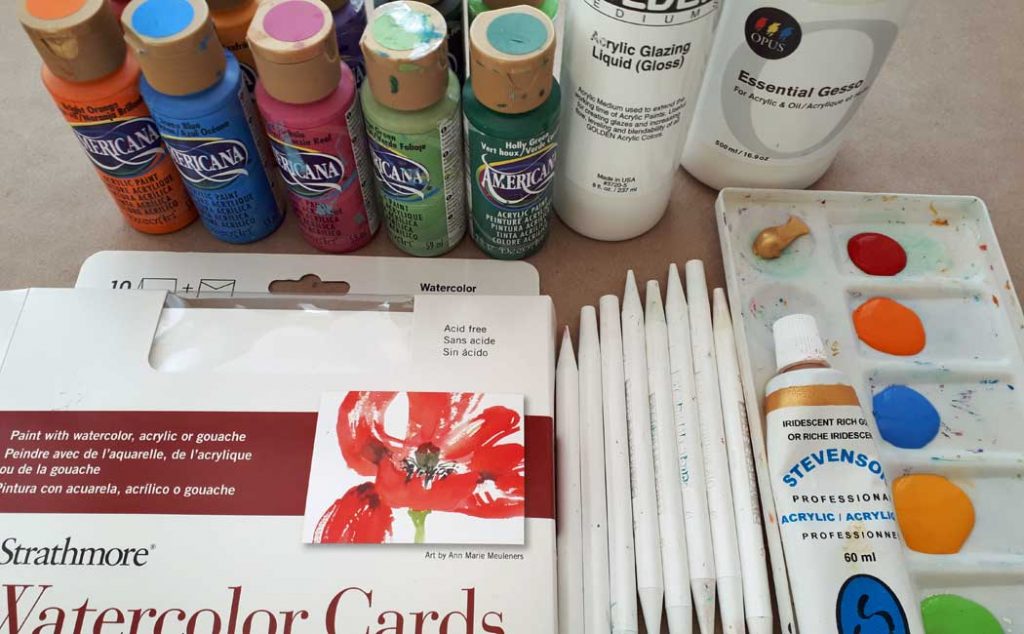
You will need the following supplies for this project:
- Strathmore Watercolor Cards
- DIY Mandala Dotting Tools
- These are currently unavailable on Amazon, but can be ordered directly from the designer at DIY Mandala Stones (they are in Canada)
- Paint Tray
- Liquid Acrylic Paints~I used Americana Brand in the colors listed below, but this set of paint by FolkArt has many similar colors to the ones I used. You can use any assortment of colors for this project.
- Primary Red
- Royal Fucshia
- Bright Orange
- Saffron Yellow
- Ocean Blue
- Lavander
- Plantation Pine
- Holly Green
- Foliage Green
- Sour Apple
- Burnt Umber
- Burnt Sienna
- Snow White
- Iridescent gold paint: I used Stevenson ‘Rich Gold’ which is a medium body paint. I thinned it with acrylic glazing liquid.
- Gesso (optional)
- Glass of water
- Damp cloth
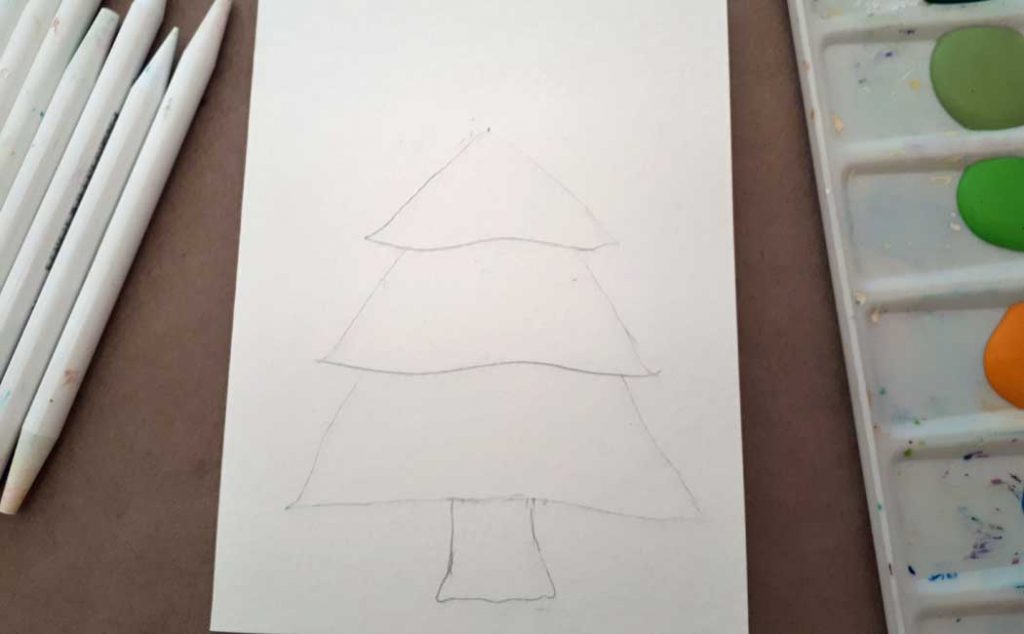
To begin, draw the outline of a plump Christmas tree on your card. For this tutorial, I will be dotting the inside of the tree, but you could also dot the outside of the card as I did in the Beginner Dot Painting Tutorial. If you are new to dot painting, you’ll want to check out that tutorial as well.
Decide if you want to write a greeting on the top of your Christmas card. If so, draw your tree on the lower part of the card. If not, center the tree in the middle.
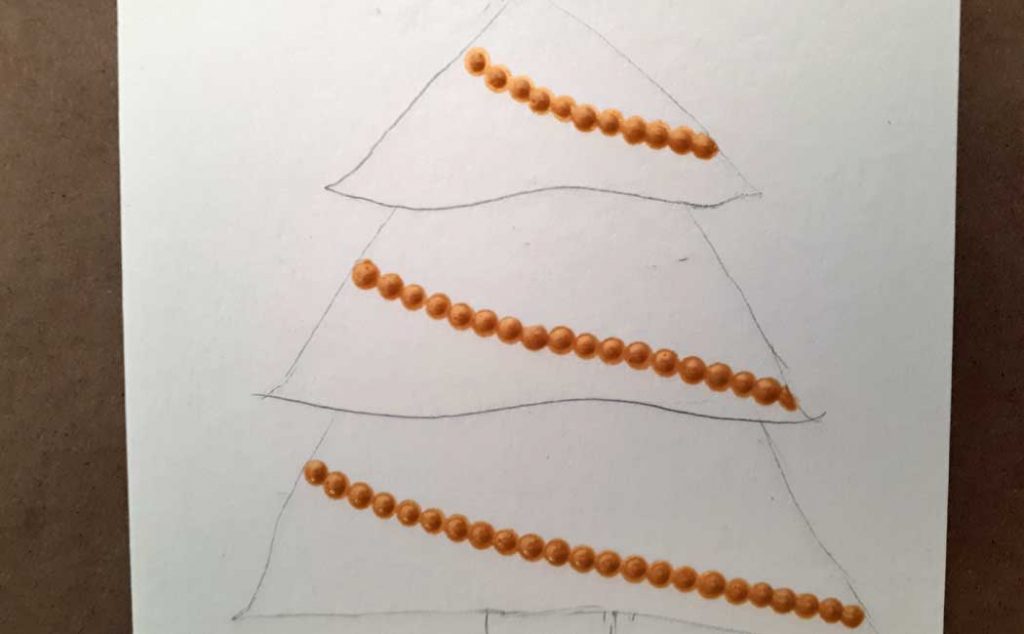
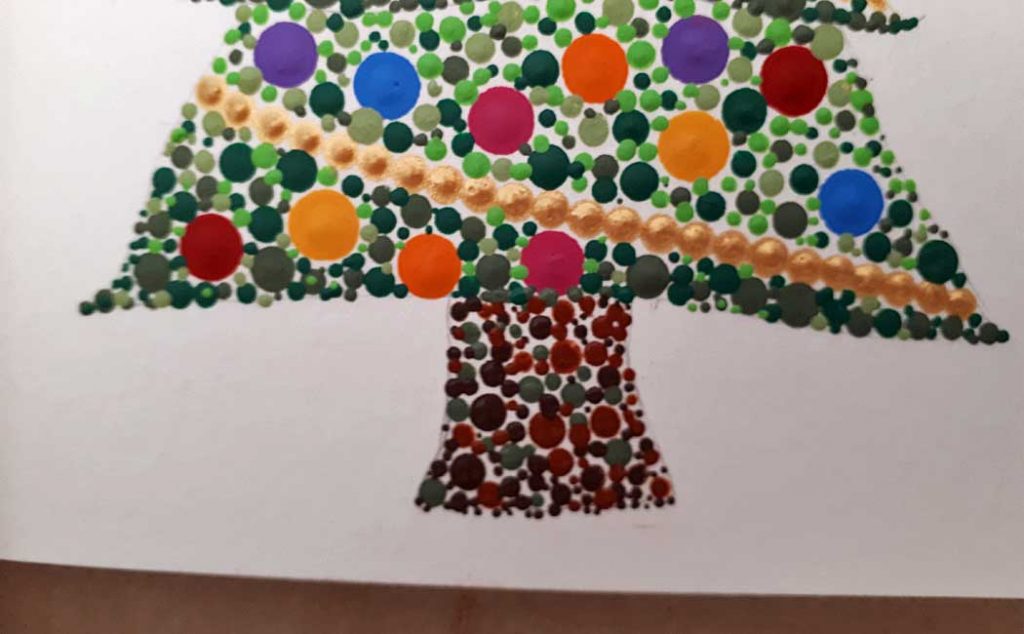
Using the gold iridescent paint, and a medium-size dotting tool, dot paint a line of garland in each section of your tree. I had to thin my paint with glazing liquid because it was a medium-body paint.
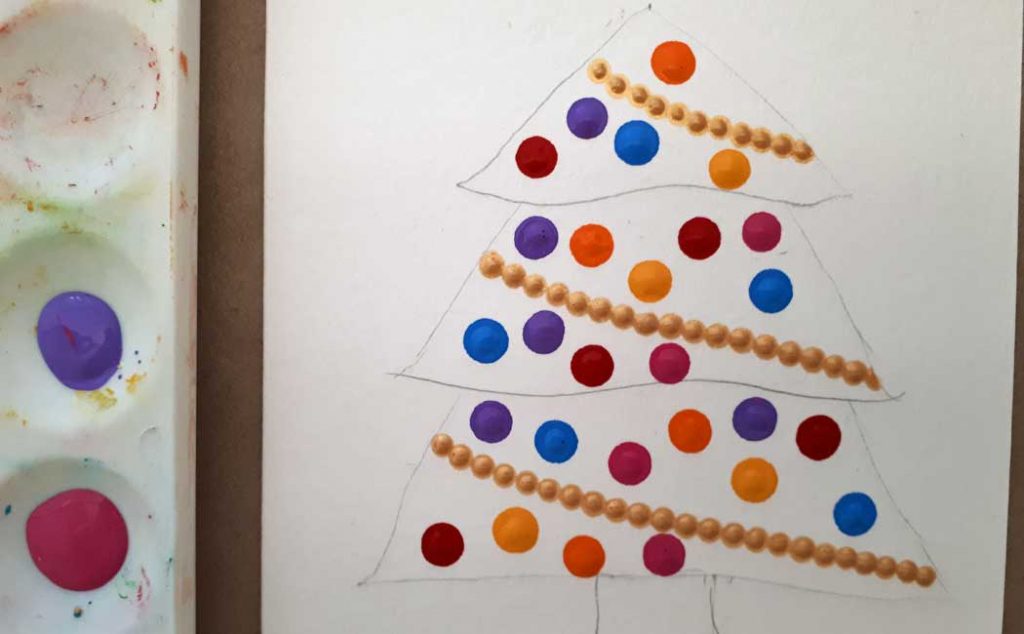
Now add your colored ornaments using larger dotting tools. You could make all the balls in one color or use multiple colors as I did here. You could also use an assortment of sizes. I just did one size ball.
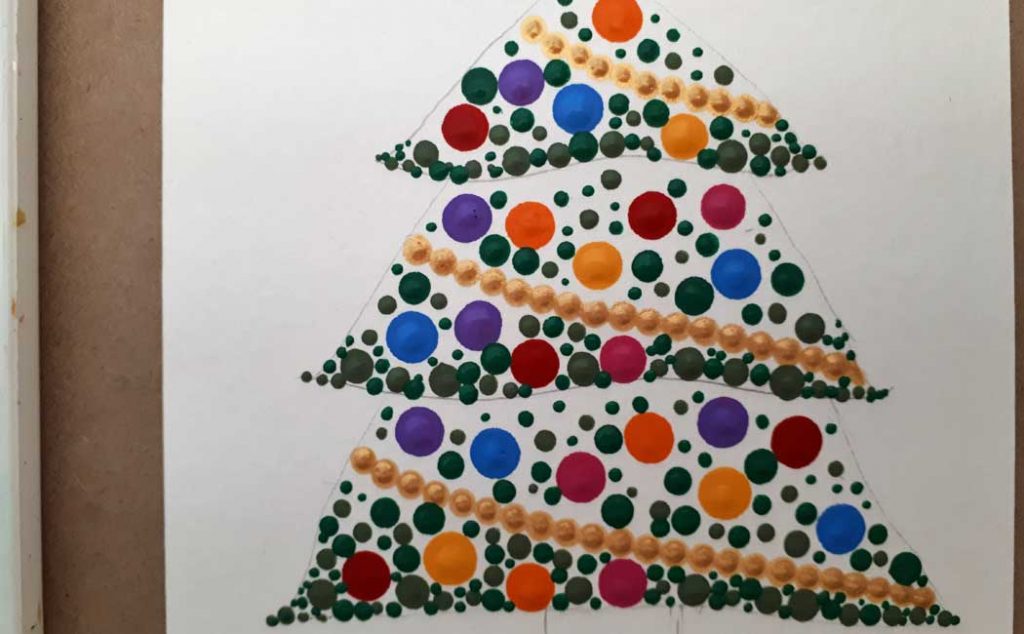
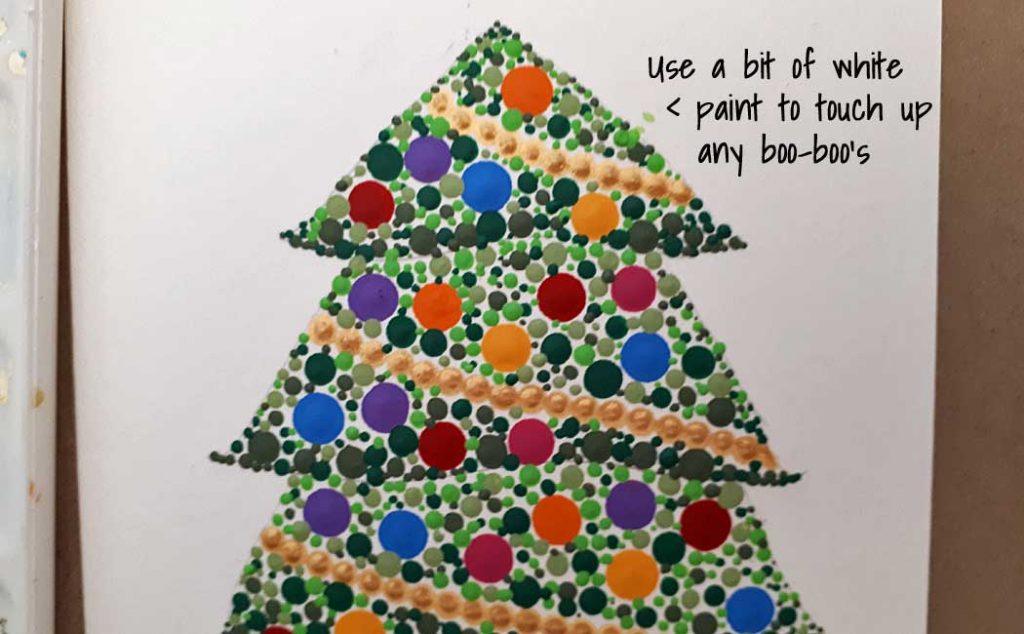
Now begin to shade the tree in with a variety of colors of green paint. The Plantation Pine was very dark, so I added a bit of white paint to lighten it up. You can do that with any of your paints if you find them too dark. You can also mix together two different green paints to make a third color. Be playful and creative! There are no stringent rules 🙂
Start dotting darker shades of green along the bottom line of each of the three groups of foliage. Use a variety of medium and small dotting tools. Feather the darker colors towards the top of the groups of foliage as shown below.
Using the lighter shades of green, begin to fill in the upper areas of the tree, mixing up your colors and the size of dotting tools.
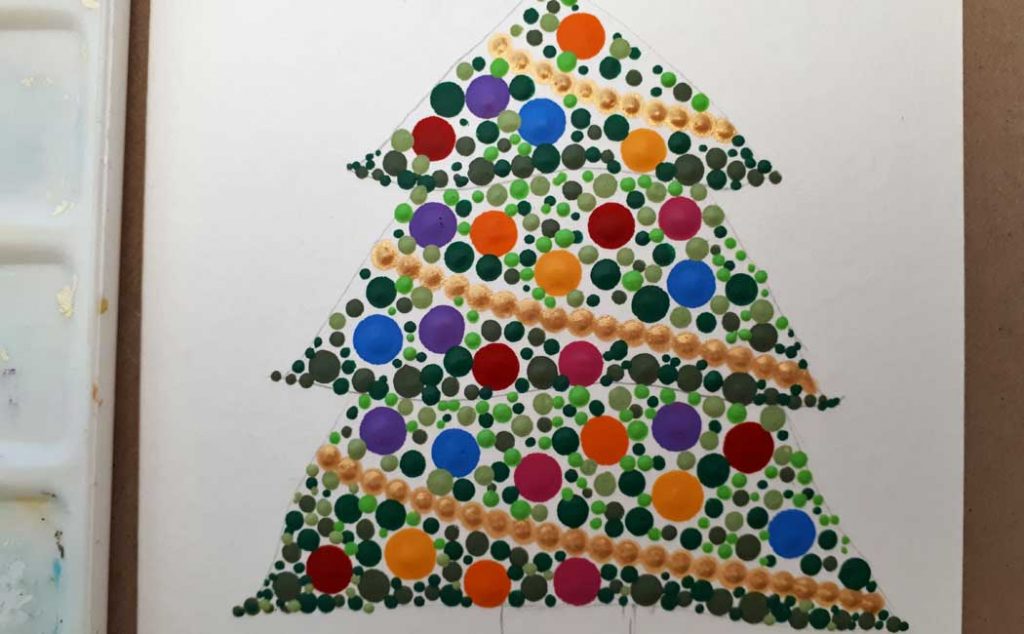
Continue to fill in with the lighter shades of green and bring some of the light shades down into the lower parts of the groups of foliage. Basically, you want to have more of the darker green at the bottom and more of the lighter green towards the top. This gives a bit of a shadow effect and outlines each section nicely.
If you make any mistakes, you can just use a little bit of white paint and a small paintbrush to feather overtop of any unwanted blotches.
Once you’ve filled in the tree area, you can use some brown tones to dot paint the truck area. Use the same idea of shading the colors together.
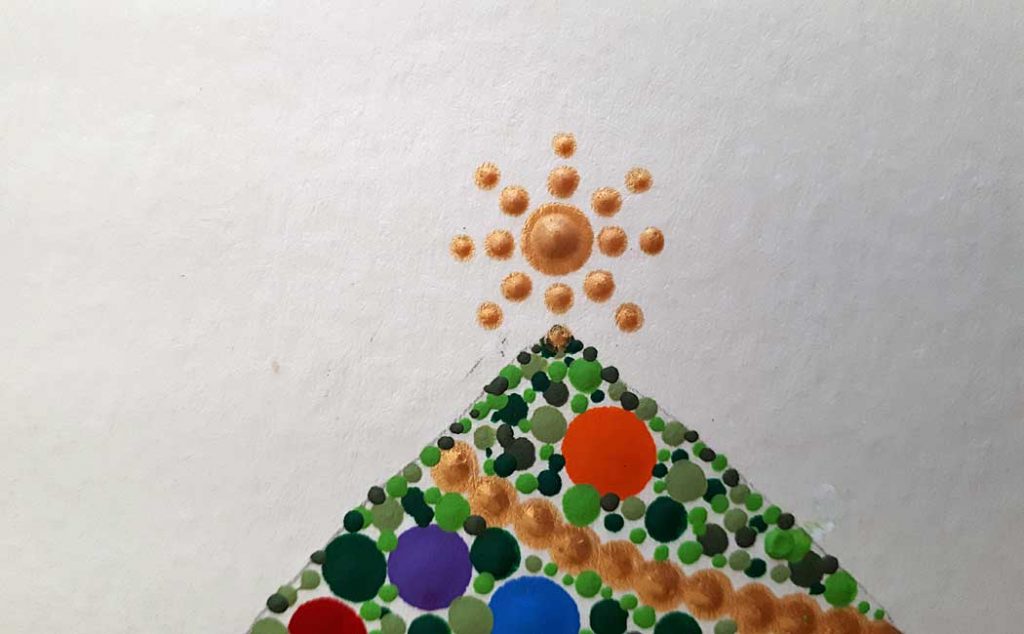
Last, but not least, use the gold iridescent paint to paint a star on the top of the tree. Place one large dot far enough above the tip of the tree to allow for two smaller dots. Paint two smaller dots around the large one, eight times.
Let the card dry really well and then erase any pencil marks that are showing. If you’ve allowed space to write a greeting, you can do that now!
Have fun with this tutorial! Leave a comment below and please share it on Pinterest or Facebook. Just click on the social share button and pick an image!
If you want more detailed instructions, check out the video below.
If you like this tutorial, you may also like: