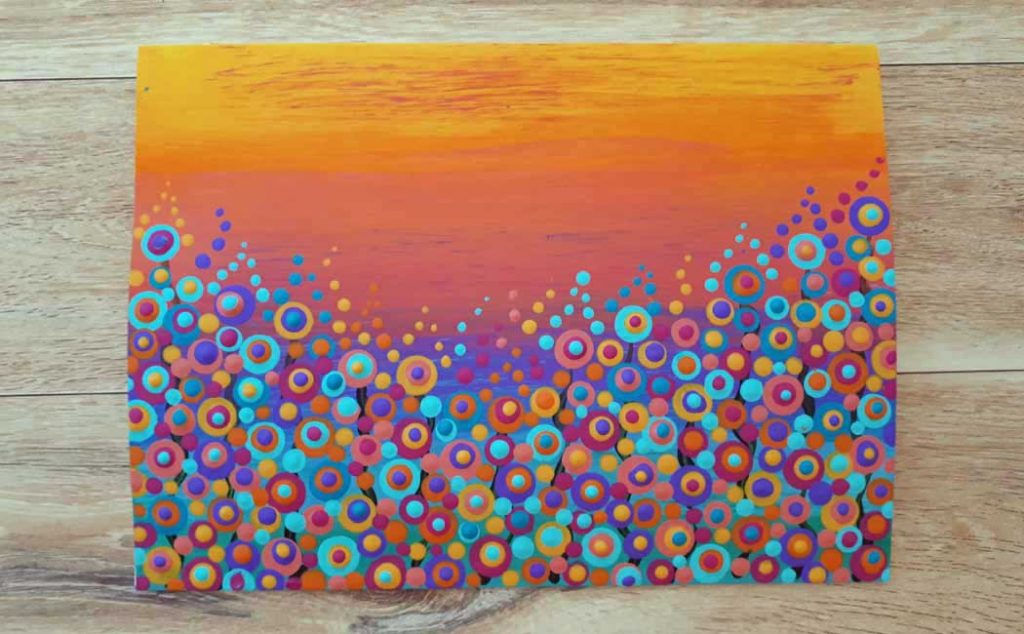
In this Dot Painting Tutorial, you will have so much fun! Dot painting is also very relaxing and I love to do an abstract style of dot painting because there are no rules…I can just be creative without thinking too much. This project can be done as a gift card or a wall hanging. Creating the background is super easy and makes such a beautiful base for this dotting project.
Some (but perhaps not all) of the links in this blog are affiliate links to Amazon.com. As an Amazon Associate, I earn from qualifying purchases. This page contains some affiliate links. Please see my policy page for details. I look for the best possible option for your convenience, however, I encourage you to support your local shops!
While this is a beginner project, I do recommend checking out my tutorial for beginners if you don’t have any dot painting experience at all. Below you will find a list of supplies needed and a couple of video tutorials that will take you step by step through the entire process of making this gift card.
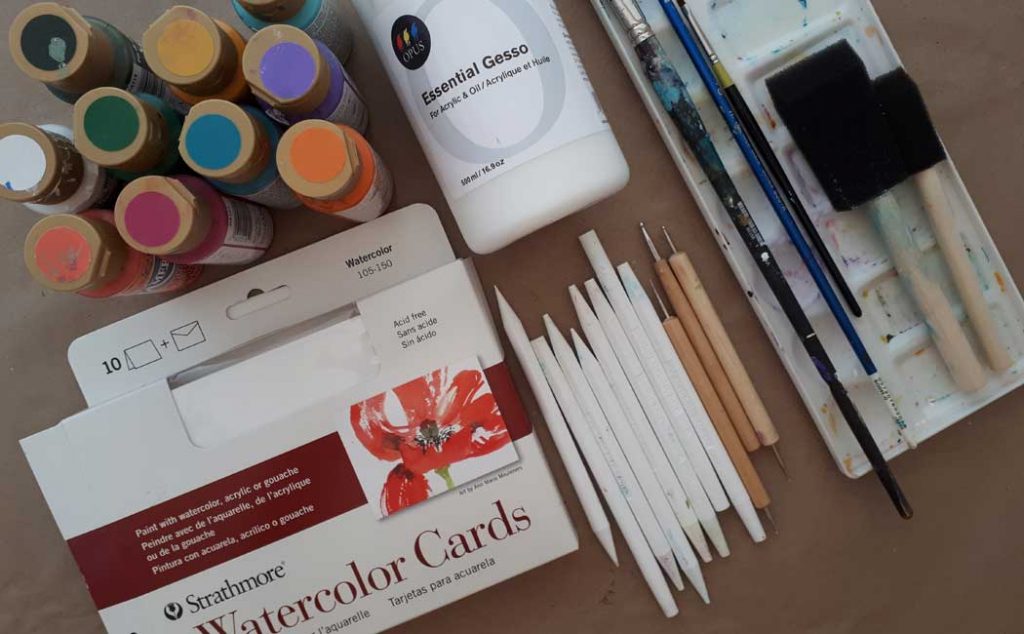
The supplies you will need are:
- Strathmore Watercolor Cards (or art paper or canvas)
- Dot Painting Tools (I love these ones made by DIY Mandala Stones)
- Paint Brushes (superfine, 1/2″ and 1″ in foam and bristle)
- Liquid Gesso
- Americana liquid acrylic paints in the following colors (just a suggestion…you can create your own color palette):
- Saffron Yellow
- Bright Orange
- Coral Blush
- Royal Fuchsia
- Lavender
- Desert Turquoise
- Bahama Blue
- Holly Green
- Plantation Pine
You will also need some paper towel, a damp cloth and a jar of water to clean your brushes in.
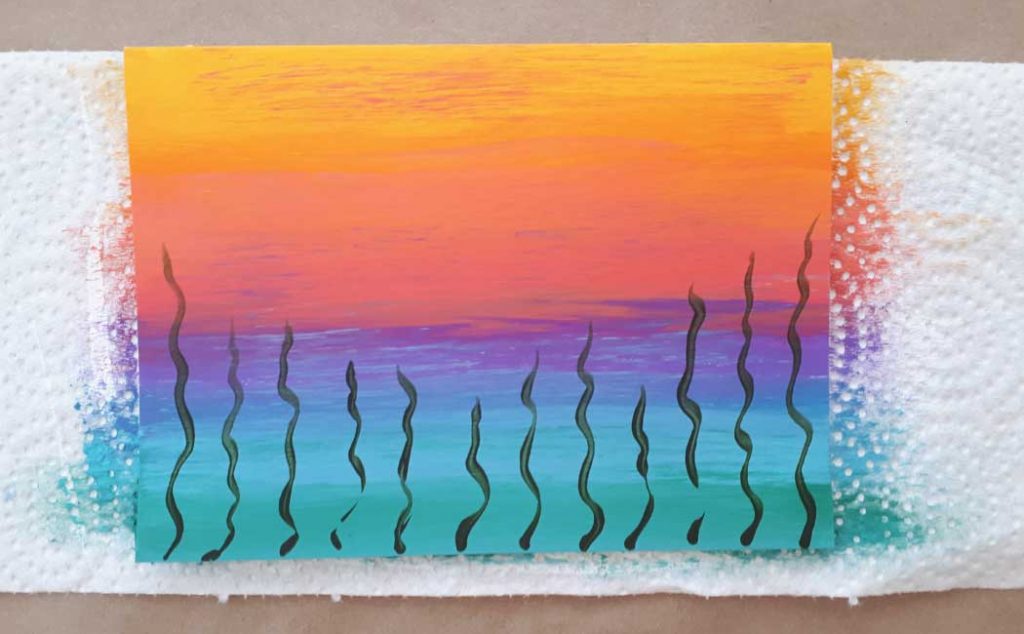
Start by preparing the surface you will be painting on. If you are using canvas, paint a layer of Gesso on the front and let it dry. If you are using a gift card or art paper, paint a layer of Gesso on both sides of the surface. This will help prevent the paper from curling towards the painted side.
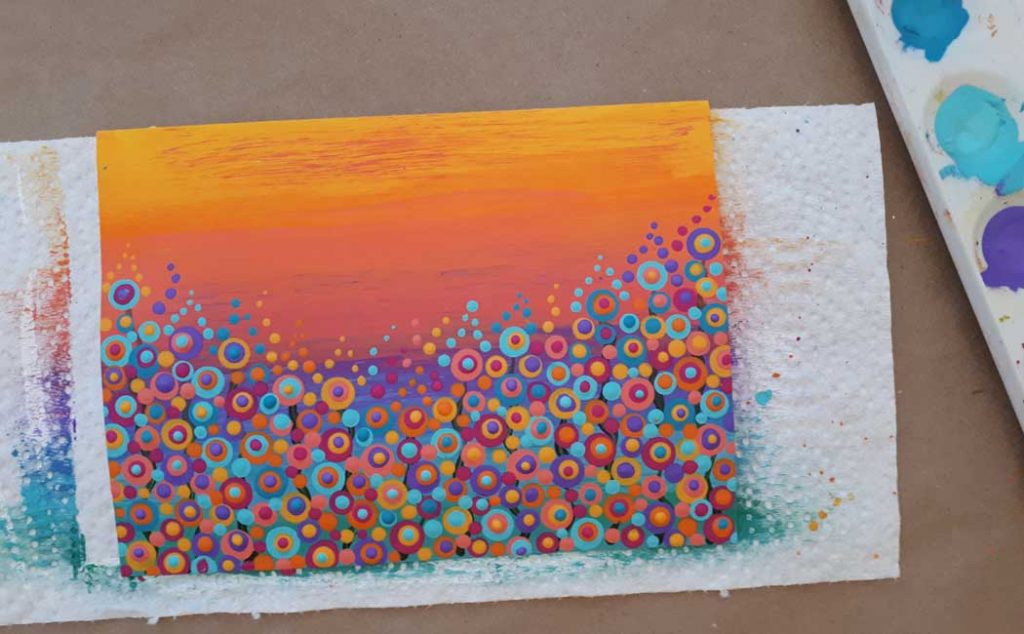
Once the Gesso has dried, you can paint the background by blending each color of paint in rows from the top to the bottom, starting with the saffron yellow and finishing with the holly green. Do two coats. Use the plantation pine to paint the ‘stems’ as shown below.
Start filling in the garden area with large dots of assorted colors (I used size 15 in the DIY Mandala tools), placing large dots at the top of each stem. Then use a smaller tool (size 11) to fill in more garden area and then go to an even smaller tool (size 6) to fill in more area. Let this dry well.
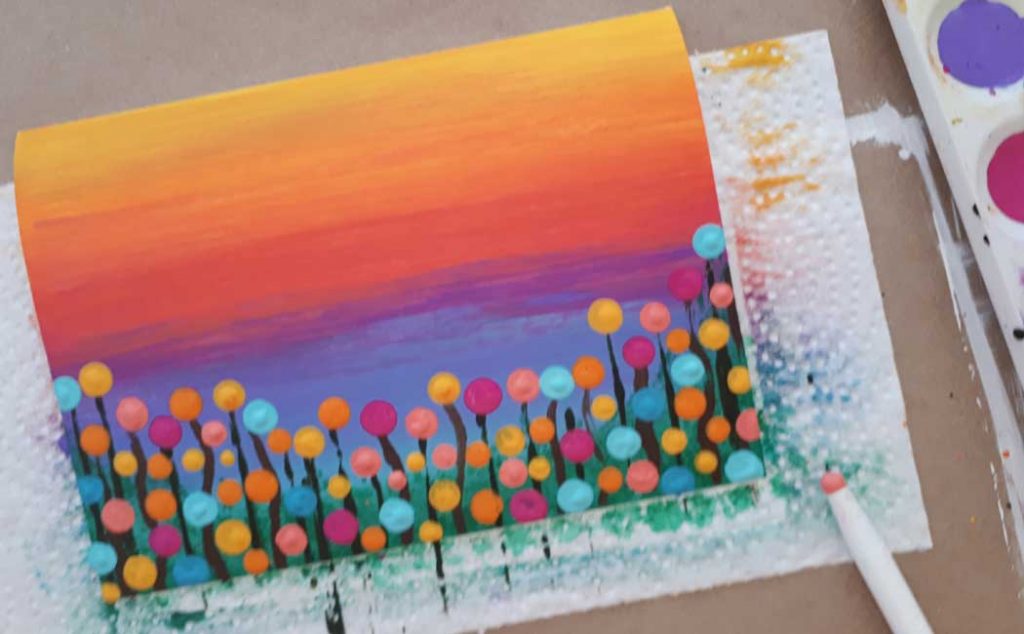
Start to dot inside the largest dots with a smaller tool (size 9), using contrasting colors. Then repeat the same process in the medium size dots using a smaller tool (size 5 or 6). Let this dry well and do a third layer of dots inside the large dots with a very small tool (size 4). Use this same size tool to fill in-between all the other dots, as well as ‘walking the dots’ above the large dots at the top of the stems to create peaks.
It is actually a challenge to write these directions which is why I created a couple of videos to guide you through this whole process. There is much more information provided in both these video tutorials. Check them out!
I hope you have fun with this project! Please subscribe, like and share on Youtube! You can also subscribe to my newsletter so you don’t miss out on any new projects!