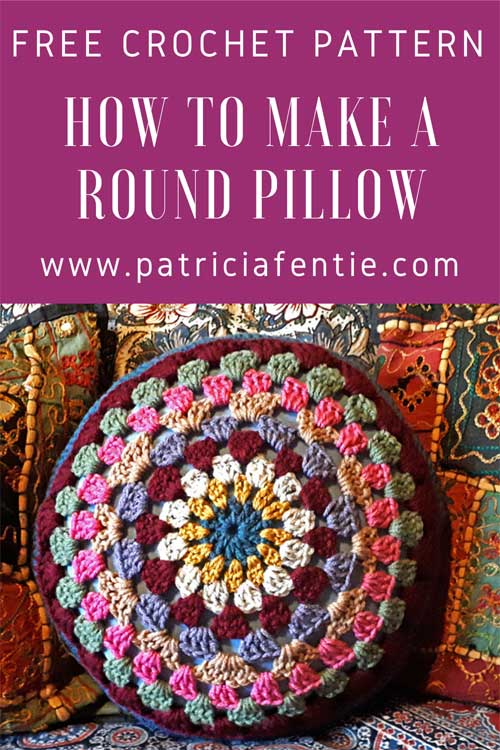
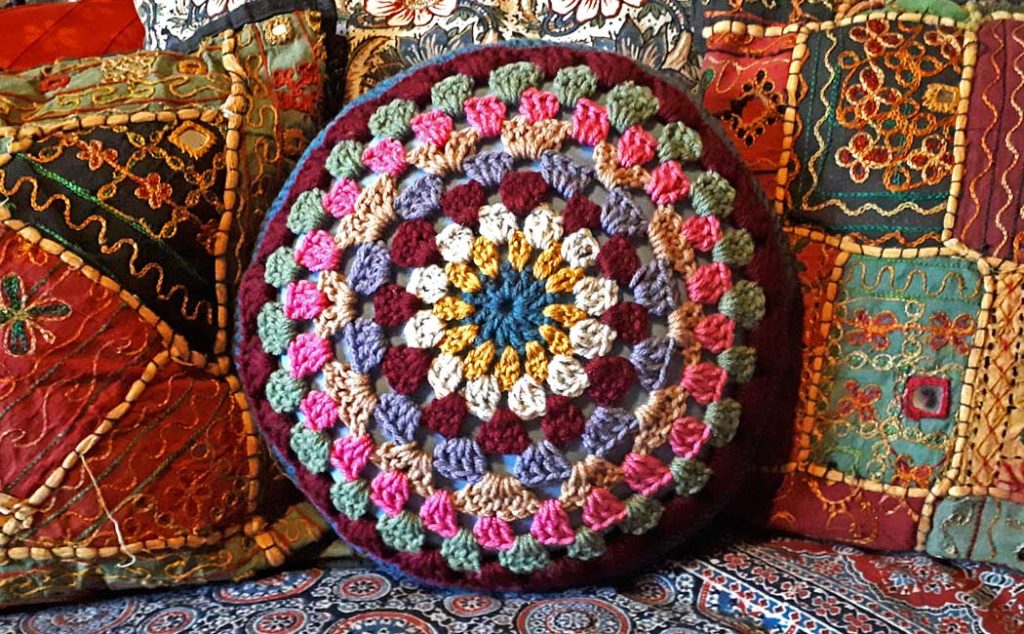
Learn how to make a round crocheted pillow to suit any round motif you like! In this tutorial, I will show you how to make a custom pillow form for your crocheted motifs, and how to join them together to make a lovely round pillow. I do have a pattern for the round crocheted motifs that I am using in this tutorial, and you can find the pattern here.
This project is quite simple and the nice thing about making your own pillow form, is that you can make the pillow the right size for your crocheted motifs. If you have to fit the motifs around a ready made pillow form, it might be a bit tricky to get the motifs the right size. Also, you can choose the perfect color fabric to suit your crocheted motifs.
I have the written directions for this tutorial and I also have a video tutorial at the bottom of this post. Unfortunately, while creating this project, I forgot to take photos of some of the steps. I’ve had to take ‘snapshots’ from the video files, and as a result, some of the photos here are very poor quality. Oopsy!
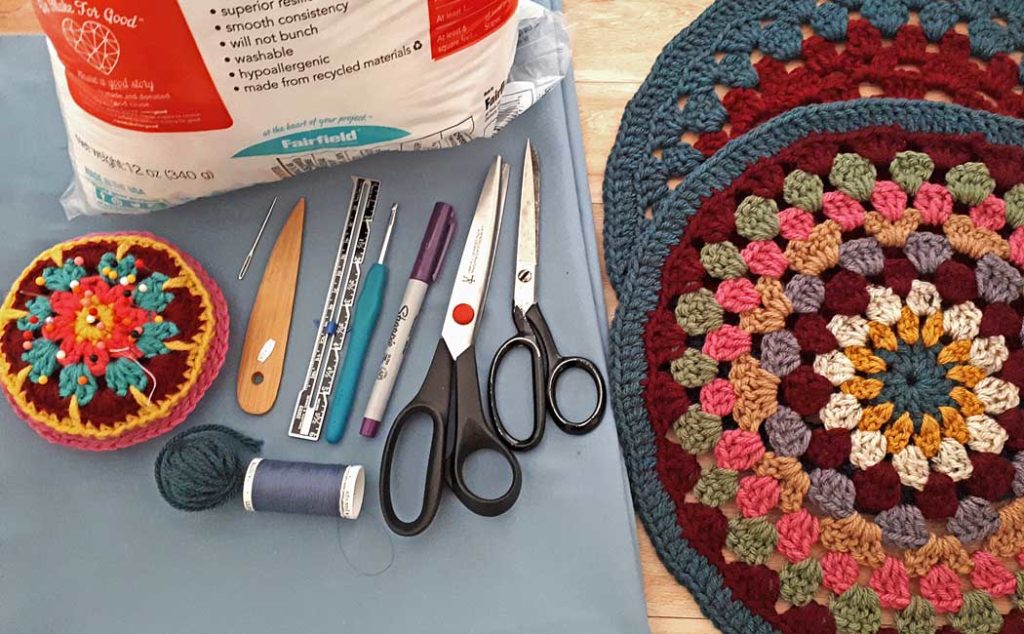
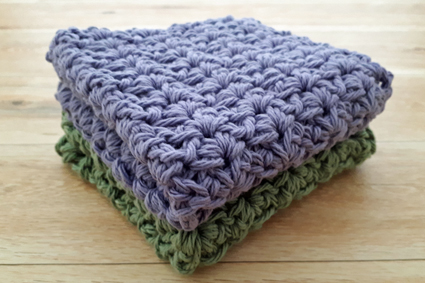
The supplies you will need for this project are two round crocheted motifs of your choice (I recommend they be at least 12″ (30 cm) in diameter). The pattern I am using is 13″ (32.5 cm) in diameter. You can use two motifs that are exactly the same or create different color schemes as I did with mine. In addition to the motifs, you will need:
- fabric
- fabric scissors
- pinking shears (optional)
- ruler or tape measure
- pen or pencil
- wooden point turner seam presser (or chopstick)
- straight pins
- needle and thread
- sewing machine (optional)
- yarn to join motifs
- crochet hook (optional)
- darning needle
- filling for the pillow form
Some (but perhaps not all) of the links in this blog are affiliate links to Amazon.com. As an Amazon Associate, I earn from qualifying purchases. This page contains some affiliate links. Please see my policy page for details. I look for the best possible option for your convenience, however, I encourage you to support your local shops!
Start by placing two layers of fabric right sides together. Pin one of the crocheted motifs to the fabric and draw dots around the motif 3/4″ from the edge. This will create the pillow form pattern that is 1/4″ bigger than the motif, plus a 1/2″ seam allowance. Remove the motif, re-pin the fabric, and cut out the pillow shape.
Sew the fabric pieces together using a 1/2″ seam allowance and leave an opening big enough to fit your hand inside. You can use a sewing machine for this, or you can hand-stitch using the technique I demonstrated in this tutorial here. (it begins at 4:08)
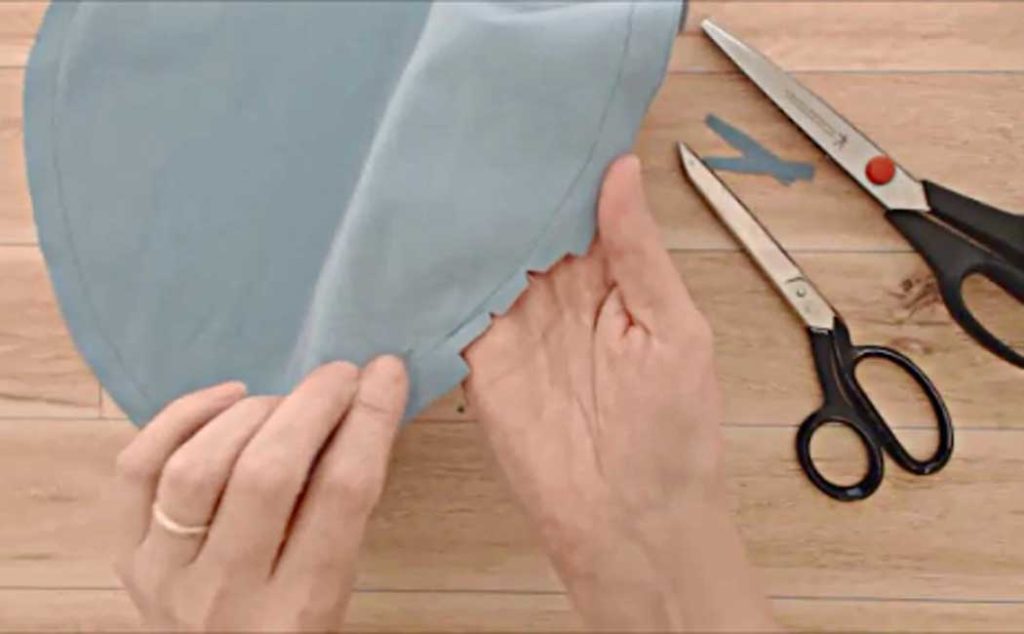
Once you’ve sewn the fabric together, trim the seam allowance to 1/4″ all the way around, except for the opening. Snip a small ‘V’ of fabric about every inch or so all the way around the edge (being very careful not to snip the stitches). If you have pinking shears, then you can skip the above step and just trim the seam allowance using the shears.
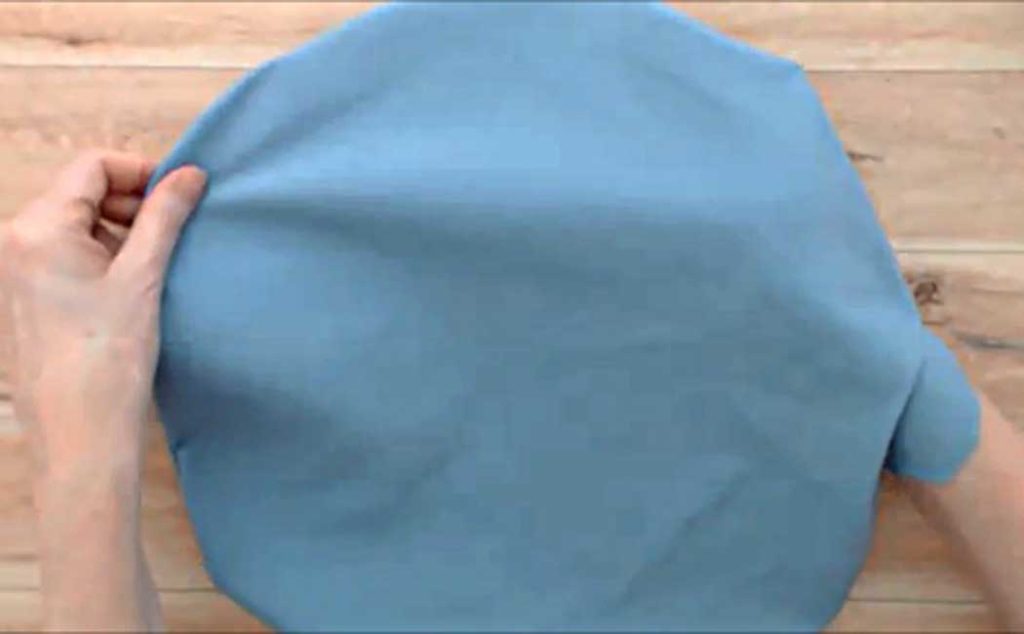
Turn the pillow shape inside out and use the wooden point turner seam presser to press the seam from the inside.

Then stuff the pillow, making it as plump as you can.
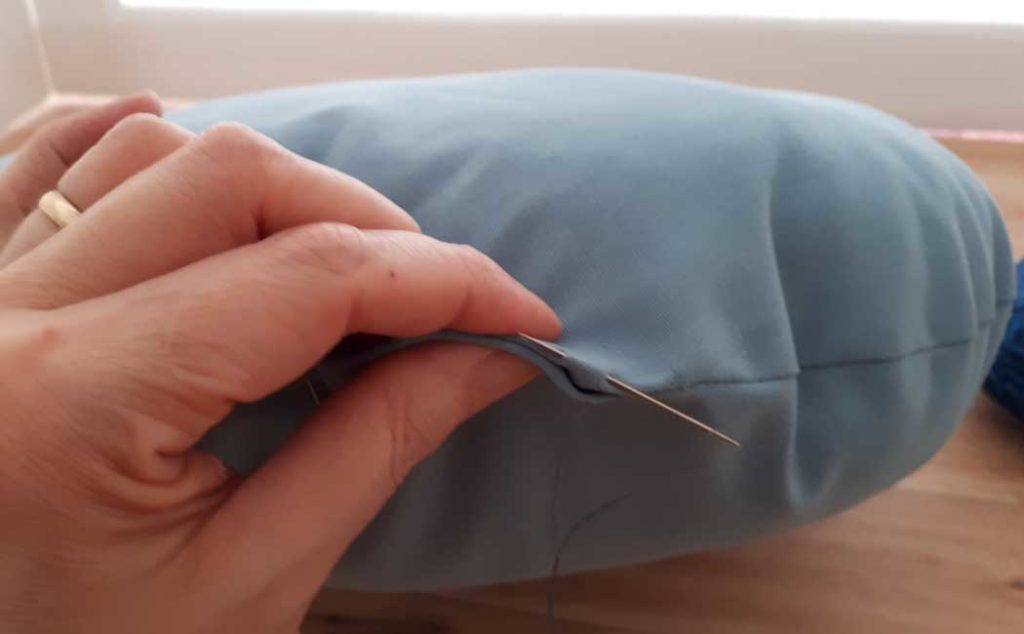
Close the opening using the invisible or ladder stitch. You can do this by placing the needle and thread under the fold of one side of the fabric for about 1/4″. Then bring the needle to the adjacent side and place another stitch under the fold of the fabric, repeat this until the seam is closed. Fasten off at the end. I do show this in detail in the video tutorial.
Now that your pillow form is done, the next step is to join the two crocheted motifs together! I will show you how to use the whip stitch to create the join, but if you prefer to crochet them together, you can check out how to do that in this video tutorial. (the instructions start at 10:35)
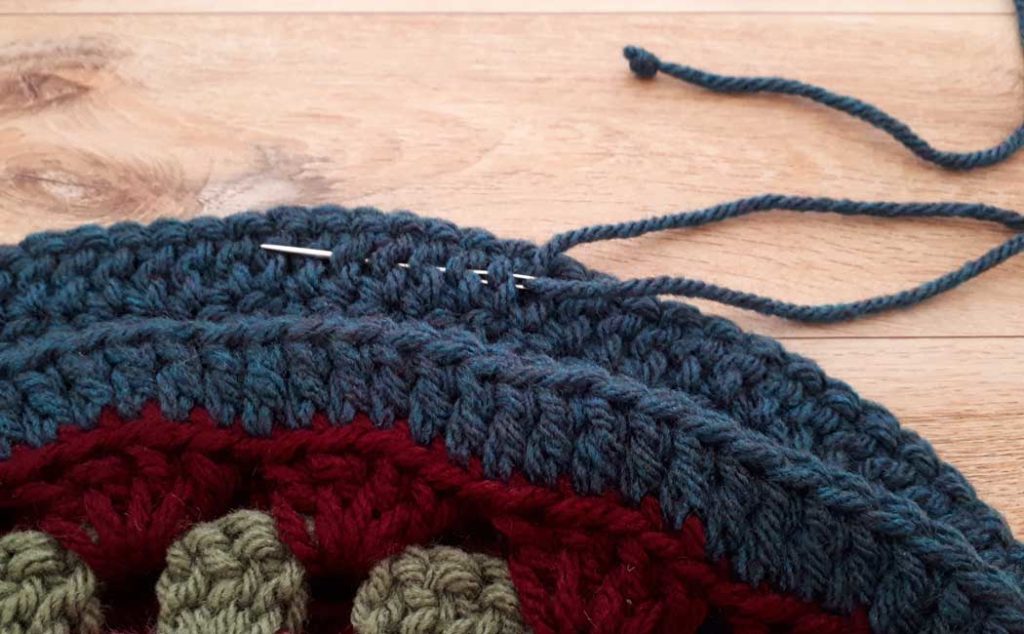
Place the motifs wrong sides together and join a piece of yarn to the inside of the back motif.
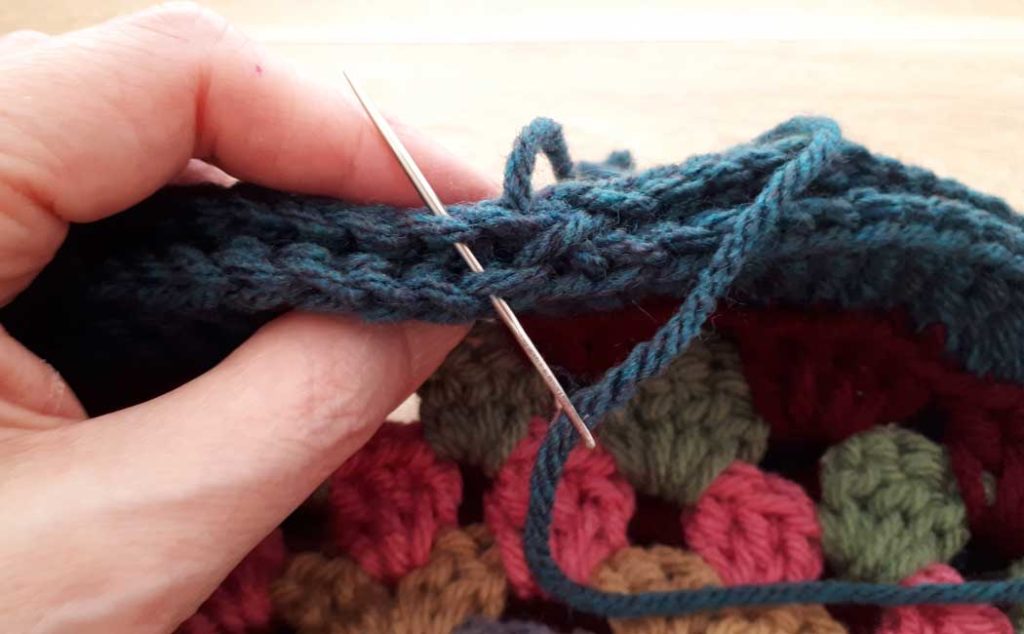
Bring the needle up through the top loop of any stitch of the back motif, coming in from the wrong side and out on the right side. Then, bring the needle from the back motif, overtop the front motif, and pick up the top loop of the adjacent stitch, going in from the front to the back. At the same time, pick up the next stitch (top loop only) of the back motif, going from the back to the front.
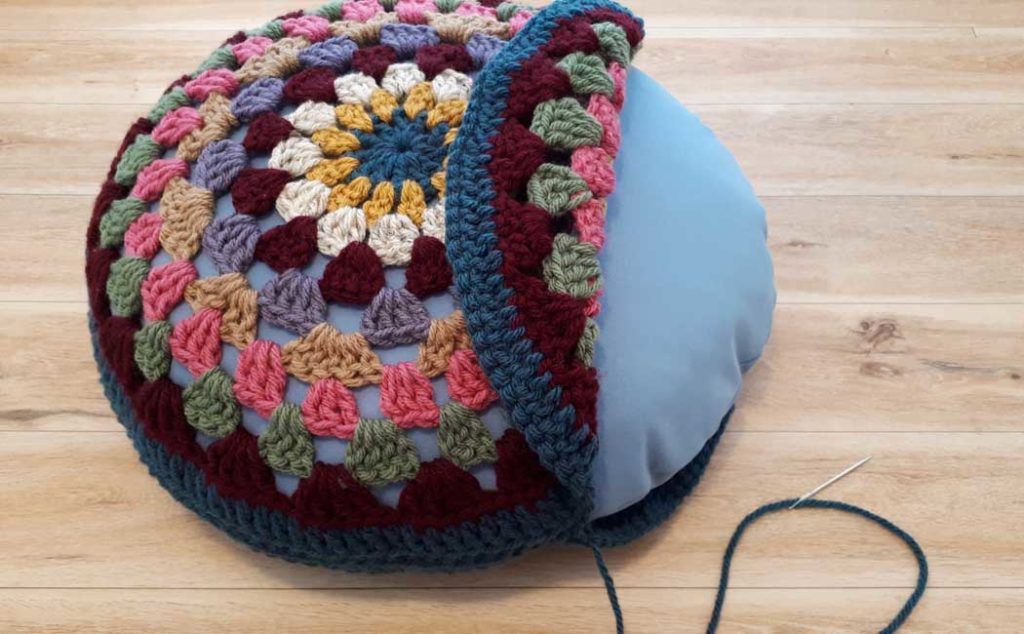
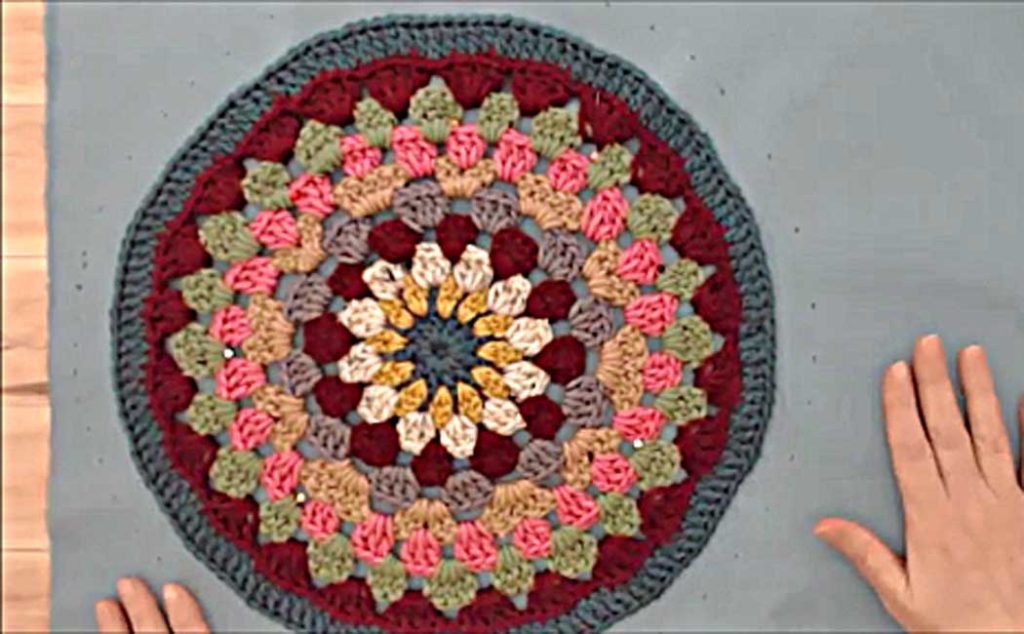
Continue to sew the motifs together in this way, joining on a new strand of yarn as needed, until you’ve gone about 3/4 of the way around. Place your custom pillow form inside the motifs and continue to sew the motifs together.
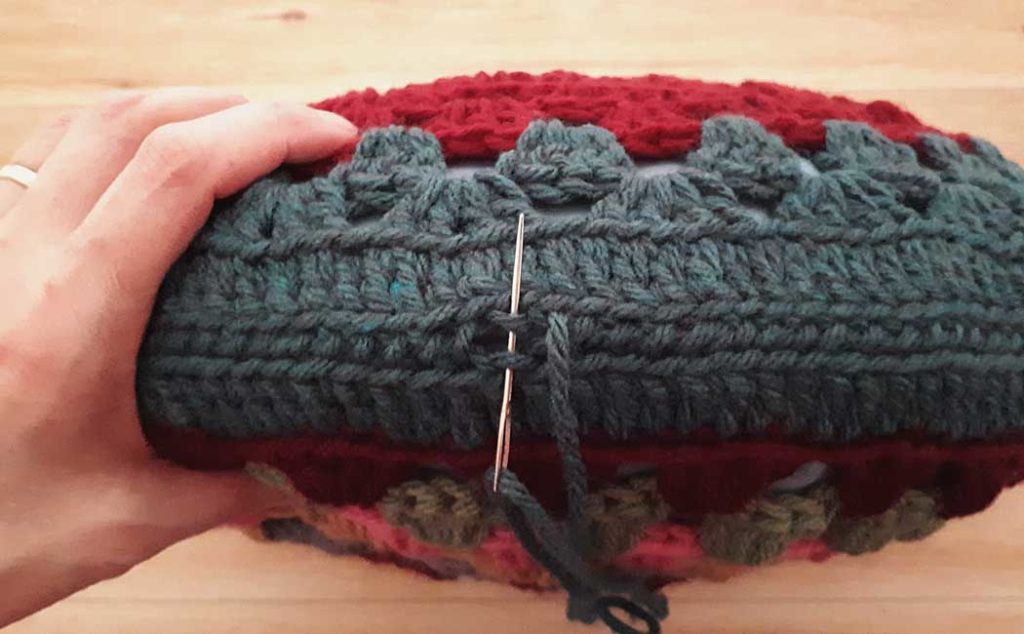
If everything has worked out correctly, you will finish as shown above. Once that stitch is complete, bring the needle down into the front motif and darn the tail end to the inside of the pillow. This will create one final stitch that will make the seam look perfectly balanced. Again, I show this in more detail in the video tutorial.
I hope you enjoyed this tutorial on how to make a round crocheted pillow. I sure love this project and it makes the perfect gift (for yourself of others), or to make for craft sales!
If you like this tutorial, then you may also like:
Sharing is caring…click on the social share button at the top of the page and choose one of these images below to share on social media!