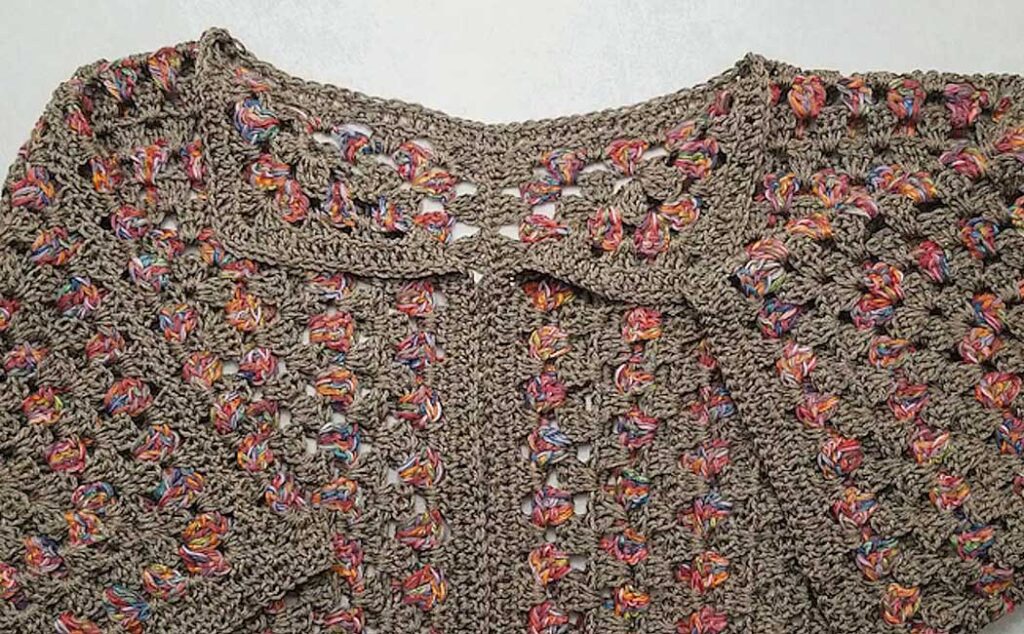
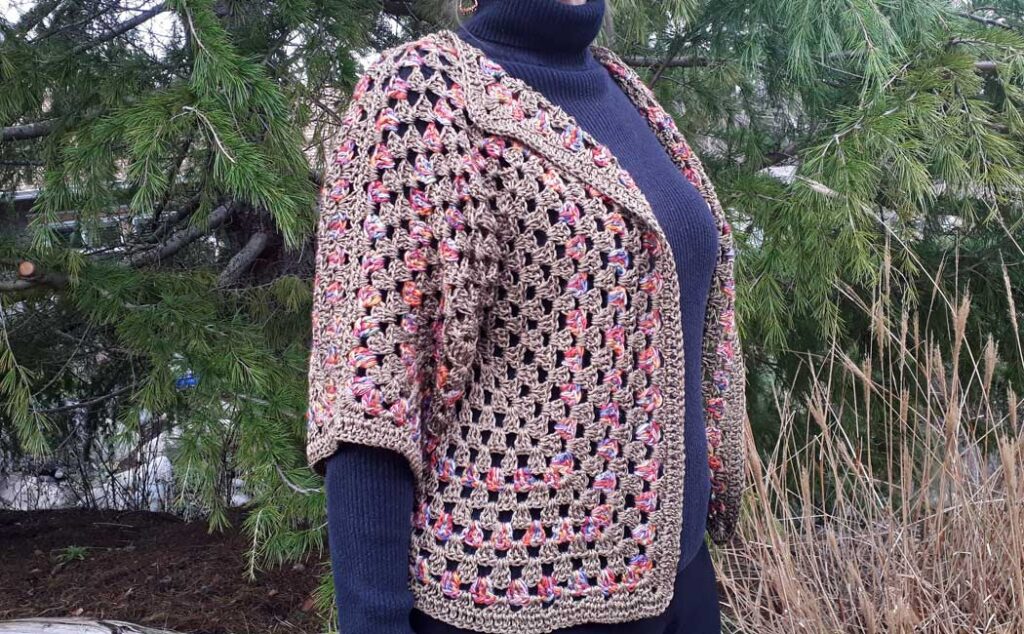
This crocheted hexagon cardigan is super easy to make and can be made with this striped design, using a solid and contrasting color, or you can use a solid, variegated, or self-striping yarn. The cardigan is made using a simple granny square stitch, so this pattern is suited for beginners with a bit of experience. As always, I have a video tutorial to accompany this pattern and that can be found at the bottom of the blog post. If you are new to crocheting, check out my Beginner Crochet Series to learn all the basics!
I am using a number 3 light-weight yarn for this crocheted hexagon cardigan, but you can use a number 4 medium-weight yarn if desired. The number of rounds required to make the cardigan to your size will be less than if using a heavier-weight yarn. I am not giving the exact number of rounds or sizes for this pattern, but I will show you how to calculate the size of the cardigan to fit your own body. I am also using imperial measurements for this pattern, so if you want to convert anything to metric, 1″ = 2.5 cm.
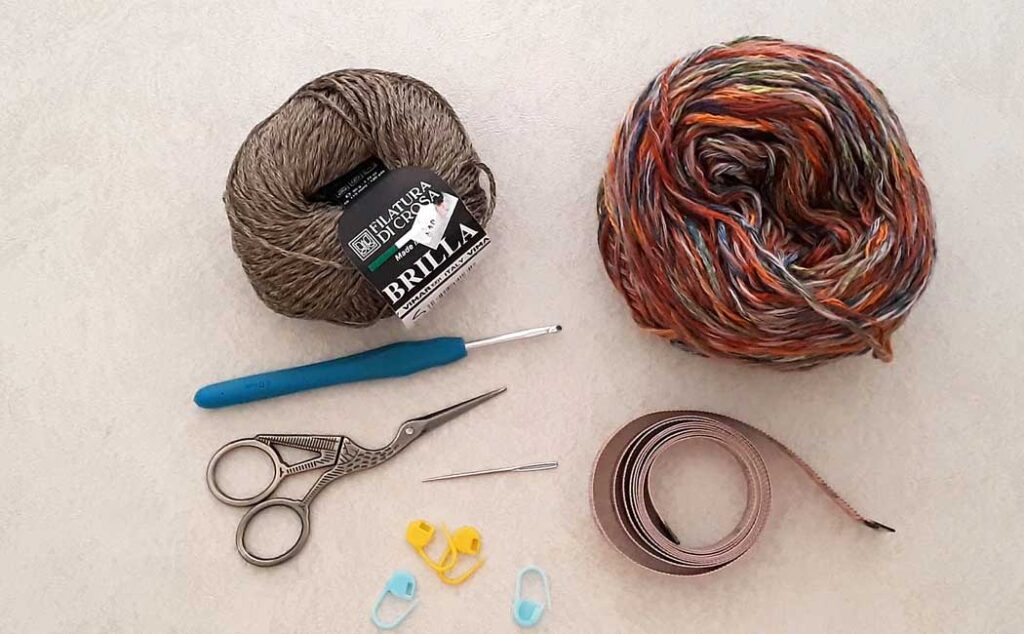
Supply List
- #3 light-weight yarn
- G-6 (4 mm) crochet hook
- Stitch markers
- Darning needle
- Scissors
- Tape measure
- Hand-steamer (optional)
The quantity of yarn used for this project is based on a small to medium size (36″ bust), so allow for more yarn for larger sizes. If using a number 4, medium-weight yarn, the quantity of yarn required will be less.
The yarn I used was from a local yarn shop and is no longer available, but here is something similar from Amazon, although I can’t guarantee the true color of these yarns. It’s probably best to go to your local yarn shop to find something you like.
Some (but perhaps not all) of the links in this blog are affiliate links to Amazon.com. As an Amazon Associate, I earn from qualifying purchases. This page contains some affiliate links. Please see my policy page for details. I look for the best possible option for your convenience, however, I encourage you to support your local shops!
Sizing Calculations
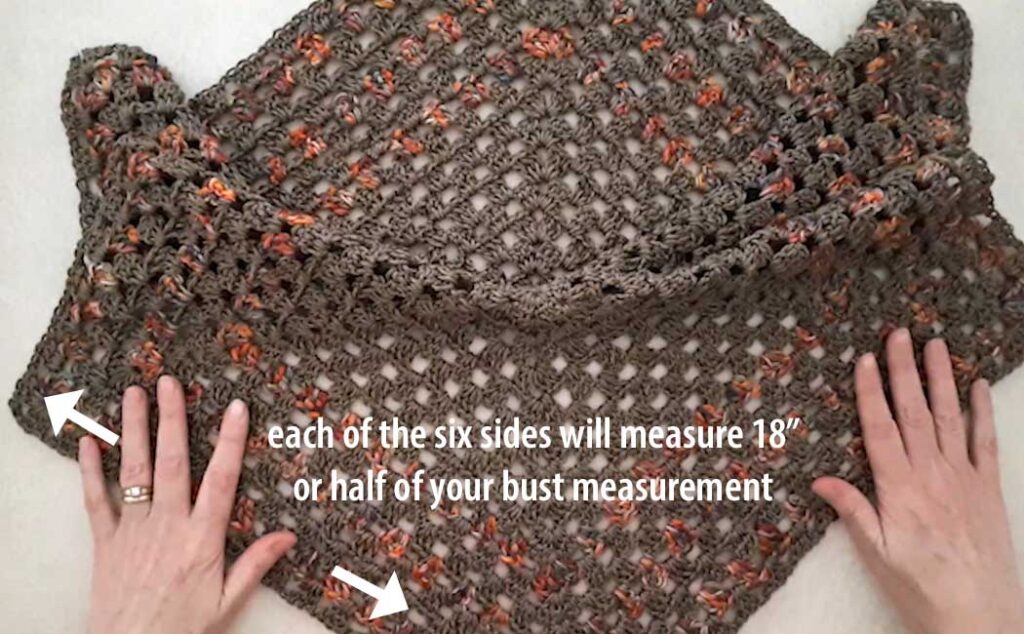
For the cardigan in a solid color, self-striping, or variegated yarn: Measure your bust around the largest part and divide that measurement by two. Crochet continuous rounds of the hexagon pattern until the straight edge of one of the six sides equals that measurement.
For example, if the bust size measures 36″, divide that by 2 to get 18″. Crochet continuous rounds of the pattern until the outside edges equal 18″. Make two hexagons.
To make the crocheted hexagon cardigan with the striped pattern, use the same calculations as above to get the finished size of each hexagon. Follow the pattern as written below for 9 rounds. Bring two opposite points of the hexagon together to make an “L” shape. This creates half of your cardigan! The below image shows this step using a completed panel, but see the image below that for the comparison.

On the finished hexagon, the measurement across the “L” section of the folded piece will be half the size of the side of the hexagon. In the example below, that would be half of 18″, which is 9″. The next part is a bit tricky to figure out how many rounds of the solid color you will need before you start with the accent color for the striped pattern. This is why you need to crochet the first 9 rounds in the solid color in order to get the measurements needed to make the calculations.
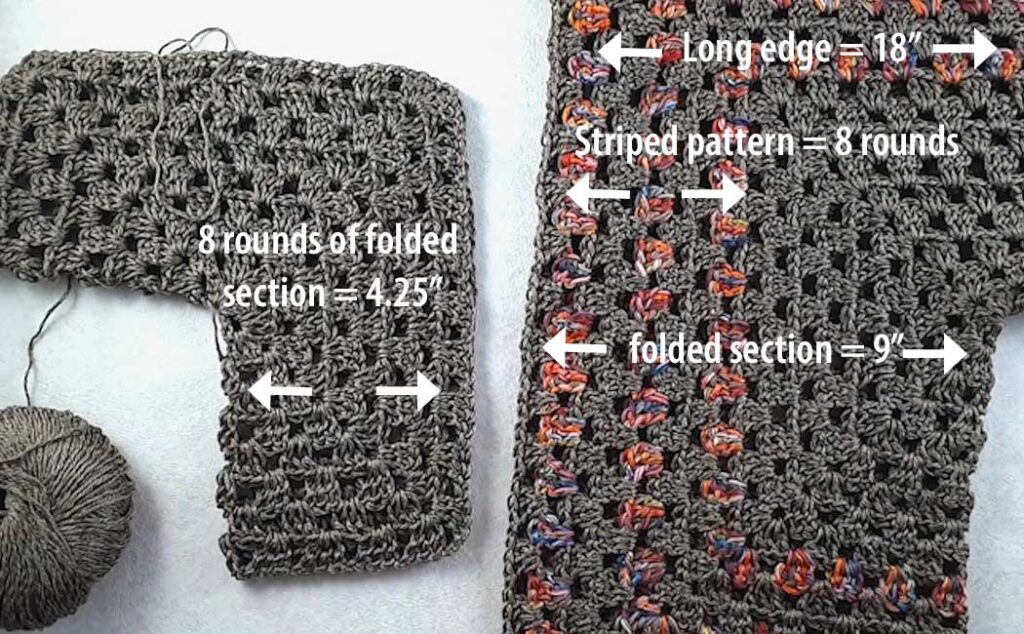
Once you have crocheted 9 rounds, fold it as shown above and measure the width of 8 of those 9 rounds (the 1st of those 9 rounds is hard to measure, so that’s why we did 9 instead of 8). The striped design is created using 8 rounds. The width of those 8 rounds will be specific to you depending on the yarn you are using and your crochet tension. In my example, that measurement equals 4.25″
Subtract that measurement from the finished width of your folded section. In my example, I will subtract 4.25″ from 9″ to get how wide the solid color part of the body should be. That measurement will be 4.75″ in my case. Continue to crochet rounds of the solid color until the body equals this measurement. For my cardigan, the first 9 rounds equal 4.75″, so I would start the striped pattern after round 9.
To give another example, if your bust measurement is 40″, your final long side of the hexagon will be 20″. Once the panel is folded into an “L” shape, the middle section will measure 10″. Subtract 4.25″ (or whatever the measurement of your 8 rounds of the center section are) from 10″. This would be 5.75″, so that is how wide the “L” shape of the middle section needs to be before you start the accent color. Based on my tension and yarn, that would be another 2 rounds of the solid color.
Important note: these measurements are subjective and you can certainly make the garment bigger if desired. I would not make it smaller though, as these measurements are for a more ‘fitted’ garment. If in doubt, add a round rather than subtract one.
The Pattern
Round one: ch 5, join with a sl st to create a ring, ch 3 (counts as first dc), 2 dc in ring, ch 2, [3 dc, ch 2] in ring 5 times (6-3dc clusters), join with a sl st into the 3rd ch of beg ch3, turn your work.
Round two: ch 3 (counts as first dc), [2 dc in first ch2 sp, ch 2, 3 dc in same ch2 sp, ch 1] (first corner made) *[3 dc, ch 2, 3 dc, ch 1 in next ch2 sp], repeat from * 4 times (6 corners made), join with a sl st into the 3rd ch of beg ch3, turn your work.
Round three: ch 3 (counts as first dc), 2 dc in first ch1 sp, ch 1, *[3 dc, ch 2, 3 dc, ch 1] in next ch2 sp, [3 dc, ch 1] in next ch1 sp, repeat from * 4 times, [3 dc, ch 2, 3 dc, ch 1] in last ch2 sp, join with a sl st into the 3rd ch of beg ch3, turn your work.
Round four to nine (if doing the striped pattern), repeat round 3, increasing the number of 3dc clusters along the straight edge for each round. Once you’ve made your calculations, continue to add rounds in the solid color (if needed), until your center section is the right size. Then, carry on with the striped pattern as shown below.
If you are using one color, continue repeating round 3 until one of the straight edges equals half the measurement of your bust measurement. Make two hexagon panels.
Then the striped pattern will be as follows:
- accent color x 1 round
- solid color x 2 rounds
- accent color x 1 round
- solid color x 2 rounds
- accent color x 1 round
- solid color x 1 round only
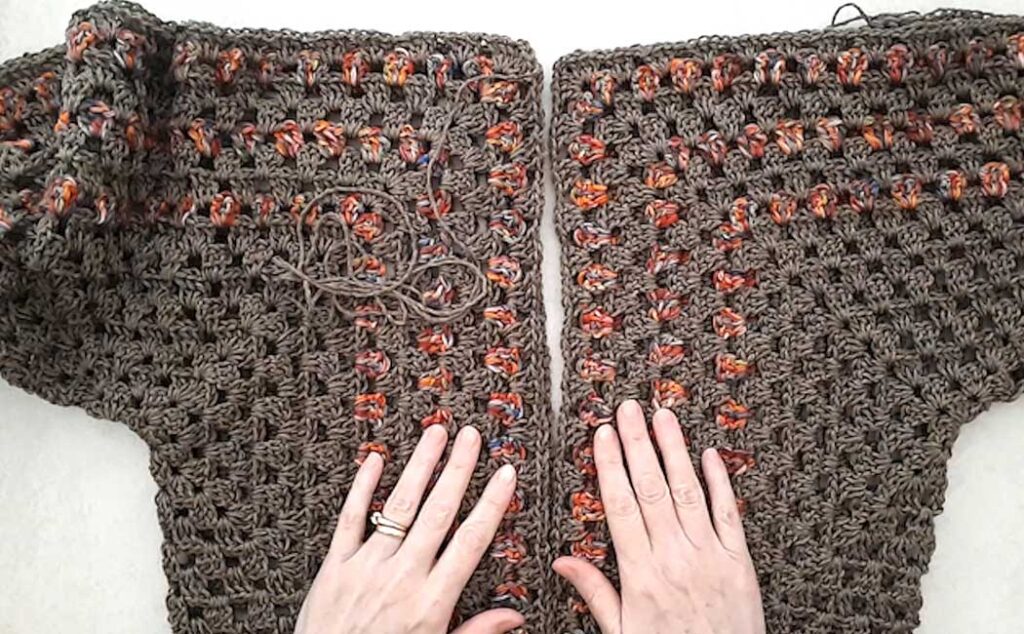
Once you have two hexagon panels made, lay them out as shown above and sew the back seam and shoulder seams together using a whip stitch (or stitch of your choice). I show how to do that in the video tutorial starting at 21:05.
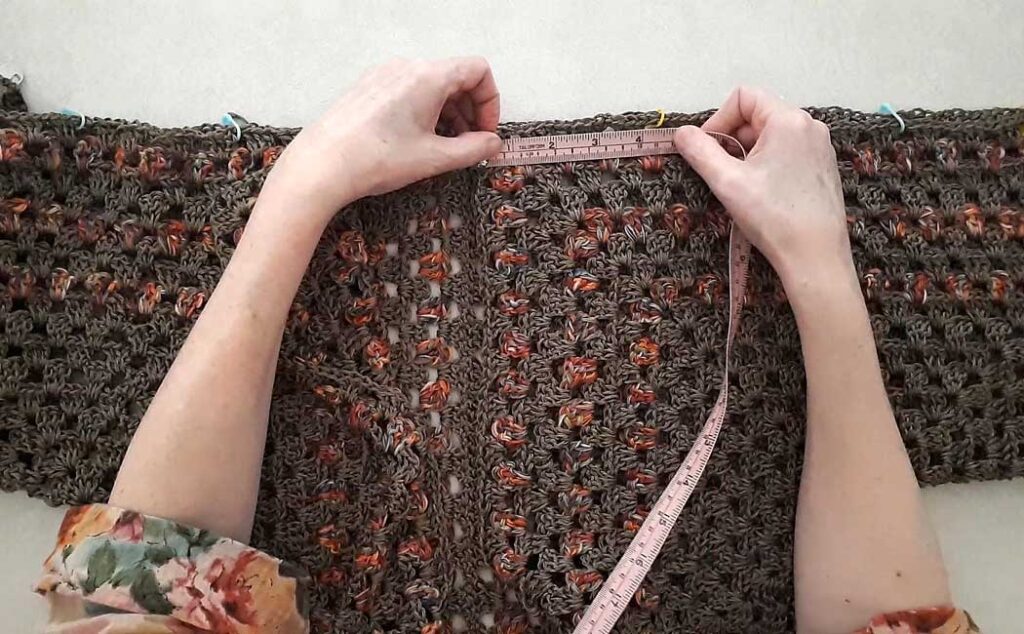
You can custom fit the shoulder seams, and I do talk more about this in the video tutorial starting at 29:15. I left a neck opening of 4.25″ from the front edge for a nice collar. You can pin the shoulder seam together to see what works best for you.
Finishing edge
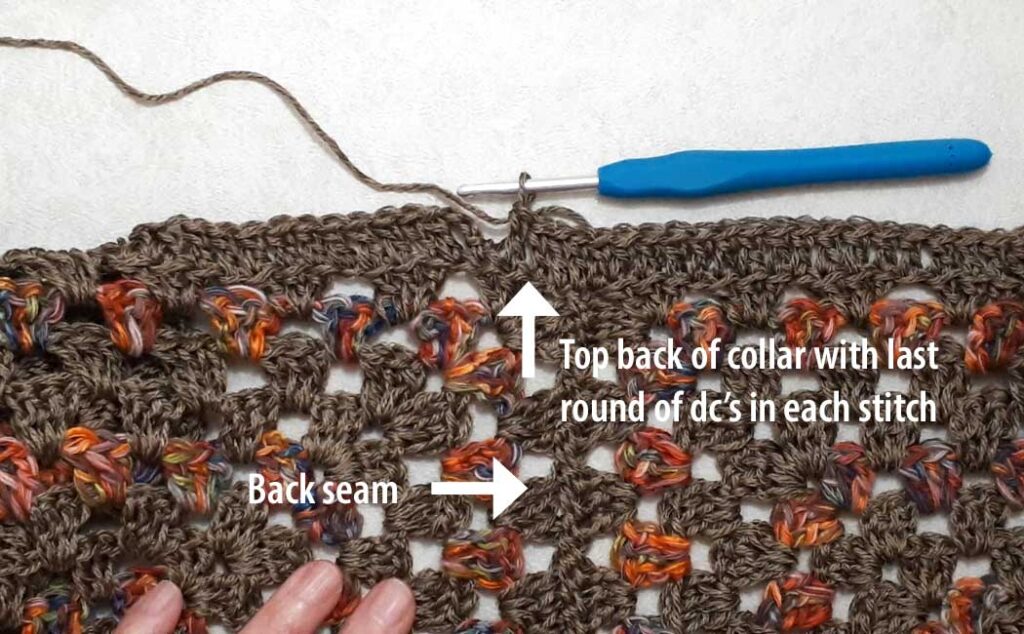
Working into the back of the crocheted hexagon cardigan, along the top of the collar, with the right side facing you, join on the solid color with a slip stitch into the back loop and back bump of any stitch.
Ch 3 (counts as first dc), 1 dc in the back loop, and back bump of each st to the first inside corner. Stop 1 stitch before the shoulder seam. Work a 3dctog into the next 3 sts including the seam stitch [beg 1st dc in 1st st, yo pull through 2 loops only (2 loops on hook), beg 2nd dc in st of shoulder seam, yo pull through 2 loops only (3 loops on hook), beg 3rd dc in 3rd st, yo pull through 2 loops only (4 loops on hook), yo pull through all 4 loops on hook]. (see 33:50 in the video tutorial if needed)
Continue working 1 dc in the back loop and back bump of each st until you reach the next outside corner (ch2 sp). 5 dc in ch2 sp. Repeat this pattern all the way around, working 5dcs in each outside corner and another 3dctog into the other side of the inside neck edge. Fasten off with a ch 1 or use the invisible stitch shown in the video tutorial at 37:16.
Repeat the same stitch pattern around the sleeves and darn in all your tail ends. The yarn I used was a bit slippery, so I actually did a knot first and then darned in the ends.
Extra tips
For how to join on a new ball of yarn or new color without a knot, see 17:50 in the video tutorial
For how to join a new ball of yarn or a new color using the magic knot, see this video tutorial.