Learn how to crochet this cute granny square poncho for toddlers! In this free pattern, you will learn how to make the granny squares, how to lay the pattern out, how to join the squares together, and how to finish the collar and bottom edge. There are options for three different sizes.
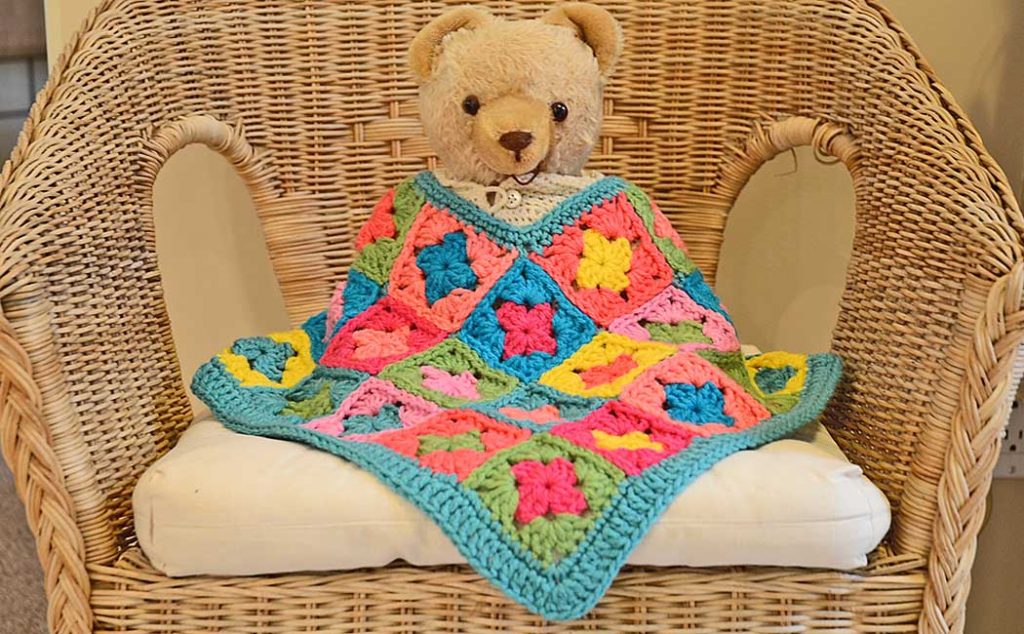
The tutorial is divided into two parts because while this is an easy project and is suited for beginners, there are a lot of steps involved. It was too much to fit into one post. I don’t have any toddlers around that I can use as models for the poncho, but I do have my husband’s little teddy bear to fill in! This gives you a good sense of the size of the poncho. You can find Part Two of the tutorial here.
You can use any yarn you like for this project. I am using a number 4 medium weight acrylic yarn in the Bernat Super Value and Premium line. This yarn is great to use because it is easy to work with, is fairly inexpensive, and is very durable! The Premium line doesn’t seem to be available through Amazon or Yarnspirations, but I was able to find mine at Walmart.
Some people complain about the Bernat yarn being stiff, but once you wash the yarn, it softens up considerably. I don’t recommend using any ‘softening’ products like dryer sheets or laundry detergents because those products contain synthetic ingredients that can be harmful to your health.
Most people don’t realize how toxic synthetic fragrances, cleaning agents, and softening agents are! If you want to learn more about this, I wrote an article called Are Commercial Laundry Products Making You Sick? After you read this, you may not want to expose yourself or your precious little ones to such toxic chemicals!
I also have a tutorial on how to make Natural Dryer Sheets, which are also great to help soften fabric. There are so many natural alternatives these days that it is completely unnecessary to use any synthetic laundry or cleaning products!

The supplies you will need for the Granny Square Poncho for Toddlers are:
- Assorted colors of a number 4 medium weight yarn. These are the colors I used and you can substitute similar or different colors!
- Bernat Super Value Peony Pink
- Bernat Super Value Aqua
- Bernat Premium Coral Peach
- Bernat Premium Hot Pink
- Bernat Premium Teal
- Bernat Premium Spring Green
- Bernat Premium Gold
- Cascade Yarns Anthem 09
- Crochet hooks in sizes E-4 (3.5mm), G-6 (4mm) or 7 (4.5mm) depending on garment size.
- Scissors
- Darning Needle
Some (but perhaps not all) of the links in this blog are affiliate links to Amazon.com. As an Amazon Associate, I earn from qualifying purchases. This page contains some affiliate links. Please see my policy page for details. I look for the best possible option for your convenience, however, I encourage you to support your local shops!
If you are new to crochet, check out my Beginner Crochet Series where you will learn all the techniques and stitches required for the project.
The poncho I am making is for 12 to 18 months which is a medium toddler size. You can make this poncho to fit 6 to 12 months, 12 to 18 months, and 18 to 24 months. To do this, you simply have to make your granny squares a certain size. This can be done in two ways…adjust the size of the yarn or use a different size crochet hook. It also depends on your tension, so you will have to make some sample squares to get the right size.

A smaller hook and yarn will create a smaller square, and of course, a larger yarn and hook will make a larger square. For this project, you could probably just go down one size hook for the infant poncho and up one size for the large toddler. The size of the squares should be:
- Infant = 2.5″ (6.5cm) with an E-4 (3.5mm) crochet hook
- Medium Toddler = 2.75″ (7cm) with a G-6 (4mm) crochet hook
- Large Toddler = 3″ (7.5cm) with a 7 (4.5mm) crochet hook
The stitches required for this project are a chain stitch (ch), a slip stitch (sl st), a slip knot, single crochet (sc), and double crochet (dc).
Begin with a ch 5 and sl st into the beg ch1 to create a ring.
Round One: Ch 3 (counts a first dc), 2 dc in ring, ch 2, *3 dc in ring, ch 2.

Repeat from * two more times. Join round with a sl st into the 3rd ch of beg ch3. Ch 1 to fasten off.

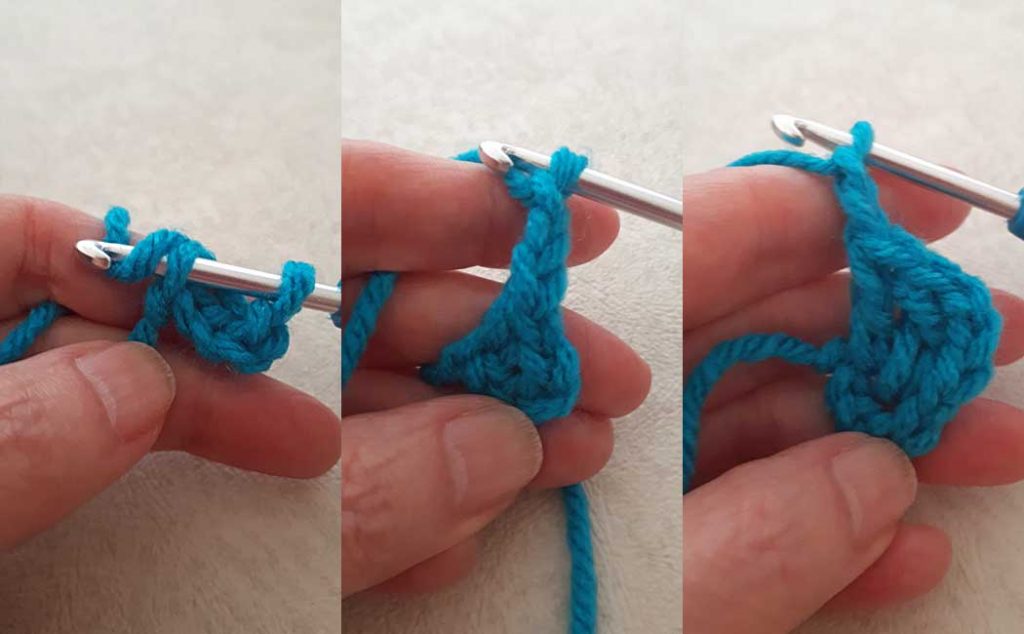
Round Two: Join new color with a slip stitch in any ch2 sp (put the slip knot on hook, place hook through ch2 sp, grab the yarn and bring it through the ch2 sp and complete sl st). Ch 3 (counts as first dc), 2 dc, ch 2, 3 dc in ch2 sp, ch 1.
*3 dc, ch 2, 3 dc in next ch2 sp, ch 1, repeat from * two more times.
Do not fasten off. Cut tail about 4″ (10cm) in length and thread onto the darning needle. Bring the needle from the back of your square into the top two posts of the 3rd ch of beg ch3. Then bring the needle down in between the V-stitch of the previous ch1 into the back of your work. Mimic a stitch with the yarn. Darn in the tail ends. This creates a ‘knotless’ finish which is nice when joining squares together.
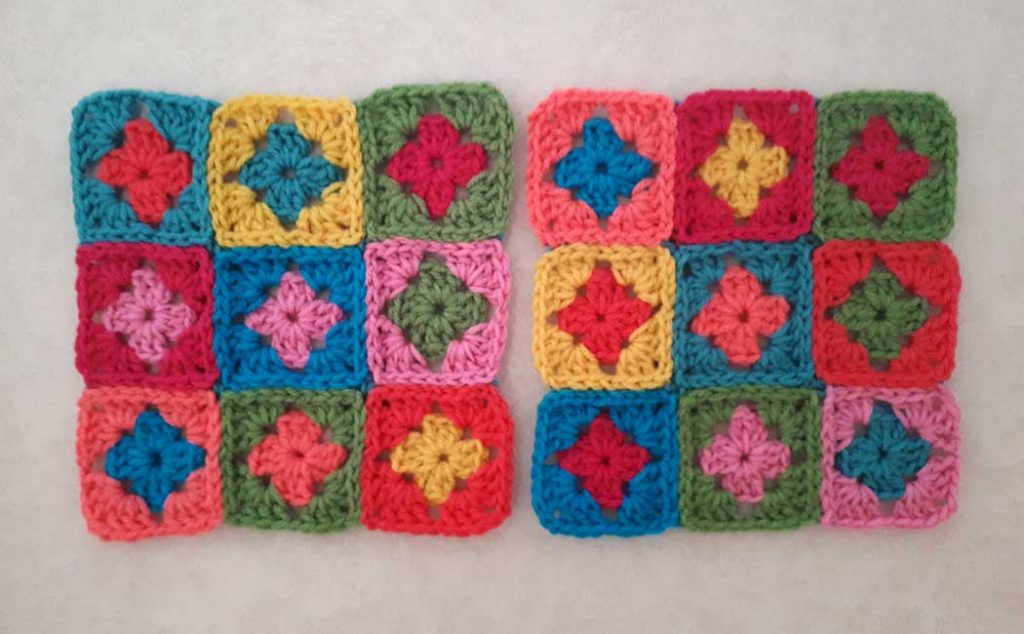
You will need a total of 36 squares in assorted colors. You can see the color combinations I used above. There will be two blocks of 9 squares with assorted colors. There are some duplicates in each block. These two blocks will be joined together to create one panel with 18 squares in total. You will create two panels with the same color scheme. I address color in more detail in the video tutorial if you want to check that out.
The sizes of the blocks and panels will be as follows:
- Infant: block = 7.5″ by 7.5″ and panel = 7.5″ by 15″
- Medium Toddler: block = 8.25″ by 8.25″ and panel = 8.25 by 16.5″
- Toddler: block = 9″ by 9″ and panel = 9″ by 18″
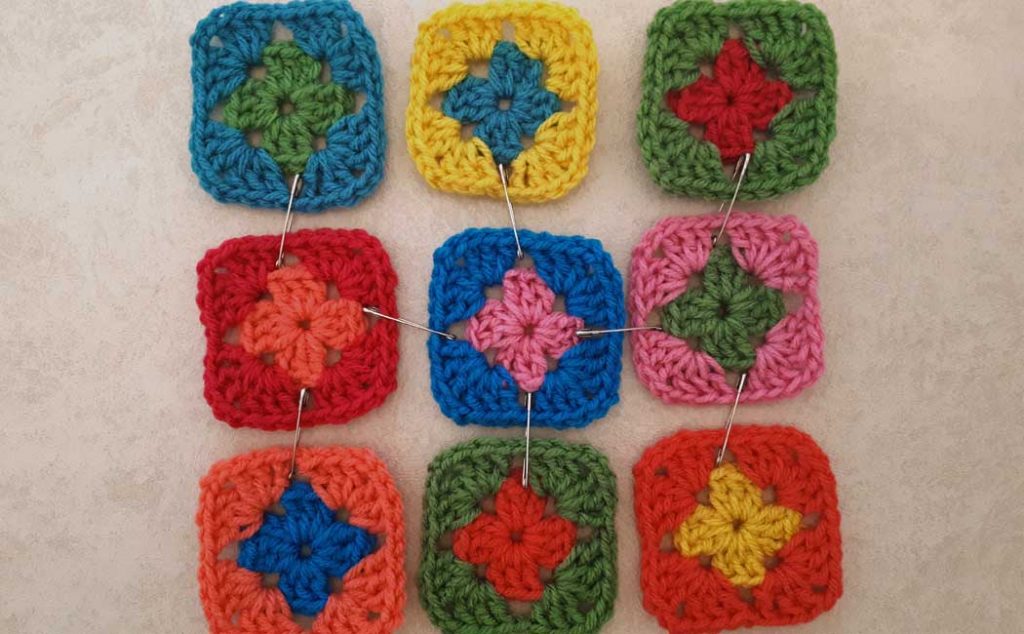
It’s a good idea to pin your squares together and take a photograph of the blocks and panels once you have them all laid out. It can be very easy to get them mixed up! You can join your squares together any way you like, but I am using an invisible whipstitch that will be worked from the back of the squares.
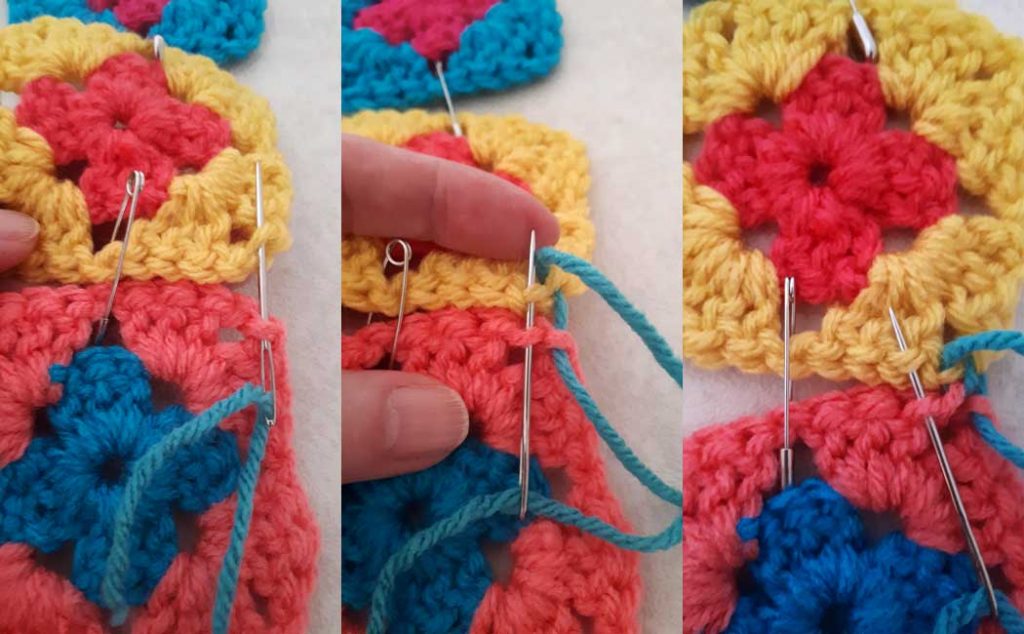
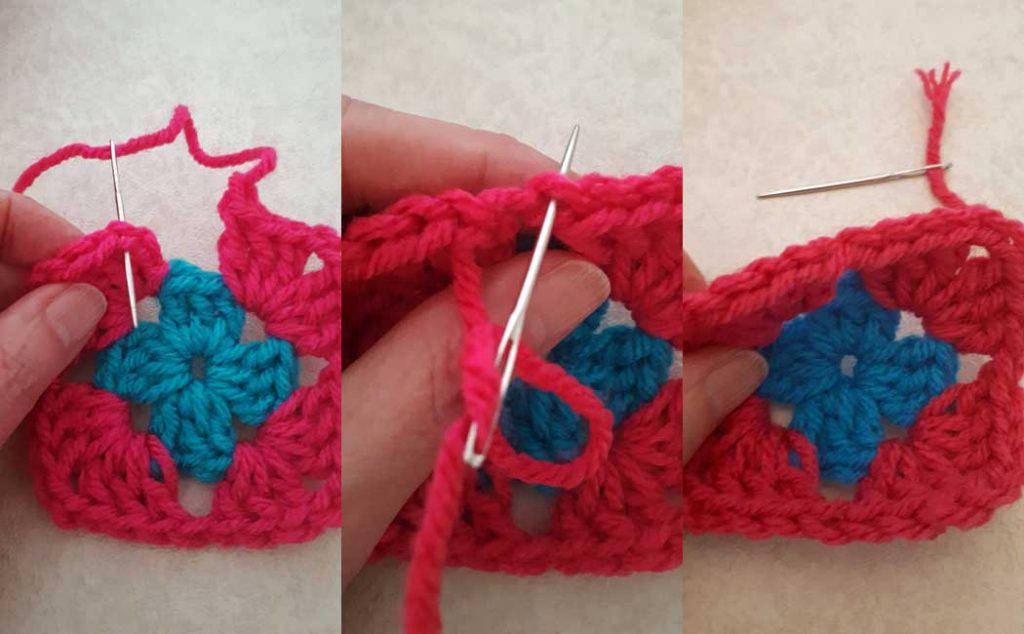
Start by joining one row of three squares together, working on the wrong side. Cut a piece of yarn three times the length of a square and thread that onto a darning needle (I’m using the Auqu to join the squares and finish around the poncho). Bring the needle under the back post of the first ch2 on the outside corner of the square closest to you (this is not the V-stitches on the top of the square, but the bump on the back of the stitch). Pick up the same stitch on the adjacent square. Bring the yarn through and repeat on the next stitch, with the needle going in the direction shown in the image above.
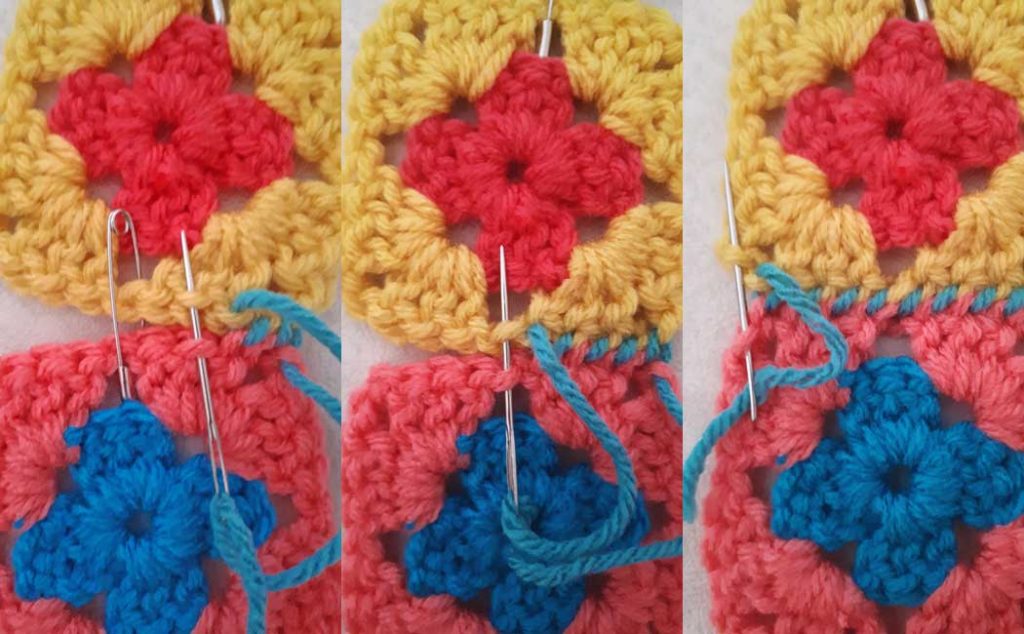
Continue to whipstitch along the back, picking up the back bump of each stitch. Be careful in the ch1 sp because it can be easy to pick up one of the top V-stitches by mistake.
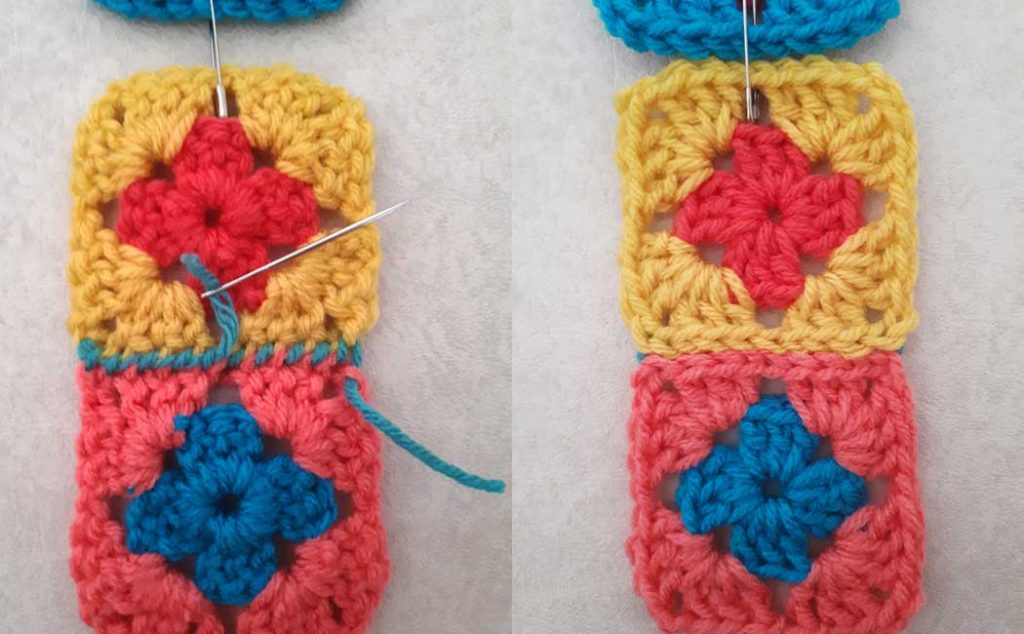
Whipstitch all the way across including the two chains in the corners. Darn in your tail ends. See how nice that looks from the top! The Aqua yarn will show a little bit, but with all the different colors in the poncho, it will blend in nicely.
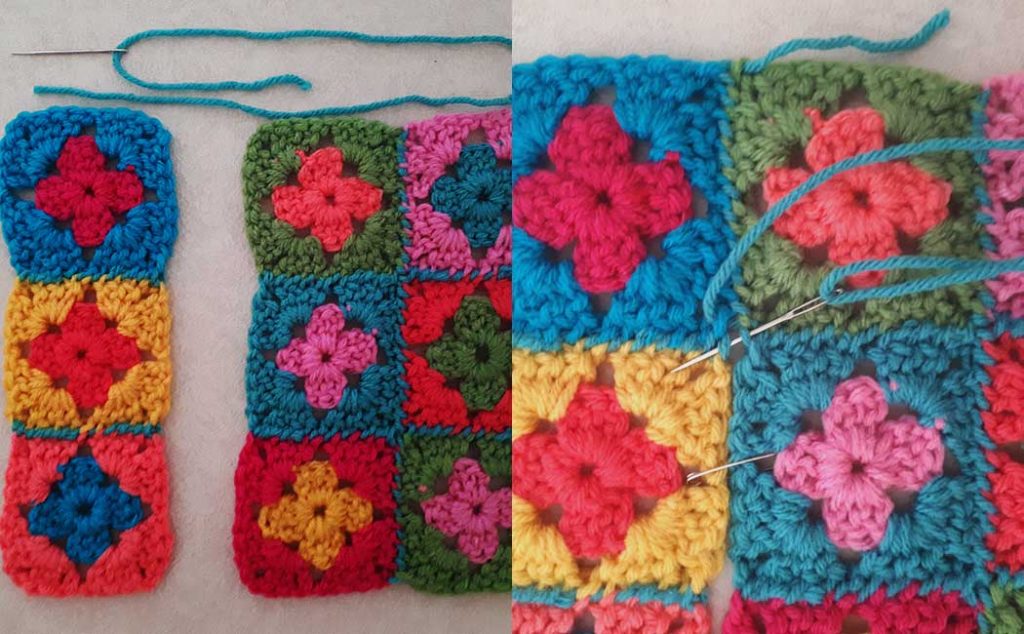
Once you’ve joined three rows of each block, join each of the three rows together to complete one block. Cut the yarn about two and a half times the length of the row. When you come to an intersection of squares in each row, make sure to pick up the Aqua yarn at the end of the squares that you’ve already sewed together. This helps to make a nice join in the intersection of the squares.

Once you’ve completed each block, join the two blocks together to make one panel. Repeat the process to make two panels in total. This completes Part One! In Part Two, we will join the two panels together to create the poncho shape and then finish the neck edge and border.
As always, I’ve created a video tutorial to go along with this post for your convenience. If some of these directions are confusing, then you can check out the video for easier instructions. Check out Part Two Here!
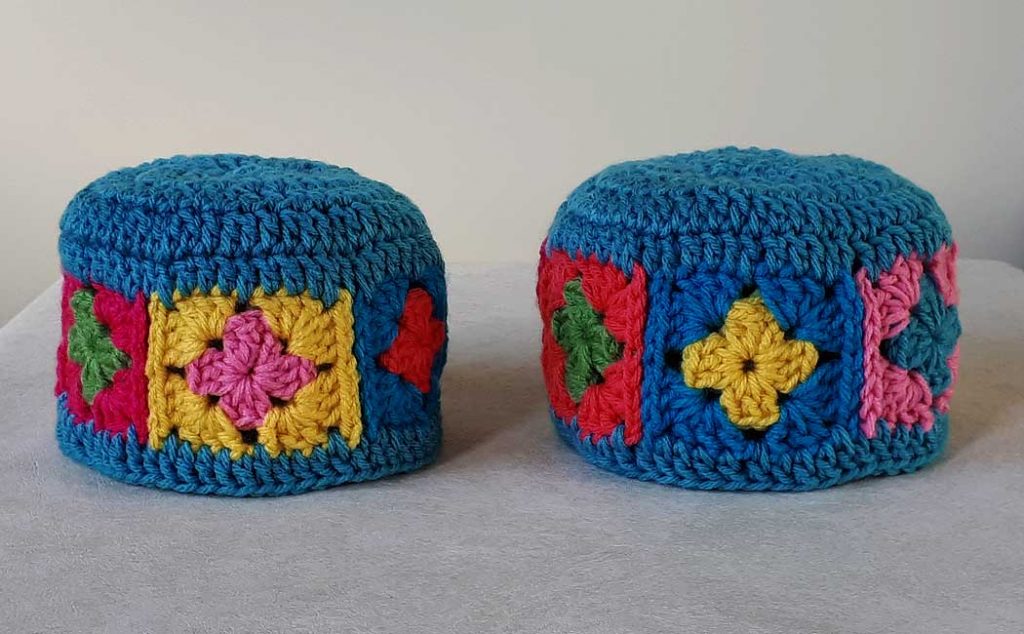
Check out the matching hat here!
This hat comes in two sizes and is perfect for a complete set!