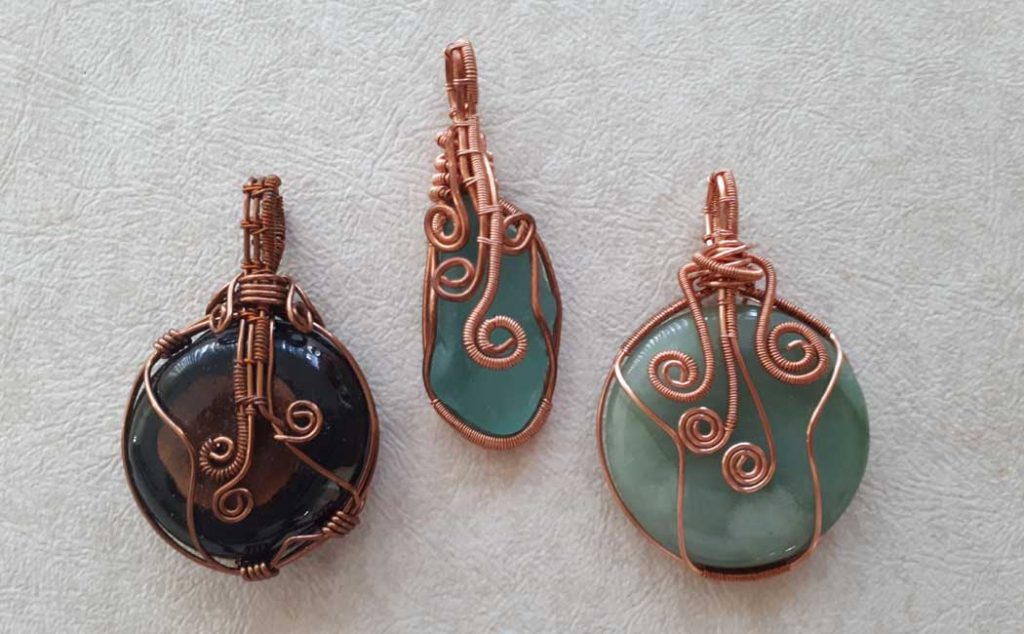
Learn how to make a wire wrapped pendant! Wire wrapping is an easy and creative way to make all sorts of wonderful jewelry. In this tutorial, I will show you how to use copper wire to make a ‘cage’ that can hold anything that doesn’t have a drilled hole. This technique can be used for sea glass, crystals, semi-precious stones or even funky stones from the beach.
Some (but perhaps not all) of the links in this blog are affiliate links to Amazon.com. As an Amazon Associate, I earn from qualifying purchases. This page contains some affiliate links. Please see my policy page for details. I look for the best possible option for your convenience, however, I encourage you to support your local shops!
For your convenience, I have created a video tutorial, however the written directions are provided below as well!
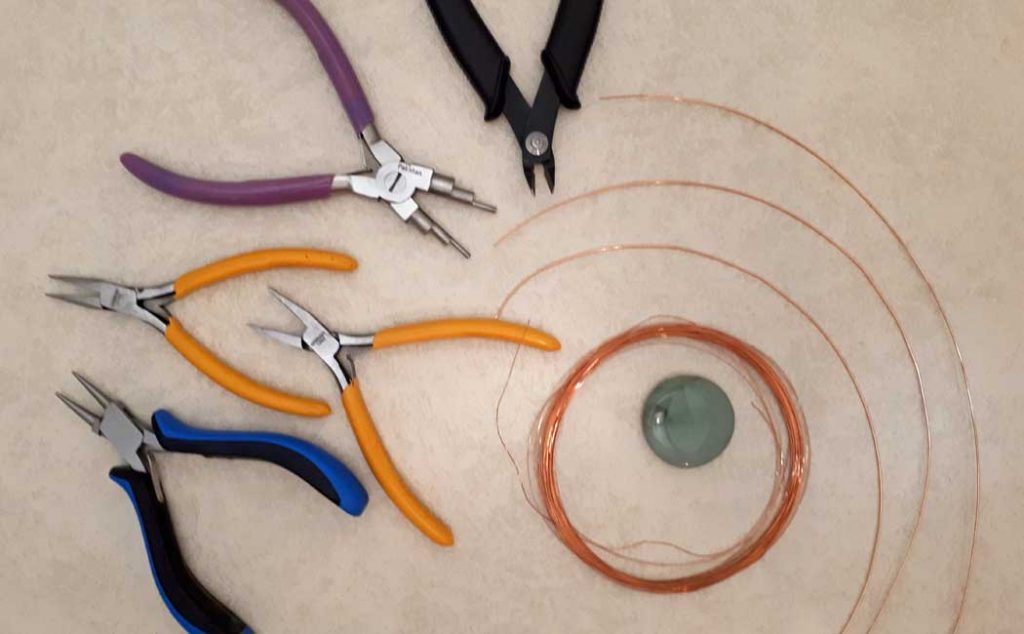
The supplies you will need for this project are:
- 20 gauge dead-soft or artistic copper wire
- 28 gauge dead-soft or artistic copper wire
- Cabochon, stone, sea glass or some item to wrap
- Flat-nose pliers (optional)
- Chain-nose pliers
- Round-nose pliers
- Bail-making pliers (optional)
- Wire cutters
If you don’t have any pliers at all, then getting a kit would be more cost-effective. The kit includes a bent-chain-nose plier, but not the bail-making pliers.
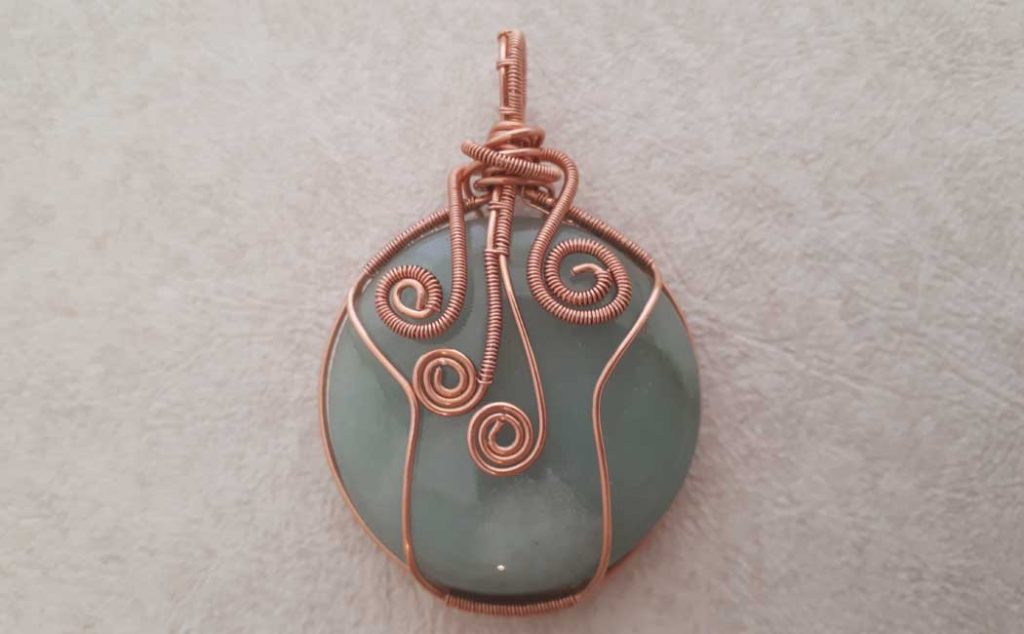
The stone I am using is a 35mm round Aventurine cabochon. You can use any stone you like and the link I provided in the supply list is for a 30mm x 40mm Aventurine cabochon. To figure out how much 20 gauge wire you will need, measure the circumference of your stone and add 8″ (20cm). Cut 3 pieces this length and mark the center.
Then cut 3 pieces of the 28 gauge wire, 20″ (50cm) in length. Hold the 3 pieces of larger wire together side by side. Use the fine wire to wrap several wraps around all 3 large wires, starting with the center mark. Don’t wrap too tight or the wires will collapse together, you want to keep them flat. Pinch the wraps nice and tight together from the sides as you are wrapping.
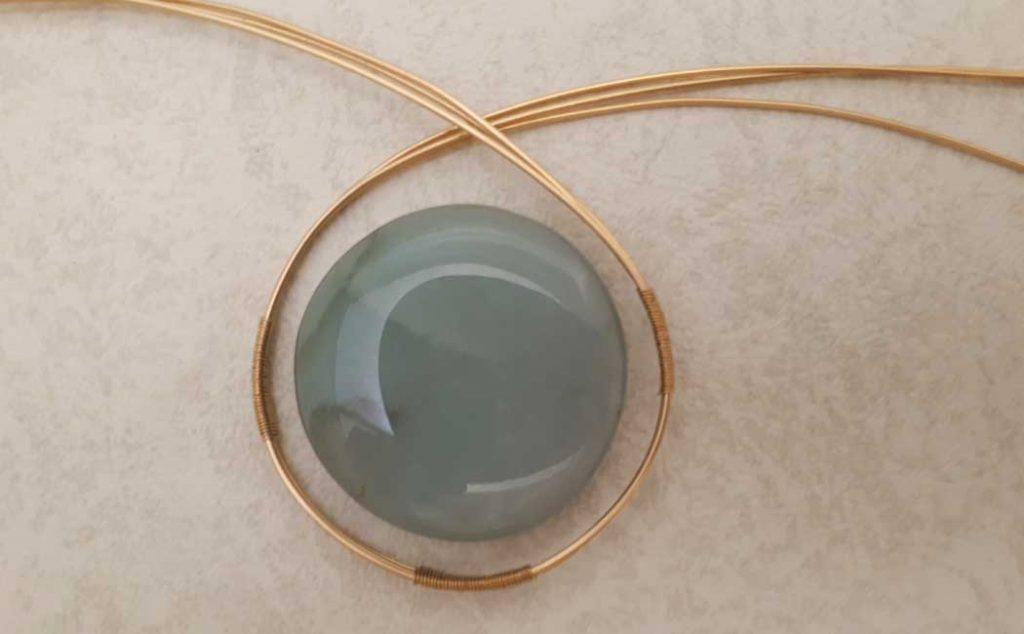
Cut the tails of the fine wire to the inside of your piece and flatten them with pliers. Once you have the center wrapped, gently shape your 3 strands of wire around your stone. Use the fine wire to wrap around the 3 strands on either side of the stone near the top.
Mark the triple strands of wire at the top where each side meets. Bend all 3 wires on each side at a 90-degree angle from the center.
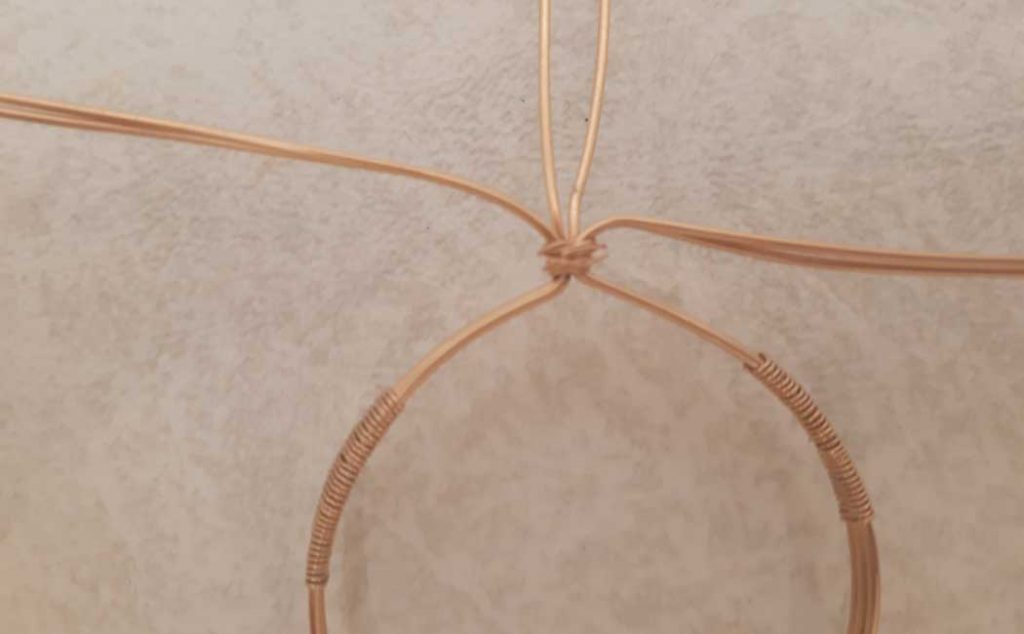
Use a 4″ (10cm) piece of 28 gauge wire to wrap the two sides together. This doesn’t have to be neat as this wire will be covered later on.
After you have joined the two sides together in this way, keep the two back wires straight (these will be used to make the bail) and bend the remaining front wires to each side. You have now created the cage!
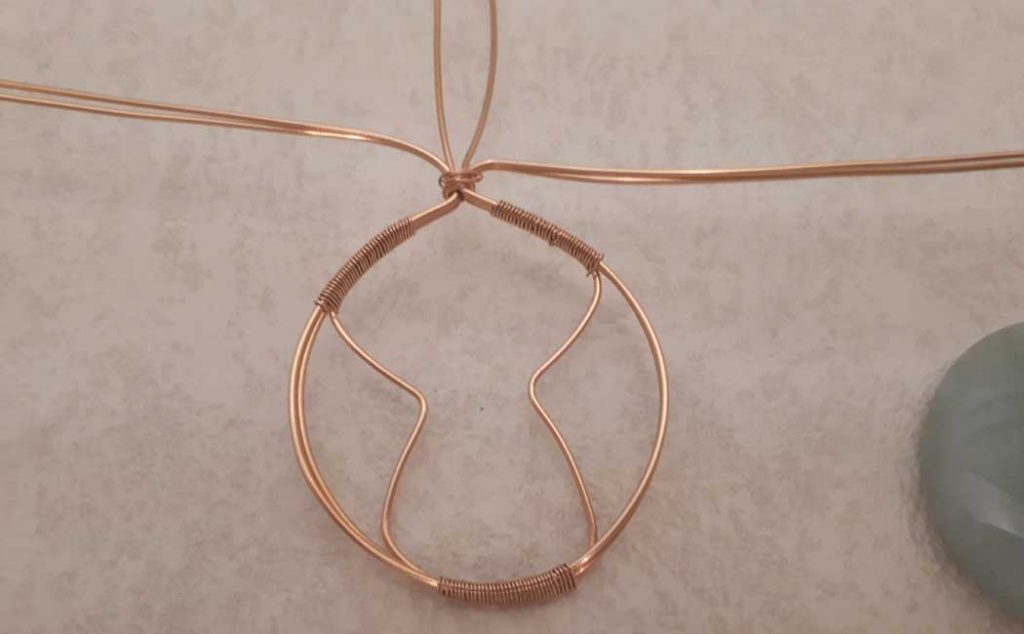
Push the fine wrapped wire pieces to the top of the cage. Starting with the back of your piece, hold it carefully, and use your chain-nose plyers to pull the back wires into the center of the piece.
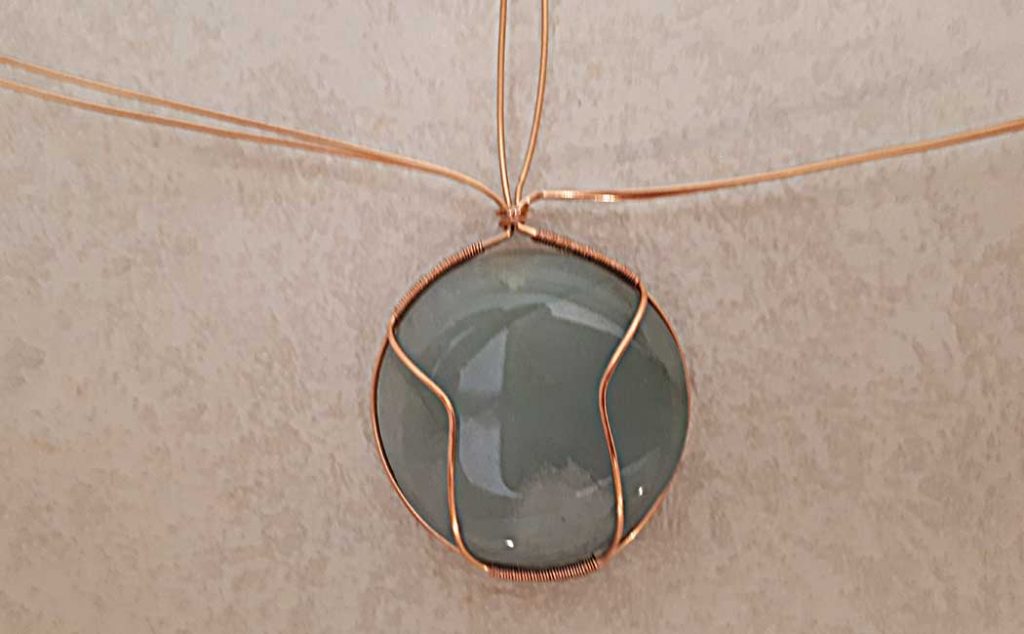
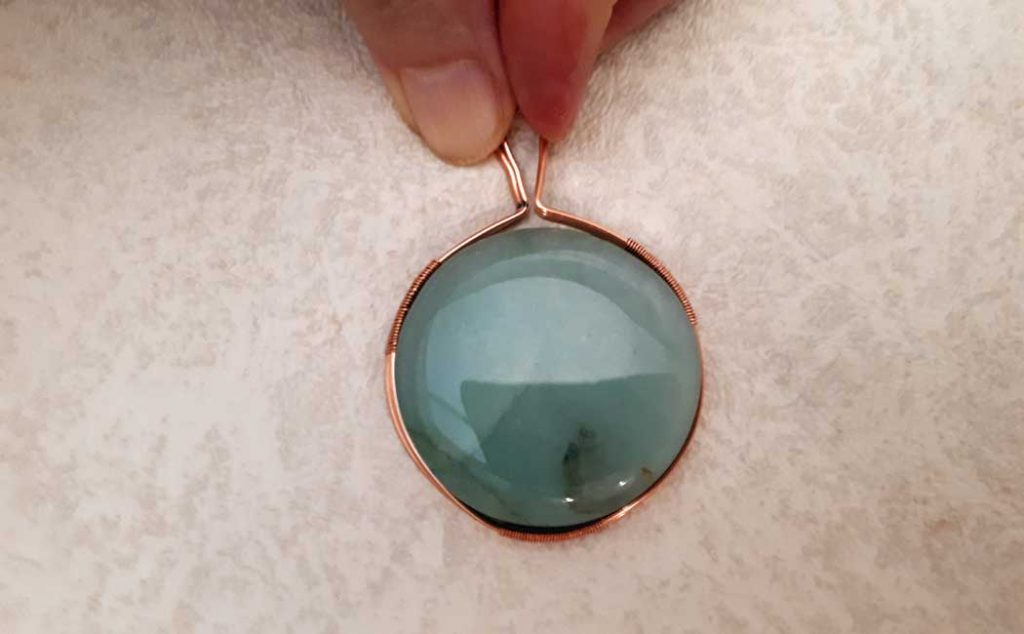
Flip the cage over and place your stone in the cage. Repeat the same process in the front to encase the stone as shown above. You can use your fingernails to do this as well.
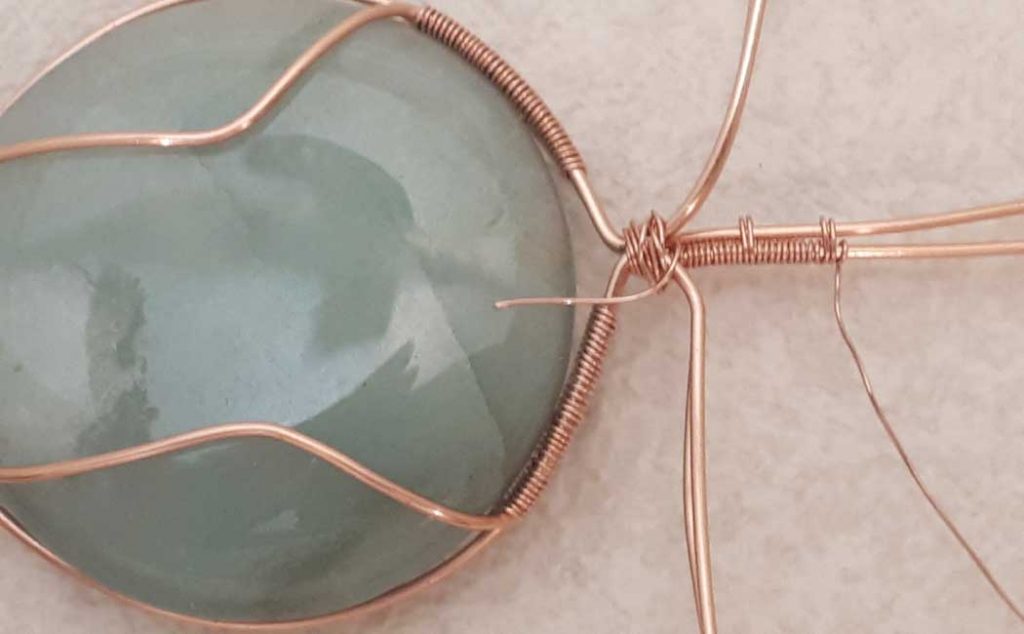
To make the decorative woven wrap for the bail, cut 20″ (50cm) of 28 gauge wire. The bail wire closest to you will be the main wire and will get the most wraps. The wire furthest away will only get a few wraps. Start the fine wire on the closest bail wire, wrapping the wire underneath and then towards you. Do 10 wraps in this way.
Gently push the wrapped wire tightly together as you wrap. For the 11th wrap, go around both wires, repeat this for the 12th wrap. Then repeat this pattern again…10 wraps around the closest wire and 2 wraps around both.
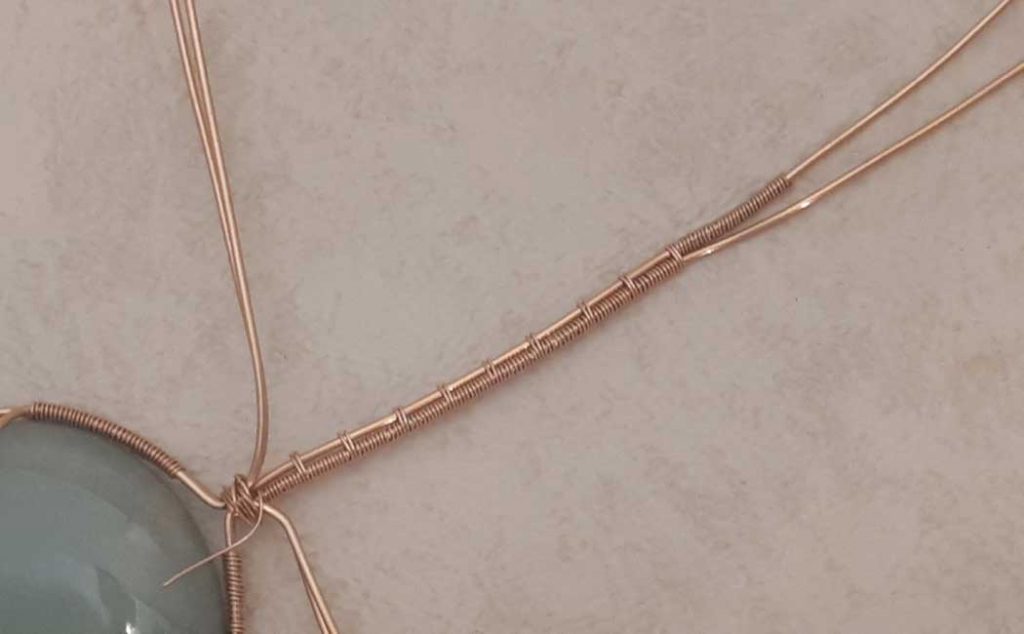
Repeat this pattern 9 times or until you run out of wire. I did 9 repeats and then wrapped the remaining wire on the other side.
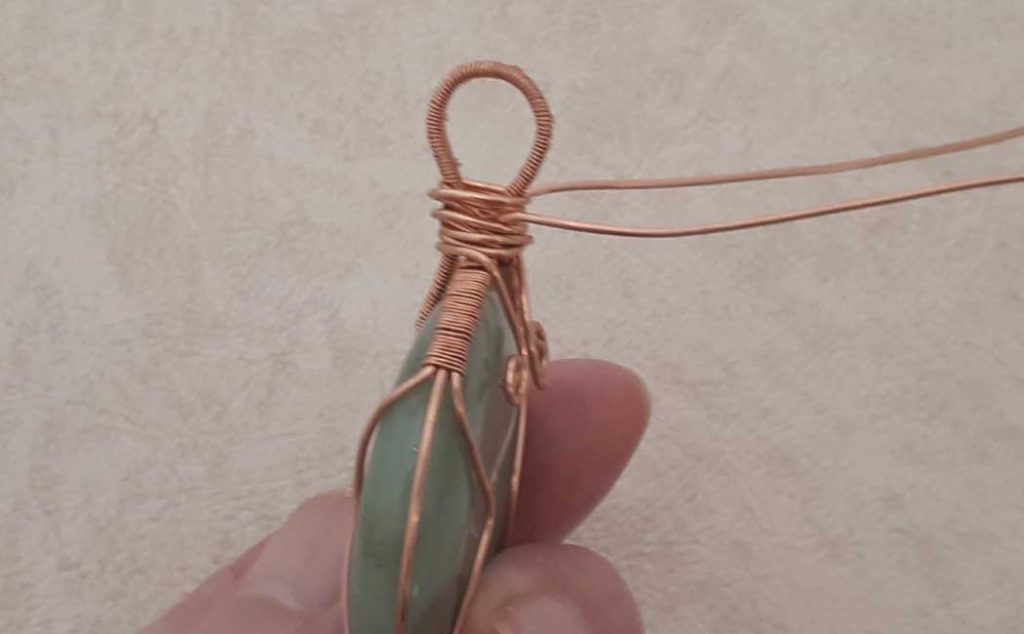
Using the bail-making pliers (or a round form like a chopstick or knitting needle), wrap your bail wire to the front of your piece. Take the front wires that were bent to the side and wrap them around the bail wires as shown above. This doesn’t have to be neat, it actually looks funky if it is not. Leave about 1.5 inches for a tail on each wire an secure them to the back of your piece. Use the round-nose pliers to coil the ends.
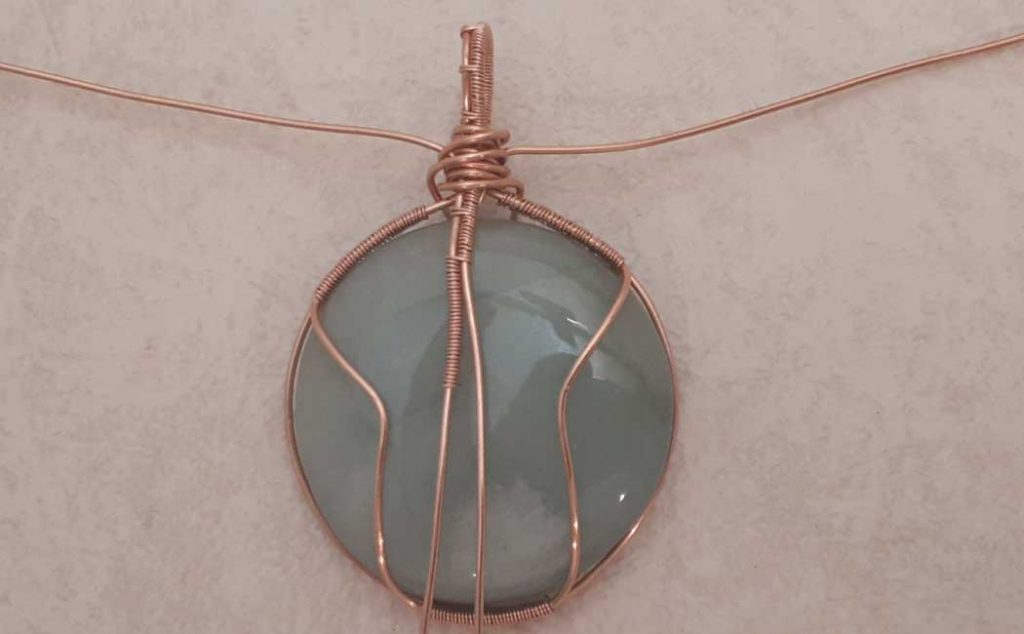
You will now have 2 wires left. At this point, you can leave them as they are and create a pattern on the front of the stone.
Or you can wrap them with the 28 gauge wire as I did below. I used 22 inches (55cm) of wire for each side. I then did one wrap around the bail with the wire on the left (facing you).
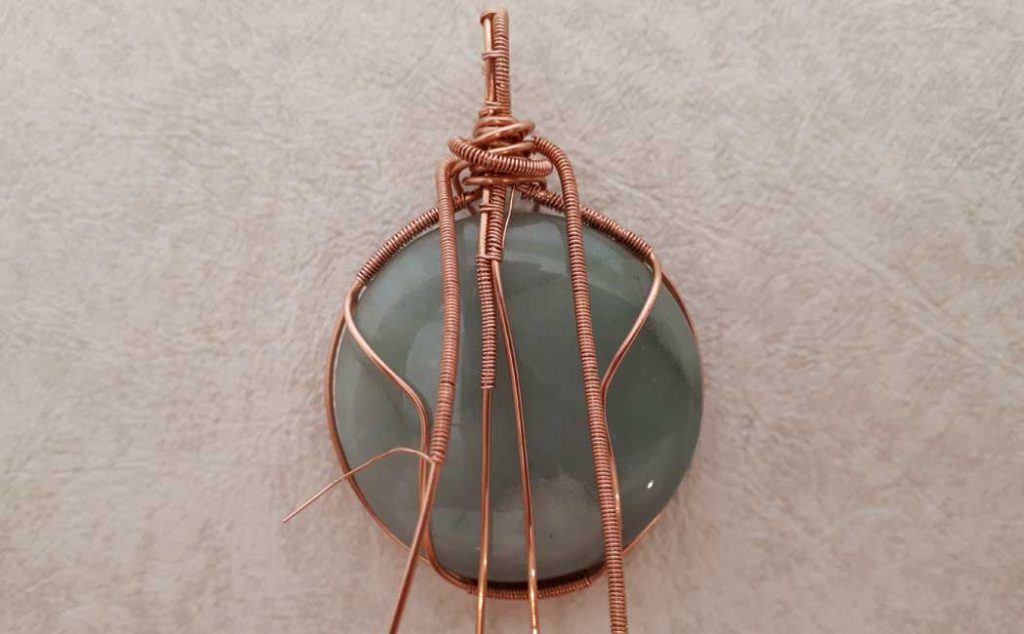
Now cut the left outside wire to 1.5″ (3.75cm), leaving about 0.5″ inch (1.25cm) of bare wire at the bottom, and cut the right outside wire to 1.75″ (4.4cm), leaving a little nub of bare wire at the bottom. Coil the left wire to the left and the right to the right, making the right coil a bit bigger and higher than the left as shown in the image below.
The two center wires will be coiled to the left as well. From the bottom of the coil on the left, measure down the next wire 1.5″ (3.75cm) and cut. Coil this wire to the left, placing it below the previously coiled wire. From the bottom of this new coil, measure down the next wire 1.5″ (3.75cm) and cut. Coil this wire to the left, placing it below the previously coiled wire.
You will have to fuss with the coiled wires a bit to get them to lay flat. I do show all of this in more detail in the video provided.
Enjoy this project and feel free to use your own creative expression! Let me know what you think in the comments below. 🙂