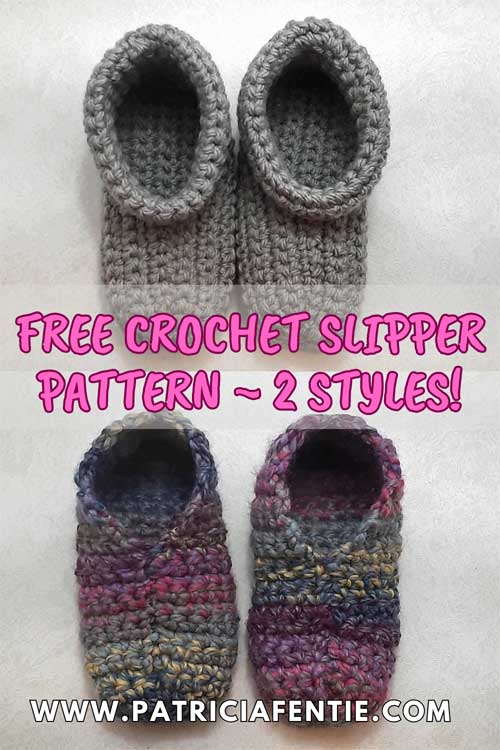
One Pattern ~ Two Styles!
There is nothing better than homemade cozy crocheted slippers! This pattern is so easy and can be made in just a few hours. I have two variations for this pattern, one with a cuff and one without. But you can also create different looks by your choice of yarn and the direction in which you sew the crocheted slipper panels together. I will explain all that later on.
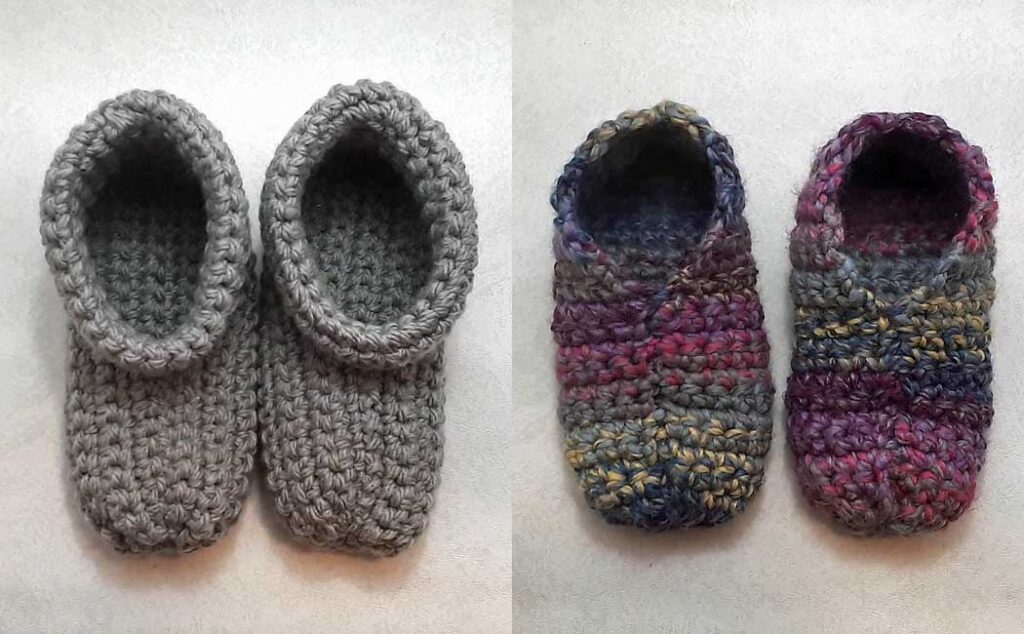
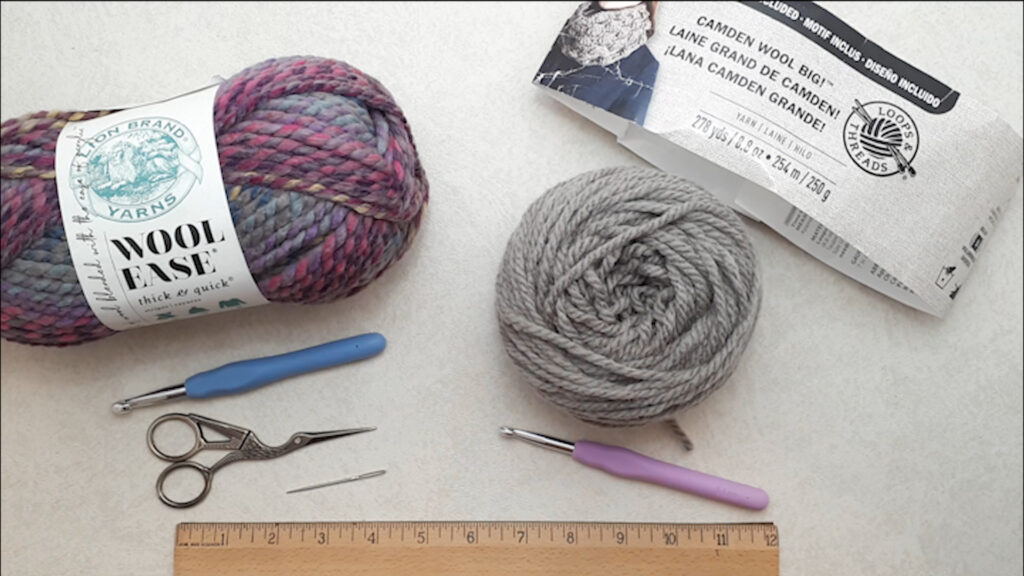
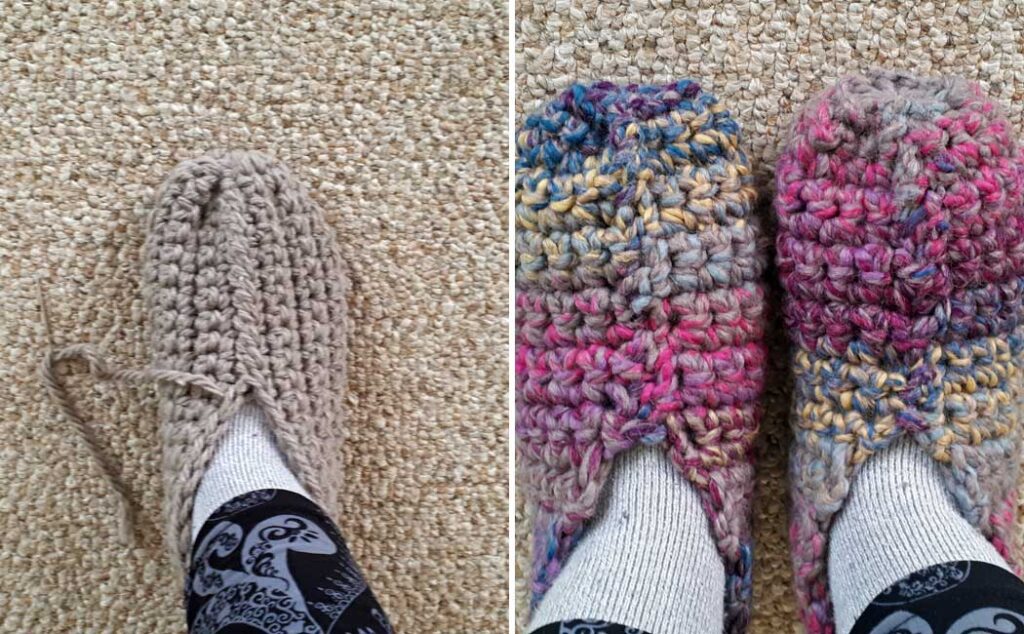
For the slippers with the cuff, I am using a number 5 bulky yarn in a solid color. The other pair of slippers are made using a number 6 super bulky yarn in a variegated color pattern. The choice is yours, but I do recommend using a wool blend of some sort, as the wool yarn is more durable and warm.
As always, there is a video tutorial for these Cozy Crocheted Slippers at the bottom of this post.
Supply List
- Slippers without cuff ~ number 6, super bulky yarn by Lionbrand: Wool Ease-Astroland 5oz/87yds
- Yardage for size 6.5 US = 87 yards (1 ball). If making with the cuff or in a larger size, a second ball of yarn will be required.
- Slippers with cuff ~ number 5, bulky yarn by Loops and Threads: Camden Wool Big-Taupe 8.8oz/278yd (this brand is no longer available, but here is a good substitute)
- Yardage for size 6.5 US = 120 yards (1/2 ball). If making without the cuff, or in a larger size, either more or less yarn will be required.
- Crochet hook: size 8mm (L-11 US) for number 6 yarn or 6.5mm (K10.5 US) for number 5 yarn.
- Scissors
- Darning needle (big eye)
- Ruler
- Sock Stop slip resistant glue (optional)
Some (but perhaps not all) of the links in this blog are affiliate links to Amazon. As an Amazon Associate, I earn from qualifying purchases. This page contains some affiliate links. Please see my policy page for details. I look for the best possible option for your convenience, however, I encourage you to support your local shops!
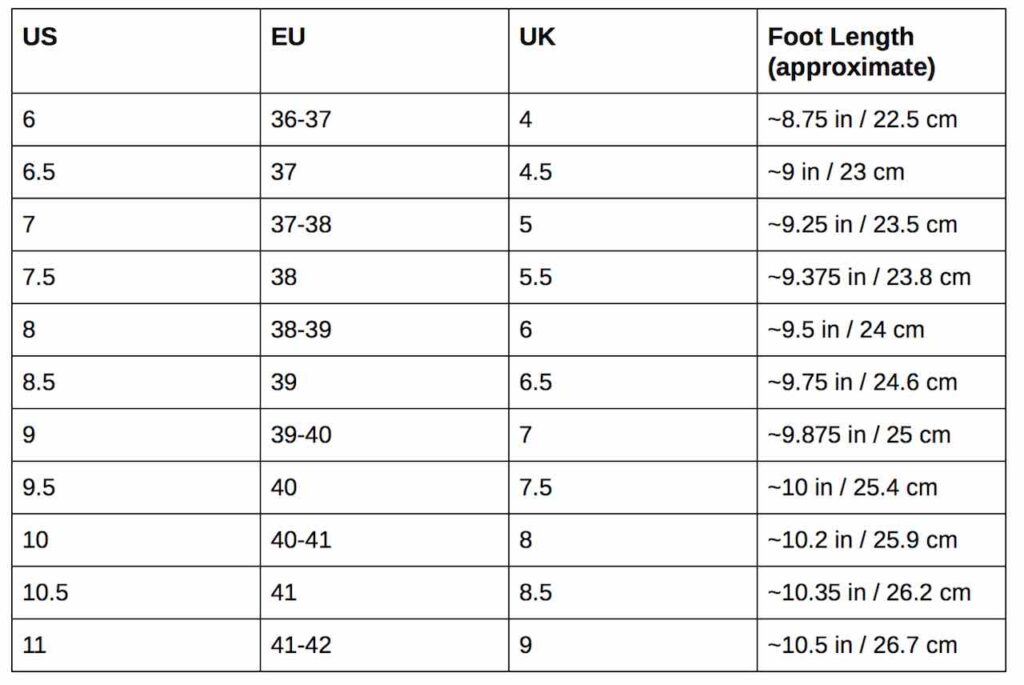
If you are new to crochet, then check out my Beginner Crochet Series. We are going to crochet a rectangle panel using a simple single crochet stitch. To calculate the size, you want to measure the length of your foot from heel to toe, and the sizing chart above is helpful if you are making slippers as a gift.
Many patterns recommend making the panel square, using the foot length measurement, but in most cases, the measurement around the widest part of the foot is a little bit bigger. So, I recommend using both measurements, the length and width, and then crochet the slipper panels that size.

For me, my foot size is 6.5 US and the length equaled 9″. The width measured 9.5″, so that is the size I made my panels. The direction of the fabric will make a difference to the length of your foundation chain. If using a self-striping yarn, like the panel on the left, it works best to have the foundation chain as the width (for me 9.5″). If you want the stitch pattern to go in the other direction, then the foundation chain would be the length of the foot (for me 9″).
When sewing the slipper panels together, the striped fabric looks much better going with the pattern across the foot, rather than along the length. This is a design principle that you can use or not, but it does make a difference in the look of the slippers. I am doing both ways so you can see the difference. The slippers with the striped fabric will be made without the cuff, and crochet up very quickly!
The Pattern for the Cozy Crocheted Slippers
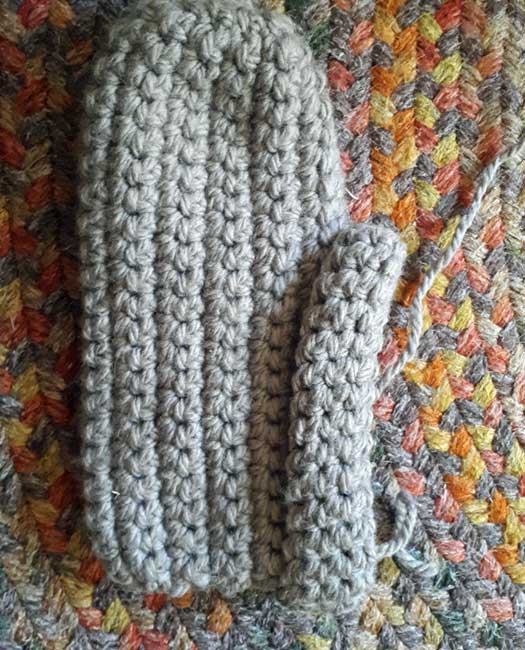
Foundation chain: make it equal to the length or width of the foot (depending on your choice of direction with the panel). Make this chain quite loose, and depending on your crochet tension, you may want to use a crochet hook a half size bigger for the foundation chain. Also, leave a long tail (12″-15″) for sewing.
Row one: ch 1, 1 sc in the back bump of the first ch from hook, *1 sc in the next back bump, repeat from * to the end of the row. You will have the same number of stitches as your foundation chain (not including the ch1 at the beginning of this row.)
Row two: ch 1, 1 sc in both loops of first st, *1 sc in both loops of next st, repeat from * to the end of the row.
Row three onward: repeat row two until you have the desired length or width of your panel, ch 1 to fasten off. Leave a 12″-15″ tail for sewing.
Depending on whether you have an even or odd number of rows, your tails will either be on both sides or opposite sides of the panels. If they are on both sides, use that end of the fabric for the toe section.
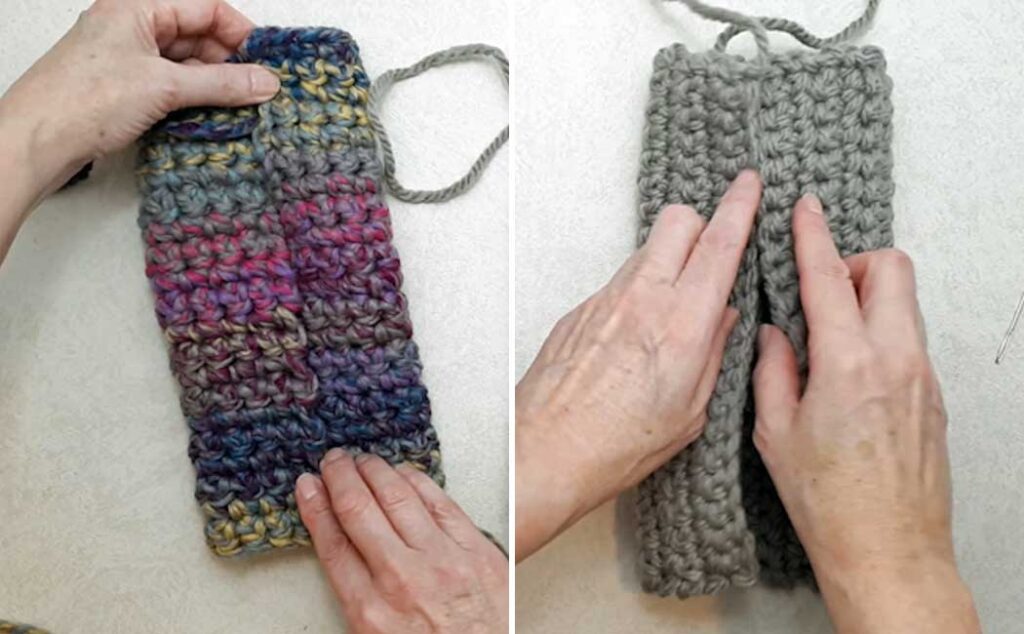
If you don’t have tails on opposite ends, then cut a piece for the heel section and join at the top back of the heel. There is no ‘right side’ to the fabric, but all the stitching will be done on one side and then the slippers will be flipped ‘right side out’ so all the stitching will be on the inside when done.

Bring the fabric together as shown in the image above the pattern directions and sew the heel closed using a whip stitch. Sew about halfway down, leaving an opening approximately 2″ long. Run a gathering stitch around the opening, pull it closed, and gather the heel into a roundish shape. Make it snug, tie a knot, and darn in the tail end. If you joined on a piece of yarn for the heel, tie a knot at the top of the heel and darn in that tail as well.
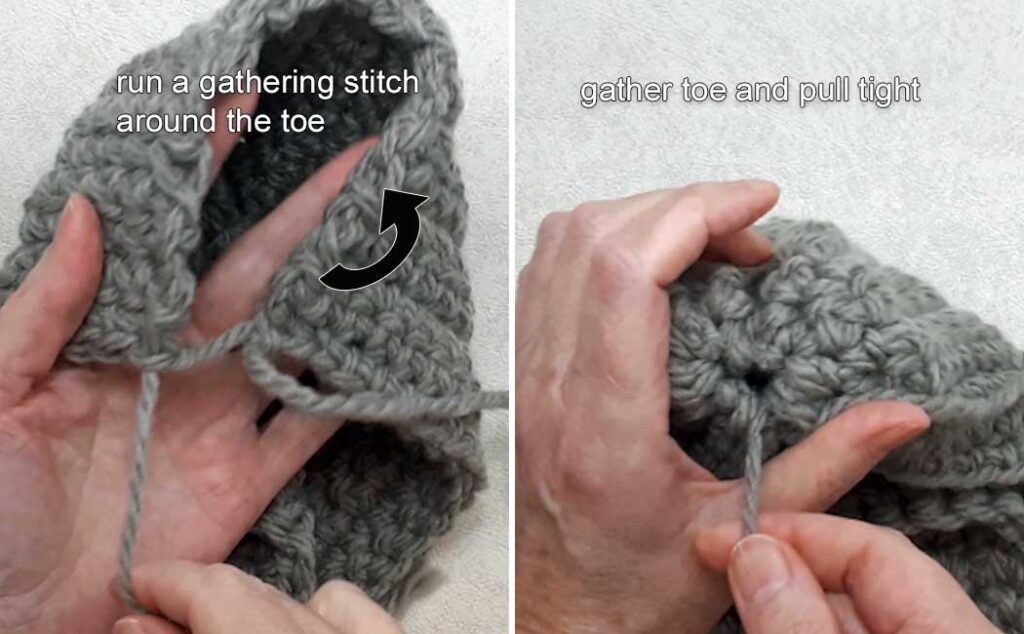
For the toe, use one tail end to make a gathering stitch around the end of the fabric. Gather the fabric into a nice snug shape, and if you have two tails, use the other to tie a square knot (as shown below). Darn in one tail end and use the longest piece of yarn to sew the top of the slipper.

If there is just one tail, make a gathering stitch as above, pull it snug, tie a knot, and carry on sewing the top of the cozy crocheted slippers closed.
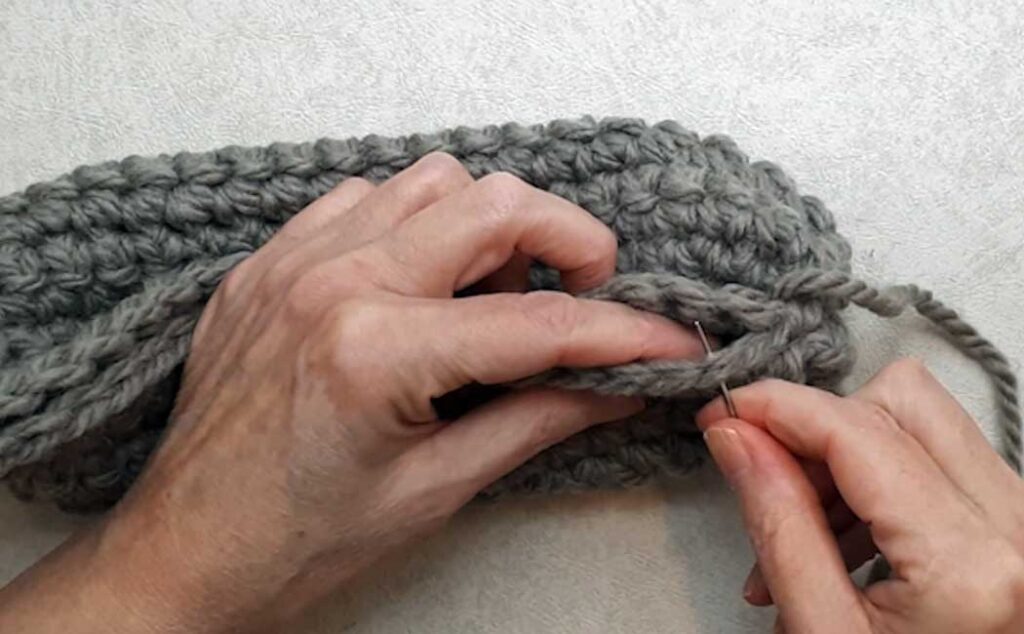
Use a whip stitch to close the top of the slipper, sewing approximately halfway from the toe. Depending on the direction of your fabric, you will be sewing either into the seam along the top and bottom of the fabric, going under both loops (see above), or into the ends of the crocheted rows (see below).
Sewing into the ends of the rows is a bit more tricky, but do your best to find stitches to sew into. There may be some gaps from the turning chains, and you can use the sewing yarn to sew up the gaps.
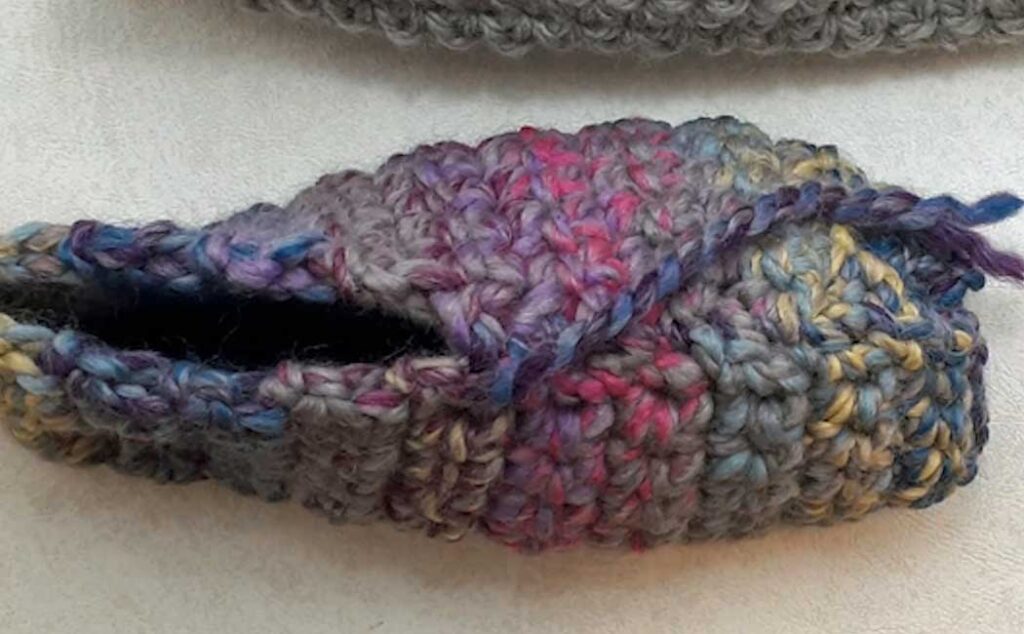
You can try the cozy crocheted slippers on to get the best fit and when you are happy, tie a knot and darn in the tail end. Turn them right side out and at this point, you can be done!

The super bulky yarn crochets up very quickly, and these slippers can be made in a very short time. The chunkier the yarn, the quicker they can be made. This size (ladies 6.5 US) used exactly one ball (87 yards) of Wool Ease yarn, so more yarn will be needed for larger slippers, or if you want to do the cuff.
And for the cuff…see the directions below!
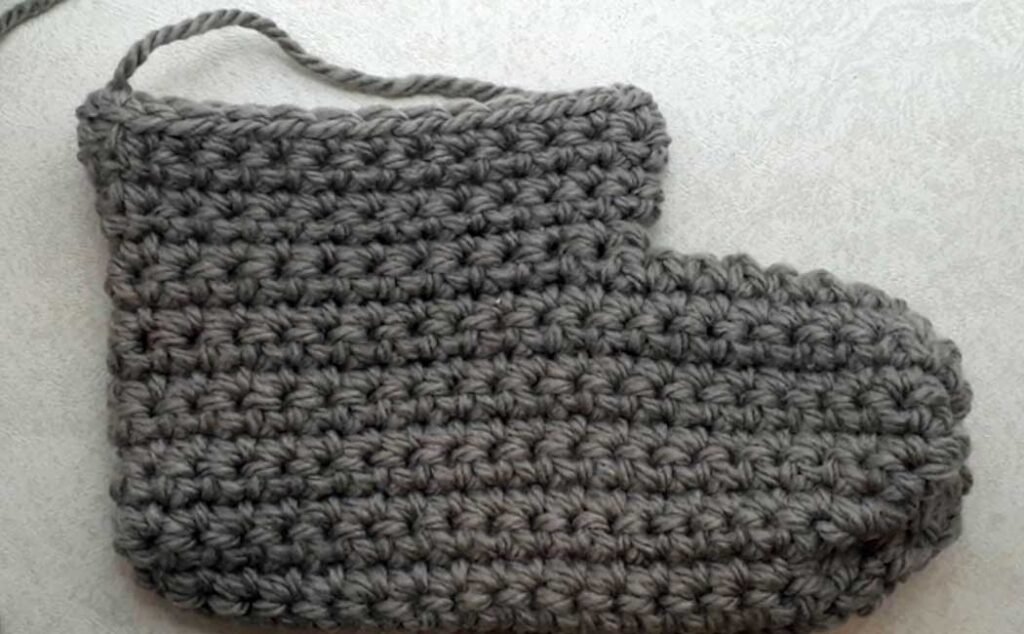
The cuff is made by doing rounds of single crochets around the opening of the slipper. If you crochet in rounds, the look of the stitches will be different from the body of the slippers (see the image on the right). This is because the slippers were made by crocheting in rows, not rounds.
If you like the look of the slipper on the right, then you can crochet in continuous rounds. But, if you want the stitches to look like the body of the slipper, then you will turn your work and crochet in the opposite direction for each round.
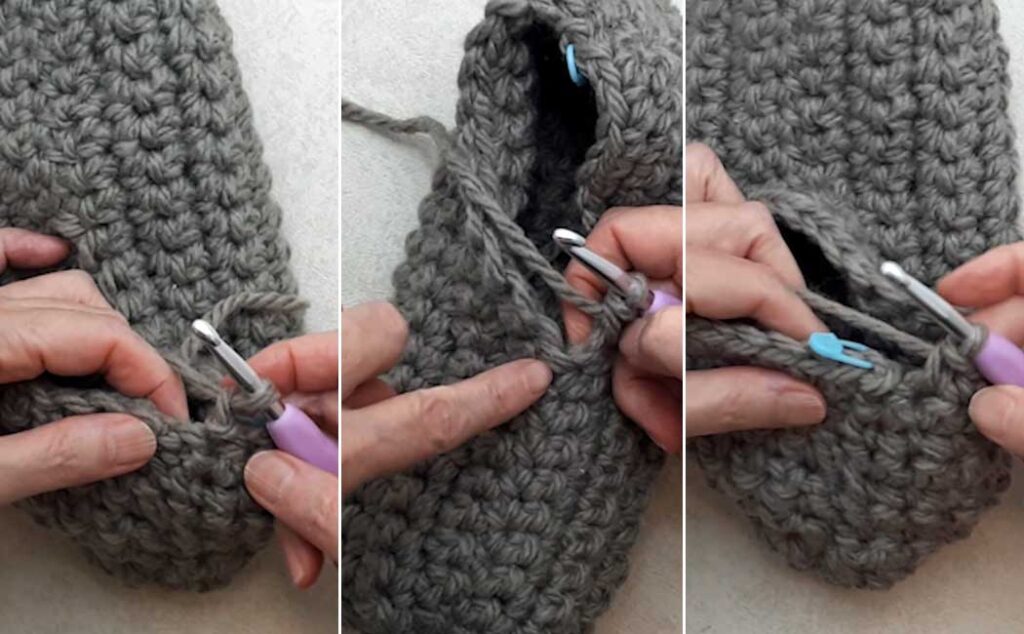
Round one: join with a sl st into the back right side of the slipper (going under both loops all the way around), ch 1, sk st, 1 sc in next st, 1 sc in each st to the front whip-stitch seam, 2 sc in seam sp, 1 sc in each st to complete round. Join with a sl st in beg ch1, and turn your work (if desired).
Note: If you have turned your slipper panel sideways as shown in the variegated slipper example, the top of the slipper opening will be the stitches at the ends of the rows and therefore, will be a bit tricky to work into (as it was to sew up the front of the slipper). Do your best to find a stitch to work into. Once you have completed the first round, the following rounds will have a nice stitch to crochet into.
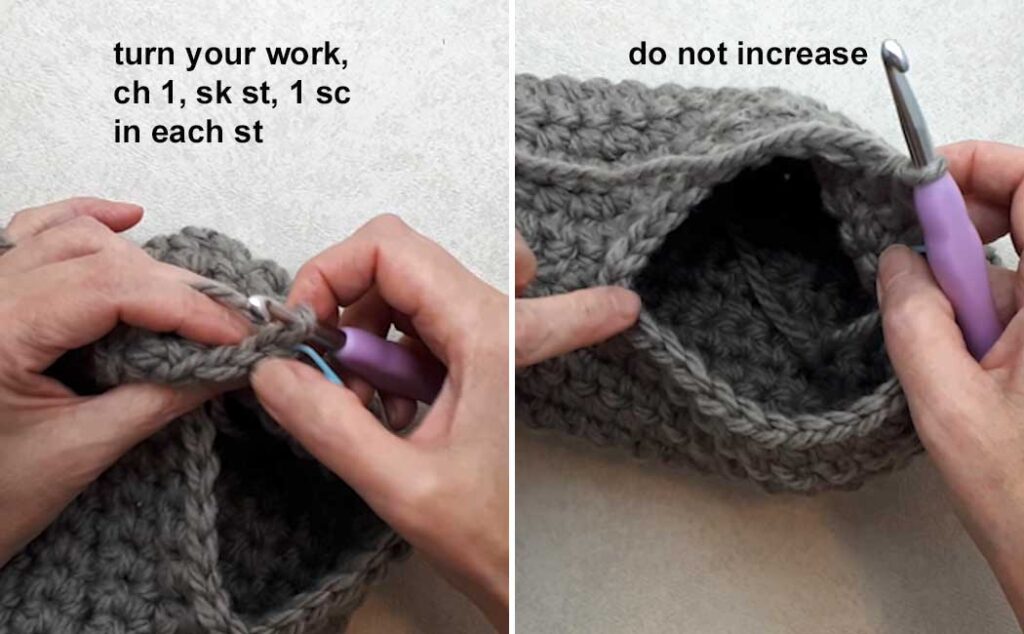
Round two: ch 1, sk st, 1 sc under both loops of each st all the way around (do not increase at the front seam), join with a sl st in beg ch1, and turn your work (if desired).
Round three onward: repeat round two until you have the cuff to the desired height. I did 5 rounds. Fasten off and darn in the tail ends.
You can see how the stitch pattern looks the same by turning your work for each round of the cuff. You can use a product like Sock Stop on the bottom of the slippers to create more traction if desired.
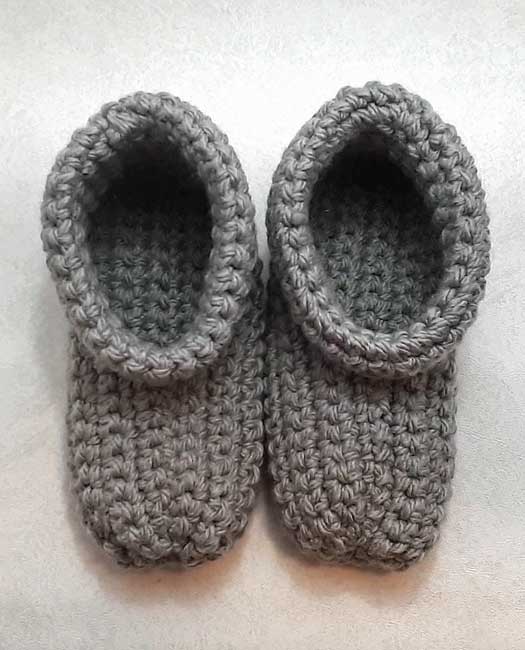
So there you go! Cozy crocheted slippers…one pattern with two variations. Of course, there are more than two ways to use this pattern. By changing the yarn, the direction of the fabric, and the height of the cuff, you can make all sorts of variations!
I love to encourage people to take these ideas and be playful with them…try different things, and don’t be afraid to unravel and try again.
Sharing is caring! Click on the social share button at the top of the blog and choose an image from below to share on social media.