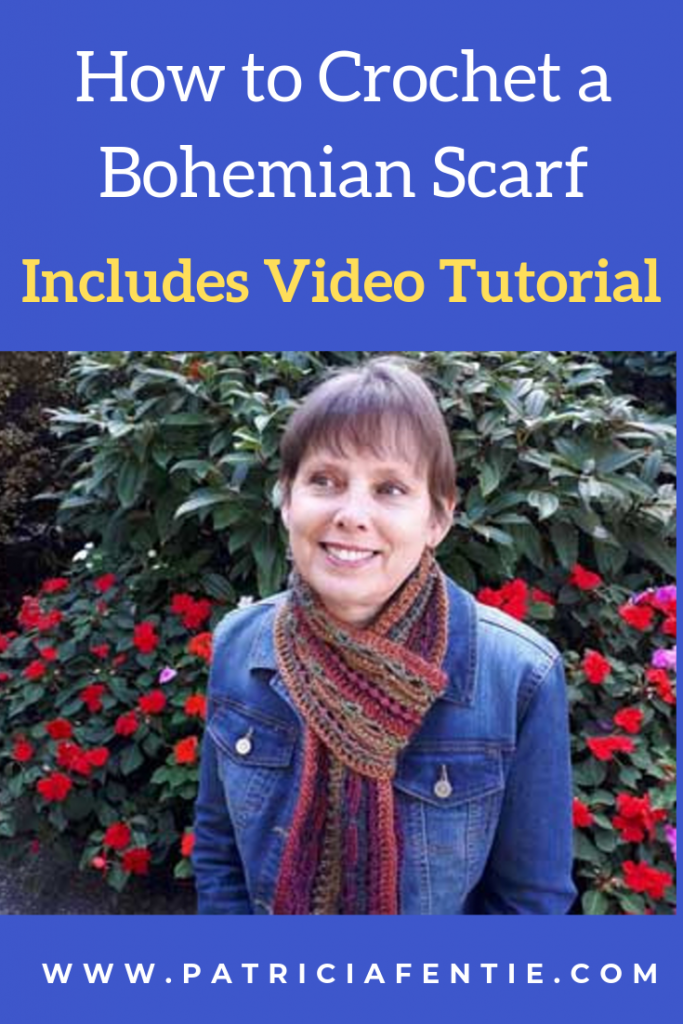
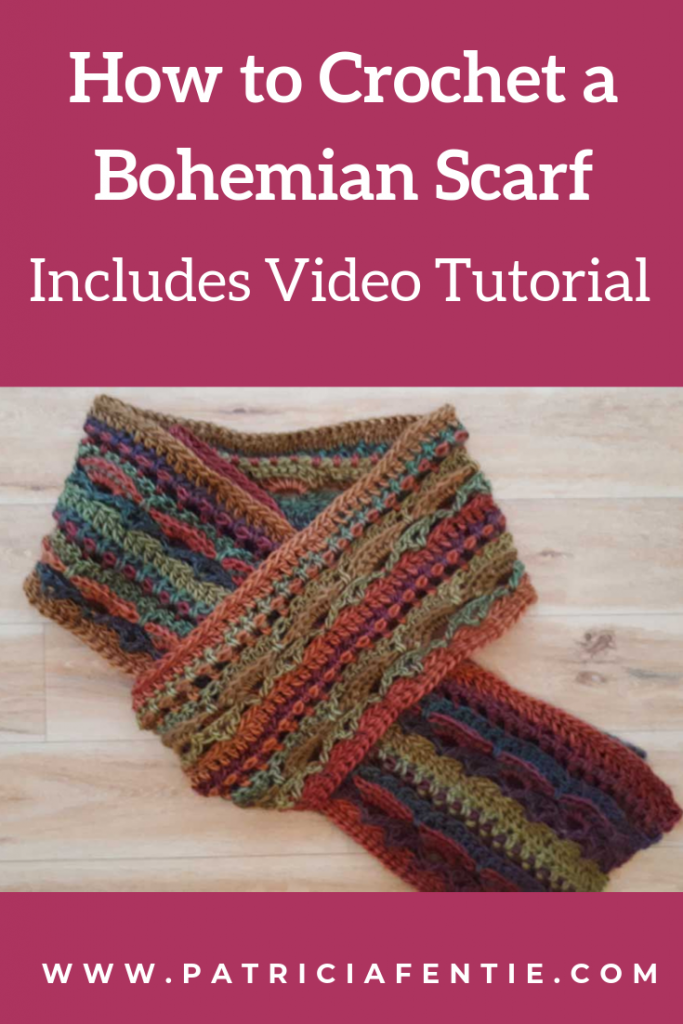
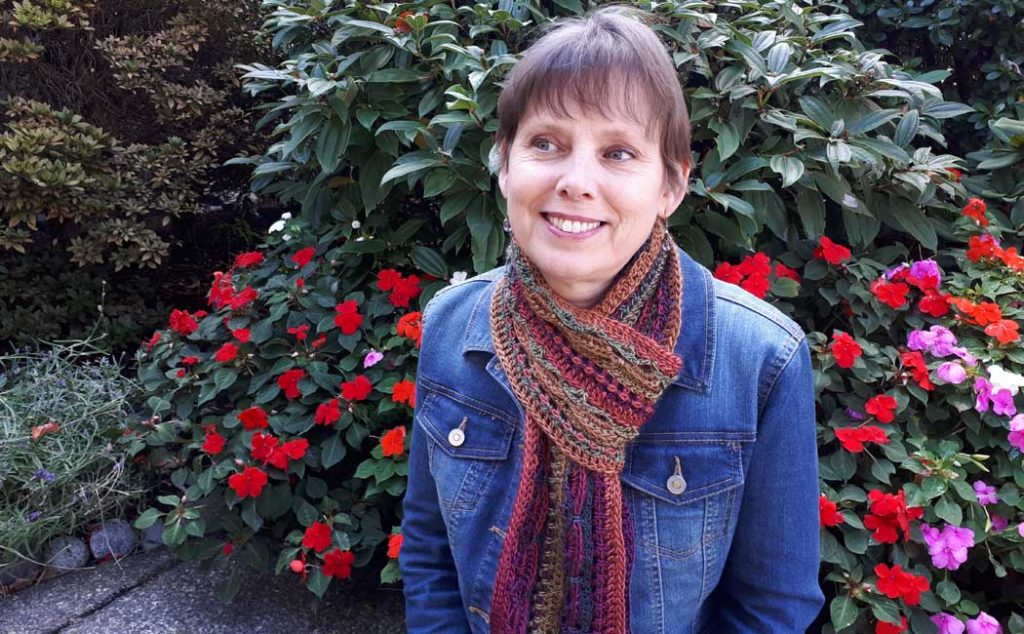
Learn how to crochet a Bohemian Scarf! I call it a Bohemian scarf because of the way the colors of the yarn work together with the textured stitches. While this is a fairly simple pattern to crochet, I would call it an intermediate level project.
However, if you are new to crochet, I do have a Beginner Crochet Series that will teach you all you need to know to do this project. You could practice with this basic Granny Square Blanket tutorial as well. Once you have a bit of experience, then the directions in this tutorial are easy to follow.
I have created a step by step video tutorial for this project as well, you can find it at the bottom of this post. Join me on this fun and creative journey!
Some (but perhaps not all) of the links in this blog are affiliate links to Amazon. As an Amazon Associate, I earn from qualifying purchases. This page contains some affiliate links. Please see my policy page for details. I look for the best possible option for your convenience, however, I encourage you to support your local shops!
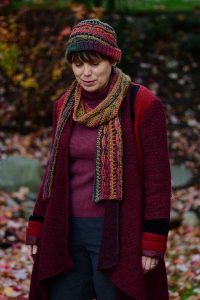
You can also check out the tutorial I created for the matching hat. The yarn used for the scarf pattern uses about 1.25 balls of yarn and the hat tutorial uses a little over half a ball of yarn. So the two pieces can be made with 2 balls of yarn! Check out the hat tutorial here.
Stitches Required:
- Chain Stitch: ch
- Half Double Crochet: hdc
- Double Crochet: dc
- Foundation Double Crochet: Fdc (see special directions below)
- Front Post Double Crochet: FPdc (see special directions below)
- Front Post Half Double Crochet: FPhdc (same as FPdc but with hdc)
Gauge and Supplies
- Gauge: 16 stitches = 4 inches (10 cm)
- Pattern repeat = 8 stitches
- Finished size = 60″ x 5.5″ (150 cm x 14cm)
- Hook: 5 mm (H/8) to 6mm (J/10) to equal gauge
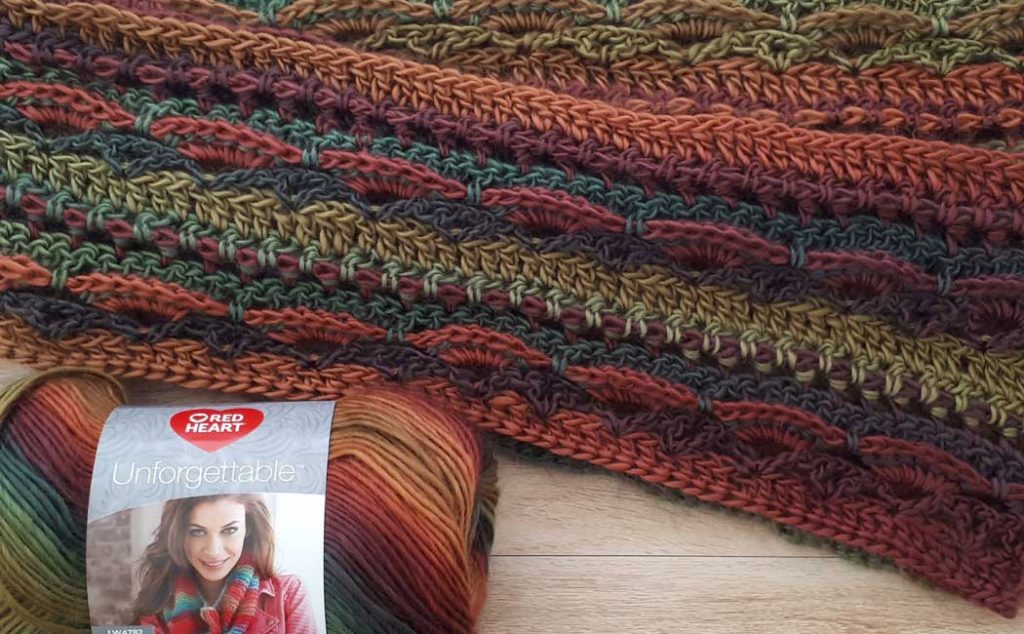
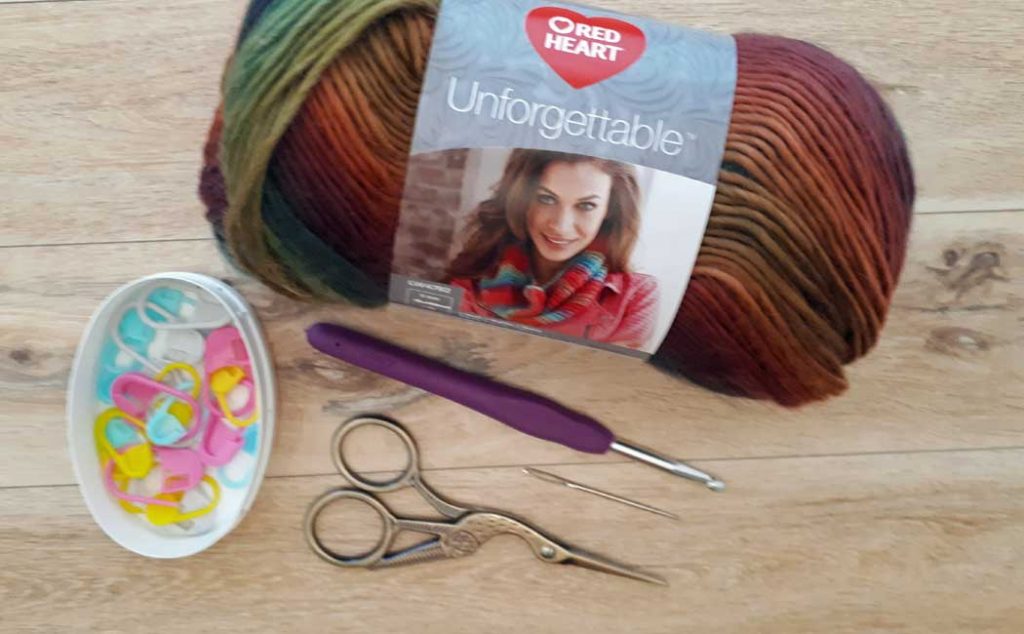
- Yarn: Medium 4 acrylic, 330 yards (305 meters)
- Yarn recommended for this project: Red Heart Unforgettable Polo#3956 x 1.25 balls
- Scissors
- Stitch markers
- Darning needle
Special Directions:
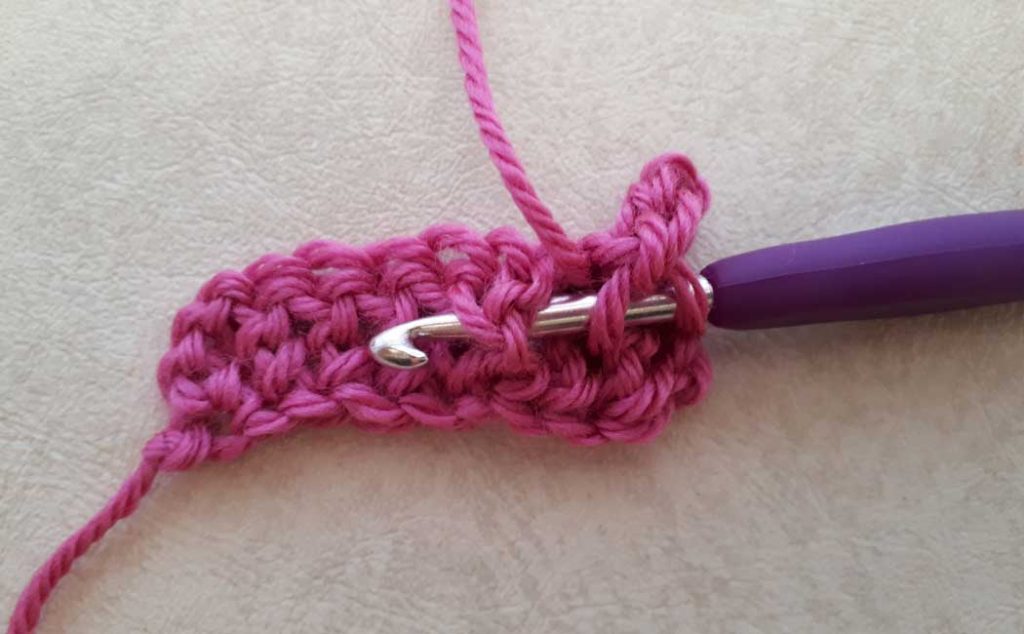
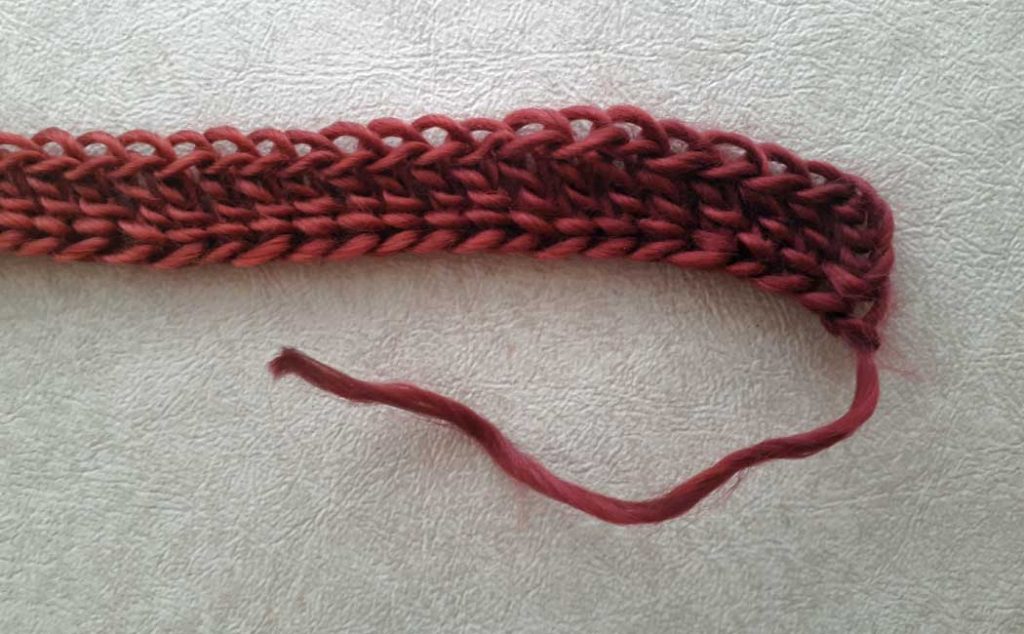
Foundation Double Crochet (Fdc)
Start with a slip knot and chain 4. Yarn over (yo) and insert hook into the 4th ch from hook (making sure to go underneath the top and back legs). Yo, pull up 1 loop (making 3 loops on your hook). Yo and pull through 1 loop. This creates the first ‘chain’. Yo, pull through 2 loops. Yo, pull through remaining 2 loops to finish off the double crochet.
You’ve created your first foundation double crochet stitch!
Next stitch: Yo, insert hook into 2 legs of the ‘chain’ you just created at the bottom of the previous stitch (obvious ‘V’ shape). Yo, pull up a loop (making 3 loops on your hook) yo, pull through 1 loop (creates first chain). Yo, pull through 2 loops. Yo, pull through remaining 2 loops to finish off double crochet.
Second foundation double crochet stitch created!
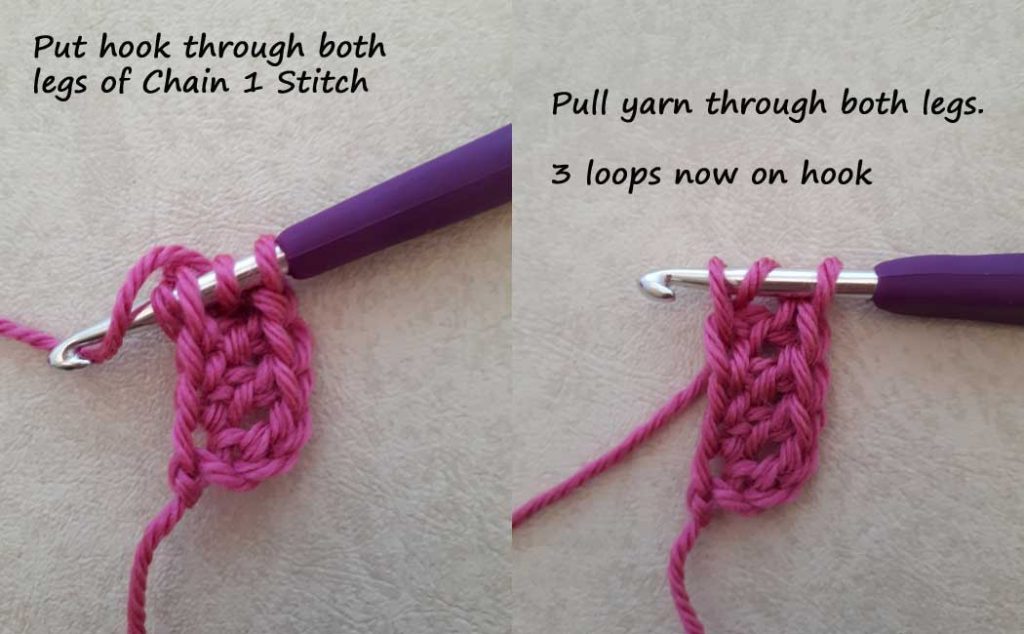
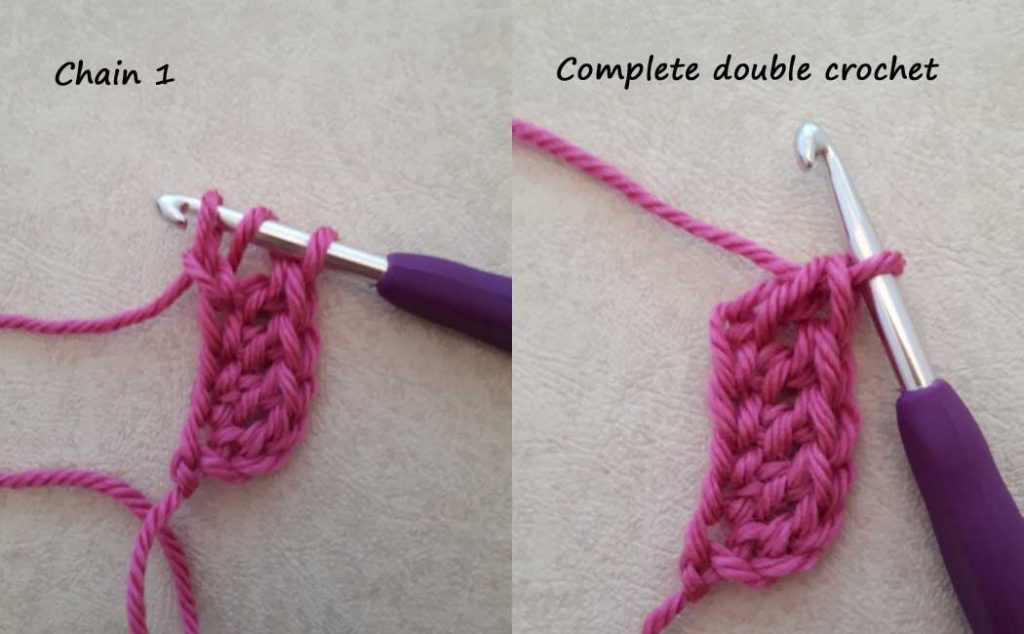
Repeat until you’ve created the number of stitches or length required.
Front Post Double Crochet (FPdc)
Yo, insert hook behind the post of the dc of the previous row, yo, pull loop behind dc post, and complete dc.
Directions:
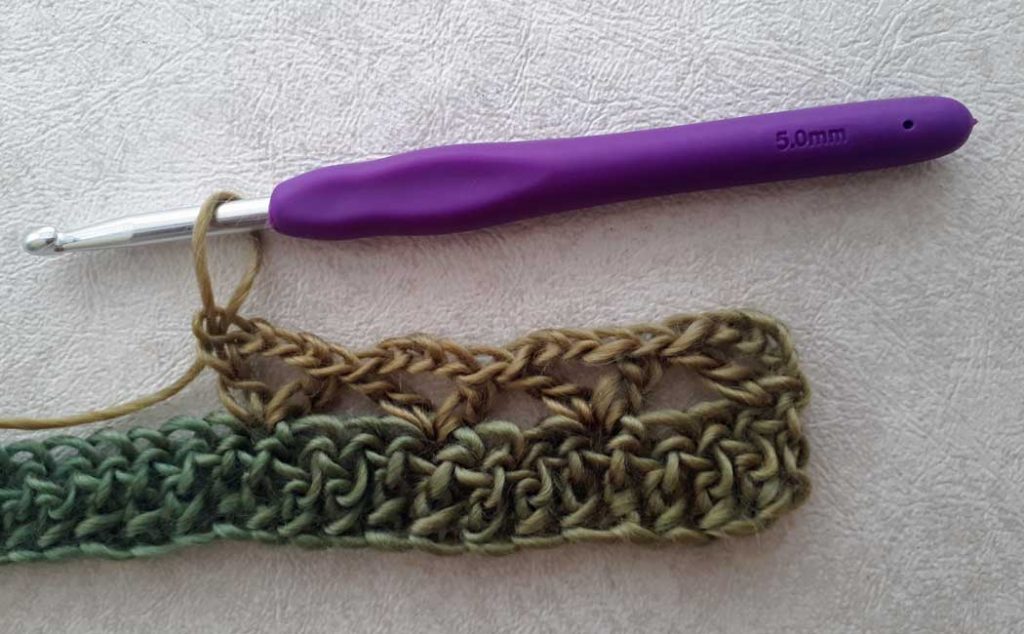
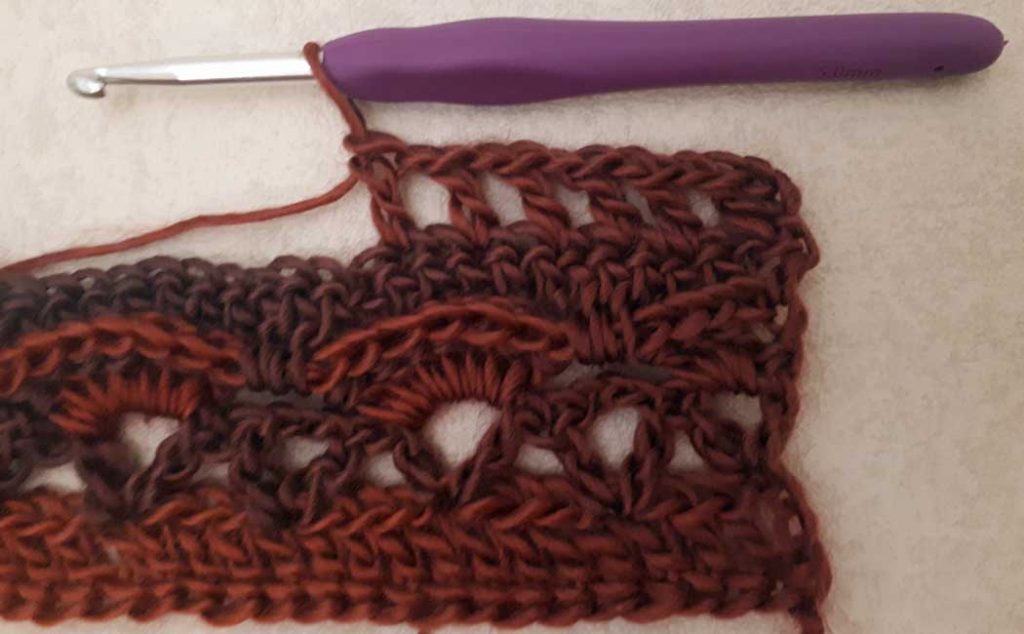
Row 1: Ch4, *1Fdc. Repeat from * 238 times to equal 240 Fdc (first ch 4 counts as 1 dc), turn your work
Row 2: Ch4, 1dc in first st of row (half a V-stitch). *Skip 3 sts, 1dc in 4th st, ch3, 1dc in same st. (V-Stitch) Repeat from * 59 times or to 4 sts before end of row. For the last V-stitch, 1dc in last st of row, ch1, 1dc in same st (half a V-stitch). Turn your work.
Row 3: Ch3, 3dc in first ch 1 sp (in half V-stitch), ch1. *skip next V-stitch, 7dc in next V-stitch, ch1. Repeat from * 28 times. Skip last full V-stitch, 3dc in ch 1 sp of last half V-stitch, 1dc in 3rd ch of beg ch 4 of previous row. Turn your work.
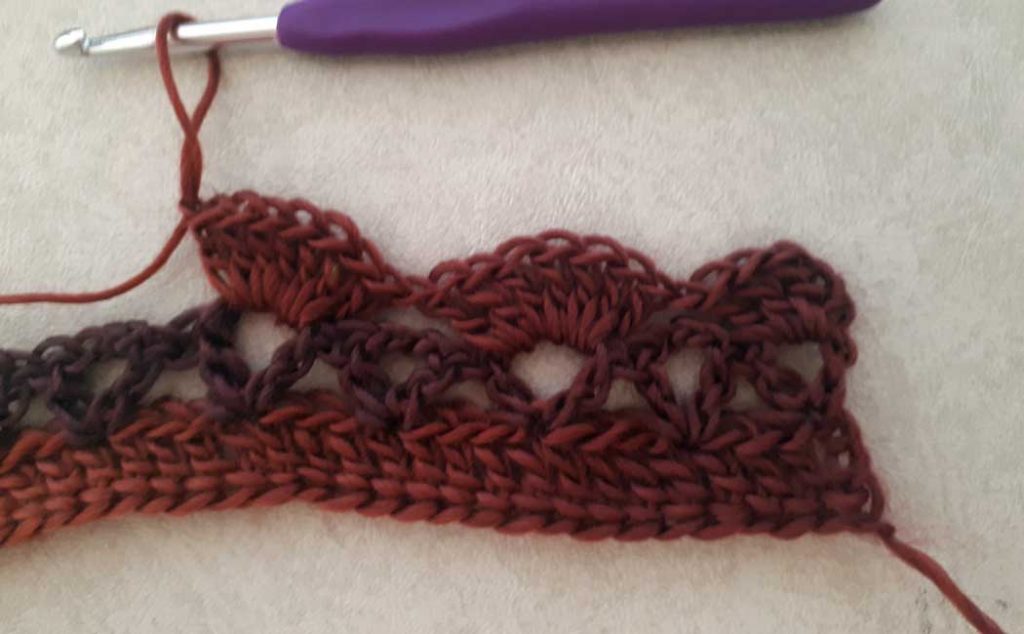
Row 4: Ch1, hdc in first dc, 1FPdc in next 3 dc posts, 1dc in next ch 1 sp. *1FPdc in next 7 dc posts, 1dc in next ch 1 sp. Repeat from * to last 7 dc shell. 1FPdc in next 3 dc posts, hdc in 3rd ch of last st. Turn your work.
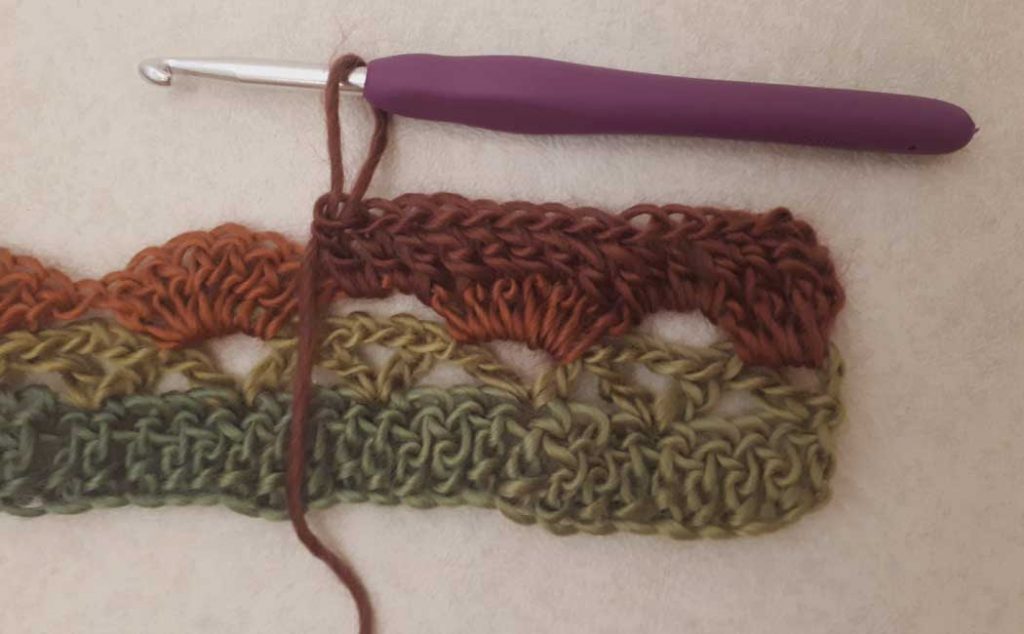
Row 5: Ch3, 1dc in first st, ch1, sk st. *1dc in next st, ch1, sk st. Repeat from * to the end of the row. 2dc in last stitch. (You should have 2 stitches left at the end of the row to ch1 and finish with the 2dc in the last stitch. If you end up with just 1 stitch left, just do one dc in the last stitch) Turn your work.
Row 6: (This is hard to see in the image below…the video tutorial shows it better) Ch2, 1hdc in first st. *1FPhdc in next dc post, 1hdc in next ch 1 sp. Repeat from * to the last 2 stitches at the end of the row. 1FPhdc in last dc post, 1hdc in 3rd ch of previous row. Turn your work.

Row 7: Ch3, *1dc next st. Repeat from * to the end of the row. Turn your work.
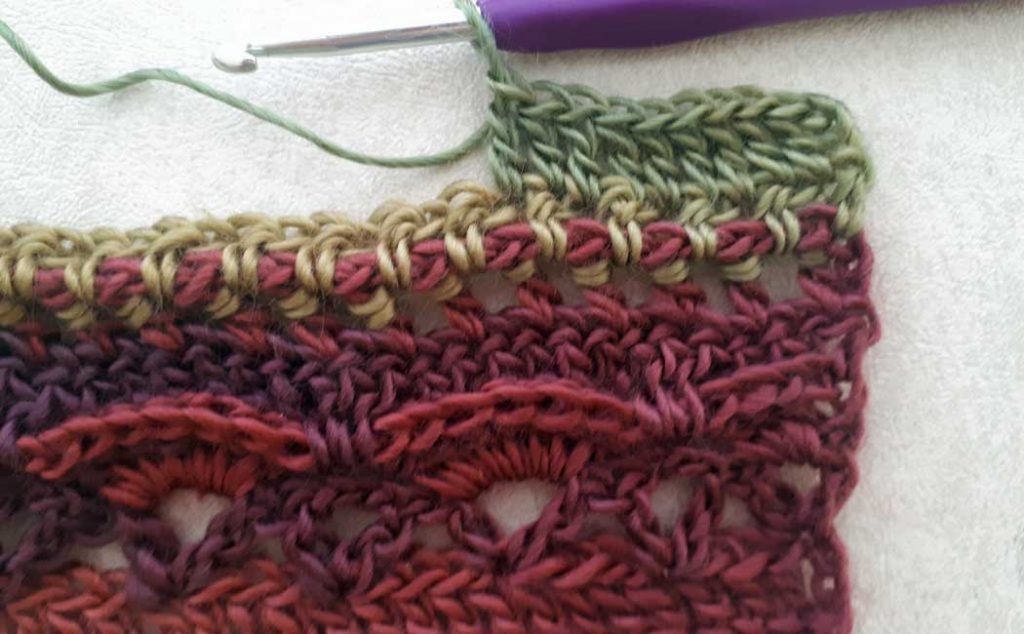
Repeats rows 2 through 7 for as many pattern repeats as you like. The scarf shown here is done with just one repeat of rows 2 through 7 with a total of 13 rows.
Darn in any ends and either steam or block your scarf…enjoy!
Here is a video tutorial for your convenience. Please subscribe to my Youtube channel as this helps to support my work! Thank you <3