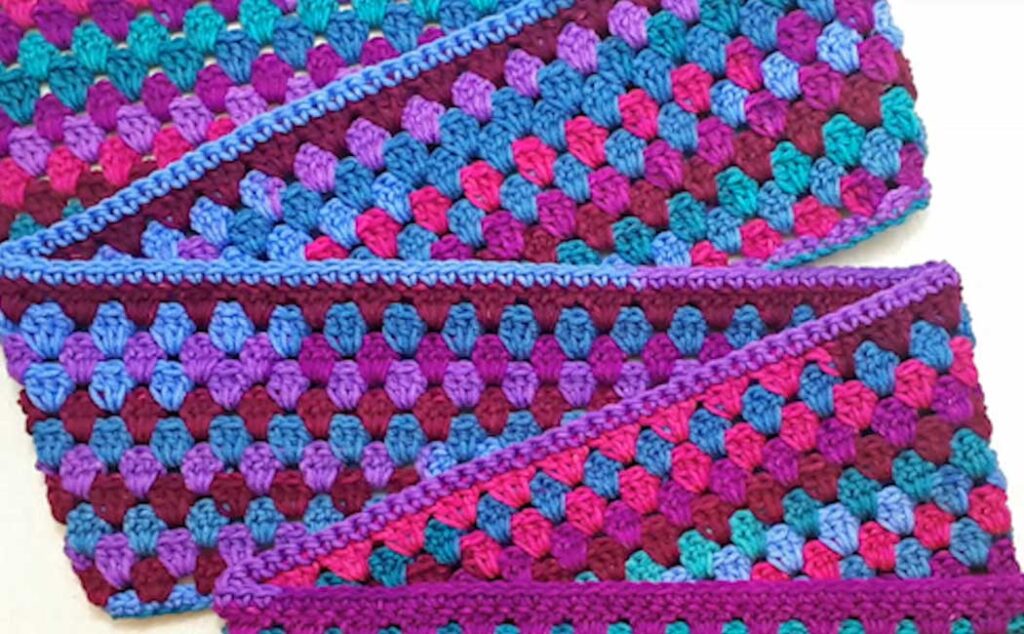
Learn how to crochet the Granny Square Straight Row Stitch and use this stitch pattern to make all sorts of projects! The video tutorial below will show you, step-by-step, how to crochet the granny square stitch in rows. I also share how I used this stitch to crochet a scarf using a wonderful self-striping yarn. The scarf project is not a step-by-step tutorial, but is a great project to practice the stitch pattern with.
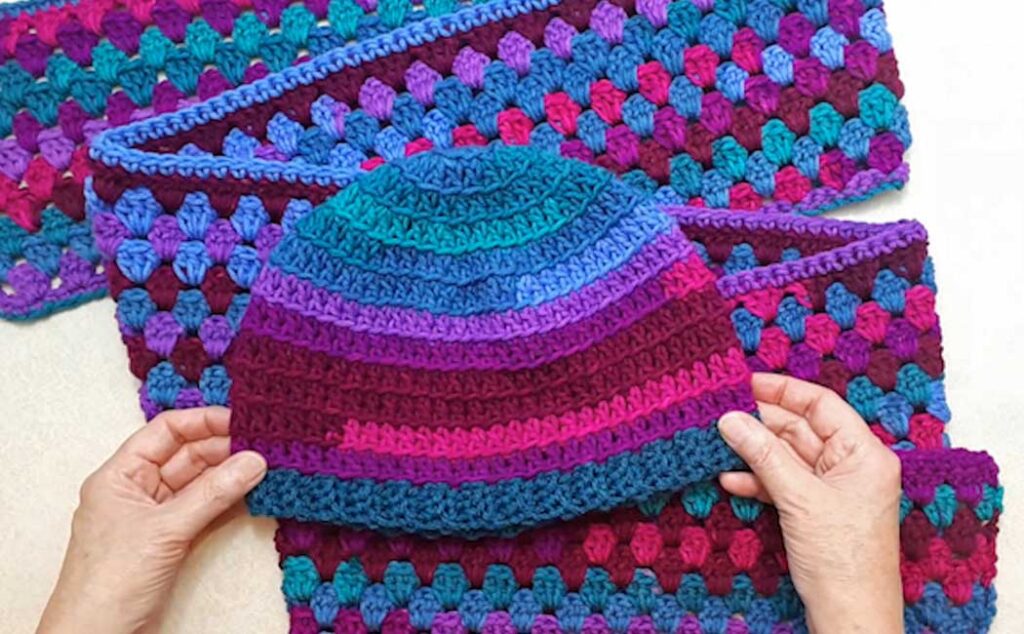
If you are new to crocheting, make sure to check out my Beginner Crochet Series that teaches all the basics of crochet. I made a matching beanie using a pattern I’ve already shared here on my blog and on YouTube, and the set turned out perfectly! I make hat and scarf sets to donate to a local high school. They have a program where they gather items to give to people in need, so I enjoy creating colorful and cheerful sets.
I do not have a written pattern for this stitch or the scarf project as I still struggle with my brain function and writing patterns is simply too difficult. I hope the video tutorial will be inspiring!

Supply List for the Scarf and Beanie Set
- 2 balls Mainstays Acrylic Yarn – Polo Stripe 285 yds/ 260 m per ball (or equivalent number 4-medium-weight yarn)
- Optional: contrasting yarn for brim of beanie
- 4.5 mm (7 US) hook for scarf
- 5 mm ((H-8 US) & 5.5 mm (I-9 US) for beanie
- Scissors
- Darning needle
The self-striping yarn created such a wonderful pattern for the scarf and beanie. Crocheting with the Granny Square Straight Row Stitch was great fun to watch how the colors would unfold and how the whole piece would look. There is no way to plan or know how it will look until the project is all done!
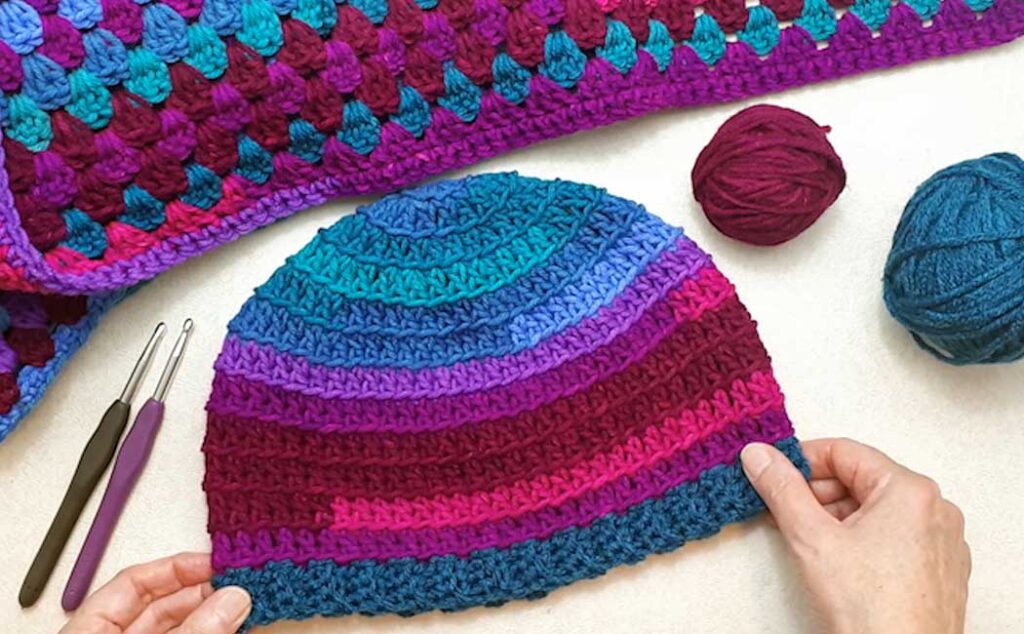
The same goes for the beanie, and what happened for me was that the top of the beanie started with the blues and teals, but by the bottom, there were only red tones left. The brim didn’t look very good in those colors, so I cut the remaining red yarn off and choose a complimentary teal tone out of my stash. I used that color for the brim and it made the beanie pop!
This project would be great for using up scrap yarn as well. Each row could be a different color and the beanie could be a mix of the colors you choose. You could also tie scrap yarn together using the magic knot and let the combination surprise you! See all the video’s below…have fun and be playful!
In the video tutorial, I show how I came across a manufacturer’s knot in the ball of yarn. I always tug on those knots, and this one came apart! If this happens to you, the Magic Knot is a great way to tie the ends back together again.